11
• Inverter peak value 800W (for maximum 0.3 seconds)
• Switch-off at low voltage 10.0V ±0.5V
• Fuse 40A (replaceable)
• Alternating current (AC) sockets (1x) 230V, 50 Hz, 400 W
• Direct current (DC) socket 12V, 11A max. 132W
• USB-Port Quick Charge 3.0 (5V, 9V, 12V)
• Work lamp 5-LED
• Dialling radio AM 520-1710 kHz / FM 88-108 MHz
• Audio input jack 3.5 mm diameter (1/8 inch)
• Charging time AC adapter (AC) 34 hours
• Charging time direct current adapter (DC) with running motor 12 hours
• Output of the AC charging adapter 15V, 500mA DC
BATTERY STAND
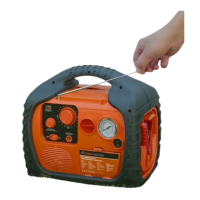
The voltmeter indicates the current charge level of the internal battery. It is the responsibility of the user to
monitor the condition of the battery regularly and to charge it additionally approximately every 3 months or after
each use.
1. Disconnect all input or output power cables and turn off all switches.
2. Press and hold the Battery Status button.
3. Read the voltmeter to determine the battery status.
o < 12V: The battery is discharged, recharge it immediately.
o ~ 12V: Battery should be charged before jump starting a vehicle
o > 12,5V: Battery is sufficient for jump start
ELECTRIC SHOCK! Exposure to water can cause electric shock. Exposure to water and excessive
moisture will also damage the unit and void the warranty. Charge the unit in an upright position for a
full 48 hours before first use. The device can be continuously charged using the AC adapter without damaging
the internal battery. To prolong the life of the unit (as with all lead-acid batteries), ensure that you charge the
unit every 3 months, even if the unit e has not been used
CHARGING
Note: Please fully charge the device before first use
via AC charging adapter
Use only the AC charging adapter supplied with this unit. Make sure that the AC/DC supplied with this unit is
operated at the correct voltage (220-230V AC, depending on the country/region).
1. Make sure that all switches are turned off.
2. Open the dust cover on the charger socket.
3. Plug the DC end of the AC/DC charging adapter into the charging socket of the power station.
4. Connect the other end of the AC/DC charging adapter to the wall socket. Open the dust cover on the Power
Stations charging jack.
5. The charging indicator lights up during charging.
6 When charging is complete, disconnect the adapter from the power outlet first, then from the charging jack
on the unit.
7. Reattach the dust cover to the charging jack.
via DC charging adapter in connection with your vehicle or boat
Use only the DC charging adapter supplied with this unit. The vehicle engine must run while charging. The
uninterrupted charging time of 12 hours must NOT be exceeded.
1. make sure that all switches are turned off.
2. Open the dust cover of the charging socket.
3. Plug the small end of the DC cable into the charging socket of the power station.
4. Plug the large end of the DC power cord into an accessory jack (cigarette lighter socket).
5. The charging indicator lights up during charging. DO NOT charge for more than 12 hours at a time.