6 7
MT2 FEATURES MT2 FEATURES
1 2
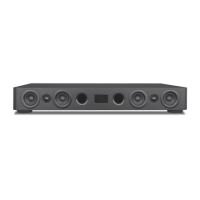
MT2 FRONT PANEL
1. STATUS LED - (Behind front panel lens.) One multi-color LED. This LED will illuminate red/blue and flash in different modes to
indicate changes in MT2 operational status.
SOLID RED - OFF (Standby). Power cord is connected and AC switch is turned ON, but the MT2 is OFF.
SOLID BLUE - ON. MT2 is ON.
SINGLE BLUE FLASH - Confirms receiving an IR command from the MT2 Remote for changes to Treble/Bass, EQ Reset,
Simulated Surround (SR), single Volume UP/DOWN command, initiating output of the Bluetooth Connection Code.
RAPID BLUE FLASH - Confirms receiving a continuous IR stream from the MT2 Remote for ramping volume UP/DOWN.
Rapid blue flash also indicates the MT2 is in Bluetooth pairing mode.
SLOW BLUE FLASH - Audio Mute. Audio signal to the speakers is turned OFF.
TWO BLUE FLASHES; DELAY - Bluetooth signal has been interrupted while Bluetooth Input is selected.
2. IR SENSOR - (Behind front panel lens.) The IR Sensor ‘sees’ the IR control commands output from the MT2 IR Remote Control
when buttons are pressed on the remote for armchair control of the MT2. This sensor must be kept clear for direct line-of-
sight to the remote, or the remote will not be able to control the MT2.
OPTICAL
INPUT
COAXIAL
INPUT
AUDIO
INPUT
L
R
proficientaudio.com
Riversi de, CA USA
Made in China
MaxT V
MT2
PROFICIENT
POWER
100 240 V~
50 -60 Hz 100 W
Z096
N27917
TO RED UCE THE RI SK OF ELE CTRIC S HOCK, DO
NOT RE MOVE COV ER (OR B ACK). N O USER SE RVICE ABLE PA RTS
INSIDE. REFER SERVICING TO QUALIFIED SERVICE PERSONNEL.
POUR R ÉDUIR E LE RISQU E DE CHOC
ÉLEC TRIQU E, NE PAS EN LEVER L E COUV ERCLE ( NI LE DOS ).
AUCUNE PIÈCE À L'INTÉRIEUR. ENTRETIEN DE PERSONNEL
QUALIFIE.
03X-MT2
4005723
5
6
7 8
9
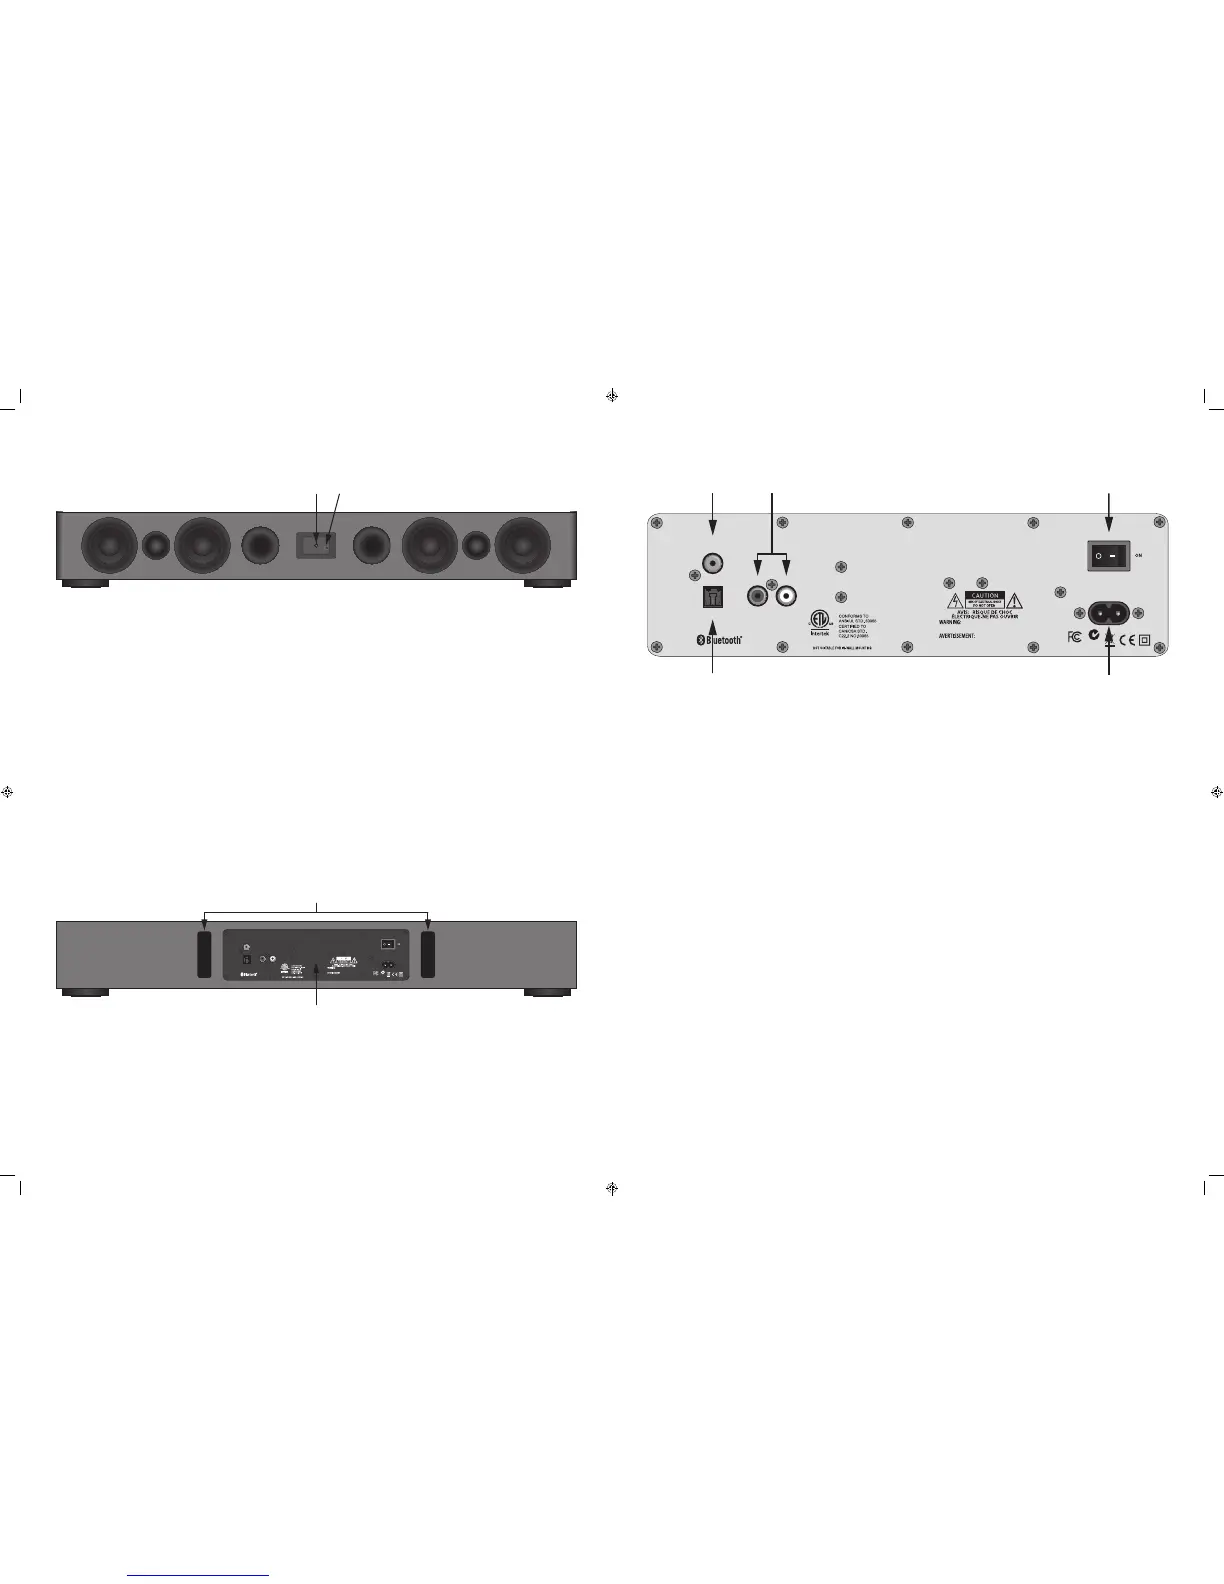
MT2 CONNECTION PANEL
5. DIGITAL COAXIAL INPUT - One RCA jack. Connect to the Digital Coaxial OUT on a TV or other source. This input is selected
by pressing the COAX button on the MT2 IR Remote.
NOTE: The audio output of a TV, Blu-ray Disc player or DVD player connected to the MT2 via Coaxial Digital, must be set to
PCM in the source’s setup. Please see the device Owner’s Manual for details.
6. DIGITAL OPTICAL INPUT - One TOSLINK connector. Connect to the Digital Optical OUT on a TV or other source. This input is
selected by pressing the OPT button on the MT2 IR Remote.
NOTE: The audio output of a TV, Blu-ray Disc player or DVD player connected to the MT2 via Optical Digital, must be set to
PCM in the source’s setup. Please see the device Owner’s Manual for details.
7. AUDIO INPUT - Two RCA jacks. Connect to the L & R Line Level Audio OUT on a TV or other source. This input is selected by
pressing the AUX button on the MT2 IR Remote.
8. POWER - Turns the power to the MT2 ON/OFF. Always turn the power OFF when making connections to the MT2. The Front
Panel LED will illuminate red to indicate Standby (power switch ON, MT2 turned OFF with IR Remote) or blue to indicate that
the MT2 is ON.
9. AC INPUT - Universal power connector. Automatically selects AC voltage for a given region. Connect to the included
2-conductor AC Power Cord. After all connections have been made and confirmed, plug the power cord into an unswitched
AC Outlet to power the MT2. Contact Proficient Audio Systems for a proper replacement should the AC Power Cord be damaged
or misplaced.
3
4
OPTICAL
INPUT
COAXIAL
INPUT
AUDIO
INPUT
L
R
proficientaudio.com
Riverside, CA USA
Made in China
Ma xTV
MT2
PROFICIENT
POWER
100240 V~
50-60Hz 100W
Z096
N27917
TO REDUCE THE RIS K OF ELEC TRIC SHO CK, DO
NOT REMOVE COVE R (OR BAC K). NO U SER SERV ICEA BLE PAR TS
INSIDE. REFER SERVICING TO QUALIFIED SERVICE PERSONNEL.
POUR RÉDUIRE LE R ISQUE D E CHOC
ÉLECTRIQUE , NE PAS ENL EVER L E COUVE RCLE ( NI LE DOS ).
AUCUNE PIÈCE À L'INTÉRIEUR. ENTRETIEN DE PERSONNEL
QUALIFIE.
03X-MT2
4005723
MT2 REAR PANEL
3. REAR PANEL BASS PORTS - Two tuned openings in the MT2 cabinet allow air to ‘release’ from the cabinet and enhance low
frequency audio. Allow at least 3 inches of clearance to a back wall to allow air to move freely from the ports for full bass
extension.
4. CONNECTION PANEL - See enlarged detail, next page.
 Loading...