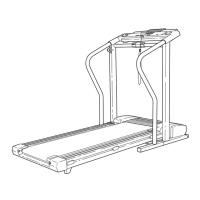
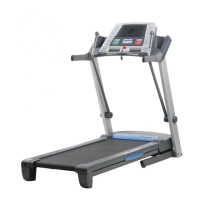
Pulse
Sensor
Incline
Switch
Clip
Key
Speed Control
Monitor Displays
98
CAUTION:
Before operating the
console, read the following precautions.
• Do not stand on the walking belt when turning
on the power.
• Always wear the clip (see the drawing above)
while using the treadmill. When the key is re-
moved from the console, the walking belt will
stop.
• Adjust the speed in small increments.
• The training zones marked beside the speed
control are general guidelines only. See pages
14 and 15 for more information.
• To reduce the possibility of electric shock,
keep the console dry. Avoid spilling liquids on
the console. Use only a sealed water bottle.
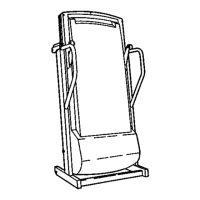
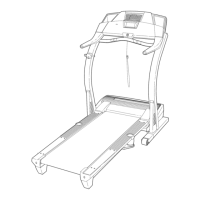
BATTERY INSTALLATION
The console re-
quires three “AA”
batteries (not in-
cluded). Alkaline
batteries are rec-
ommended. To in-
stall batteries,
open the battery
cover under the
console as shown.
Press three batteries into the battery compartment.
Make sure that the negative (–) ends of the batter-
ies are touching the springs. Close the battery
cover.
STEP BY STEP CONSOLE OPERATION
Before operating the console, make sure that the
power cord is properly plugged in. (See HOW TO
PLUG IN THE POWER CORD on page 7.) If there is a
thin sheet of clear plastic on the face of the console,
remove it.
Next, step onto the foot rails of the treadmill. Find the
clip attached to the key (see the drawing above), and
slide the clip onto the waistband of your clothing.
Follow the steps on pages 8 and 9 to operate the con-
sole.
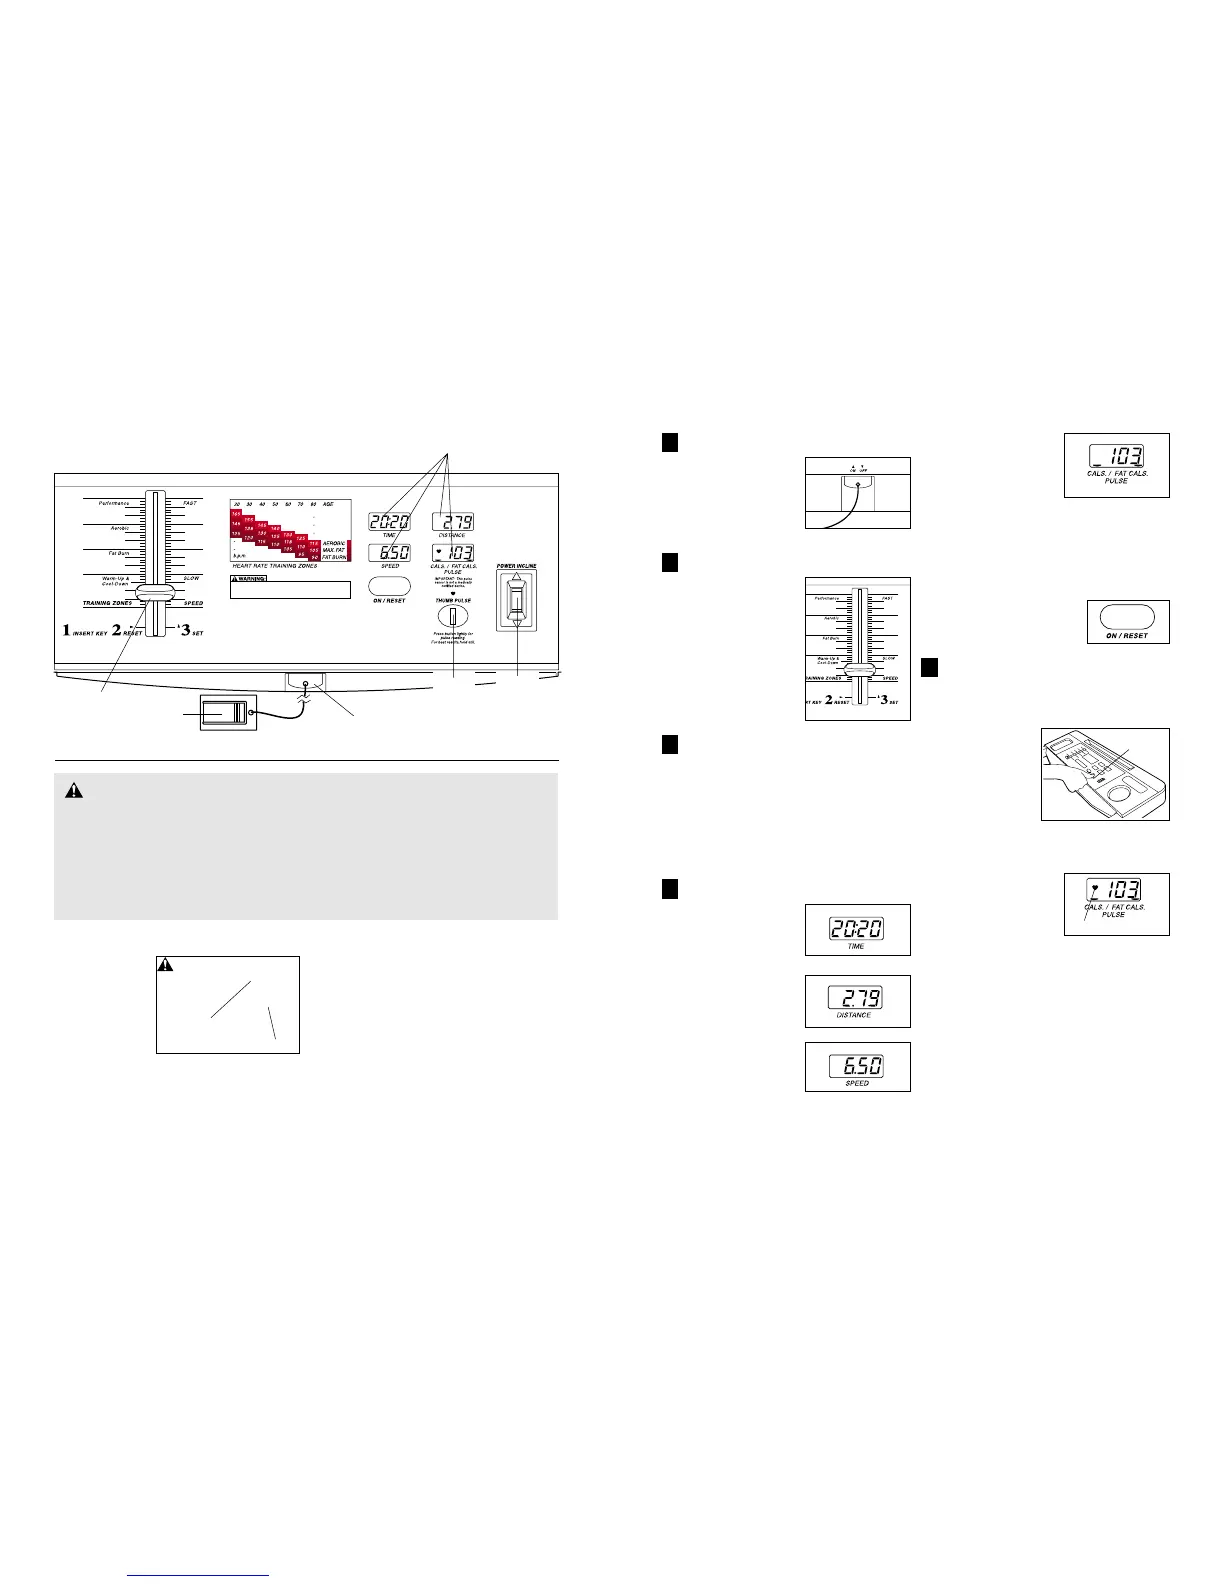
Insert the key fully into the power switch.
Inserting the key will
not turn on the dis-
plays. The displays will
turn on when the
ON/RESET button is
pressed or when the
walking belt is started.
Reset the speed control.
Slide the speed control
down to the RESET po-
sition. Note: Each time
the walking belt is
stopped, the speed
control must be moved
to the RESET position
before the walking belt
can be restarted.
Start the walking belt.
After you have moved the speed control to the
RESET position, slowly slide it upward until the
walking belt begins to move at slow speed.
Carefully step onto the walking belt and begin exer-
cising. Change the speed of the walking belt as de-
sired by sliding the speed control.
To stop the walking belt, step onto the foot rails and
slide the speed control to the RESET position.
Follow your progress with the monitor displays.
TIME display—This
display shows the total
time that you have
walked or run on the
treadmill.
DISTANCE display—
This display shows the
total distance that you
have walked or run.
SPEED display—This
display shows the speed
of the walking belt.
CALORIES/FAT CAL-
ORIES/PULSE
display—This display
shows the approximate
numbers of calories and
fat calories you have
burned. (See FAT
BURNING on page 14 for an explanation of fat
calories.) Every seven seconds, the display will
change from one number to the other. The FAT
CALS indicator will light when the number of fat
calories is displayed. Note: This display will also
show your pulse when the pulse sensor is used.
The displays can be reset, if
desired, by pressing the
ON/RESET button.
Measure your pulse, if desired.
To use the pulse sensor, stand on the foot rails and
place your thumb on the pulse sensor as shown.
The pulse sensor is pressure-activated; fully press
down the pulse
sensor. Do not
press too hard,
or the circula-
tion in your
thumb will be re-
stricted, and
your pulse will
not be detected.
Next, slightly raise
your thumb until the heart-shaped indicator by the
CALORIES/FAT CALORIES/PULSE display flashes
steadily. Hold your
thumb at this level.
After 5 to 10 seconds,
your pulse will be
shown. Hold your
thumb on the sensor
for another 15 seconds
for the most accurate
reading. If the displayed pulse appears to be too
high or too low, or if your pulse is not displayed, lift
your thumb off the sensor and allow the display to
reset. Press down again on the sensor as described
above.
Make sure that your thumb is positioned as shown,
and that you are applying the proper amount of pres-
sure to the pulse sensor. Try the sensor several
times until you become familiar with it. Remember to
stand still while measuring your pulse.
3
4
5
2
Pulse
Sensor
1
Indicateur
Batteries
Battery
Cover
 Loading...