13
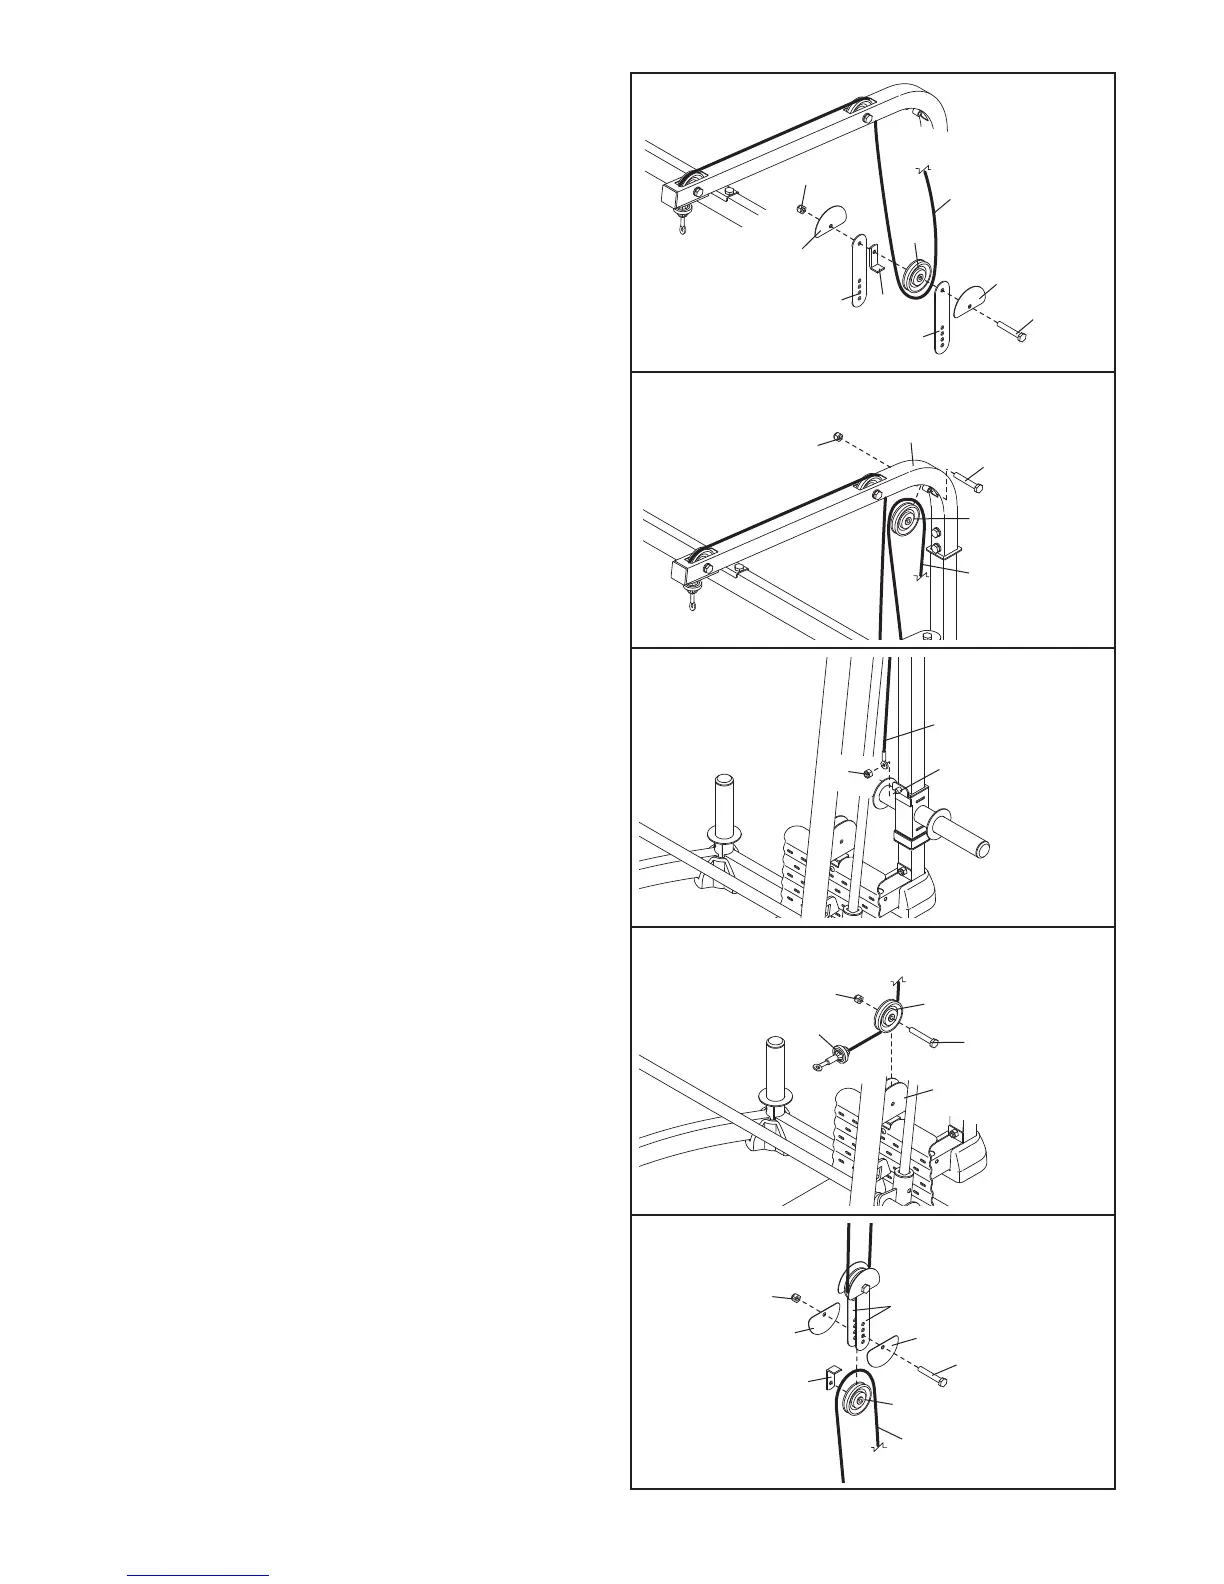
24. Route the Cable (61) under a Pulley (63). Attach
the Pulley, a Cable Trap (66), and two Half Finger
G
uards (65) to the two Pulley Plates (35) with an
M10 x 50mm Bolt (79) and an M10 Nylon Locknut
(
77). M
ake sure that the Cable Trap is oriented
to hold the Cable in the groove of the Pulley.
25. Route the Cable (61) over a Pulley (63). Attach
the Pulley inside the Top Frame (45) with an M10
x 78mm Bolt (87) and an M10 Nylon Locknut
(77).
26. Attach the Cable (61) to the M10 x 20mm Bolt
(89) with an M10 Nylon Locknut (77). Make sure
that the Cable can pivot easily on the Bolt.
27. Route the second Cable (61) under a Pulley (63).
Attach the Pulley to the Center Rack Base (39)
with an M10 x 45mm Bolt (75) and an M10 Nylon
Locknut (77).
77
6
5
65
79
35
35
66
63
61
24
25
77
87
45
63
61
27
28
89
61
77
26
61
63
75
39
77
61
79
65
35
63
66
77
65
28. Route the Cable (61) over a Pulley (63). Attach
the Pulley
, a Cable
T
rap (66), and two Half Finger
Guards (65) to the two Pulley Plates (35) at the
indicated hole with an M10 x 50mm Bolt (79) and
an M10 Nylon Locknut (77). Make sure that the
Cable T
rap is oriented to hold the Cable in the
groove of the Pulley.