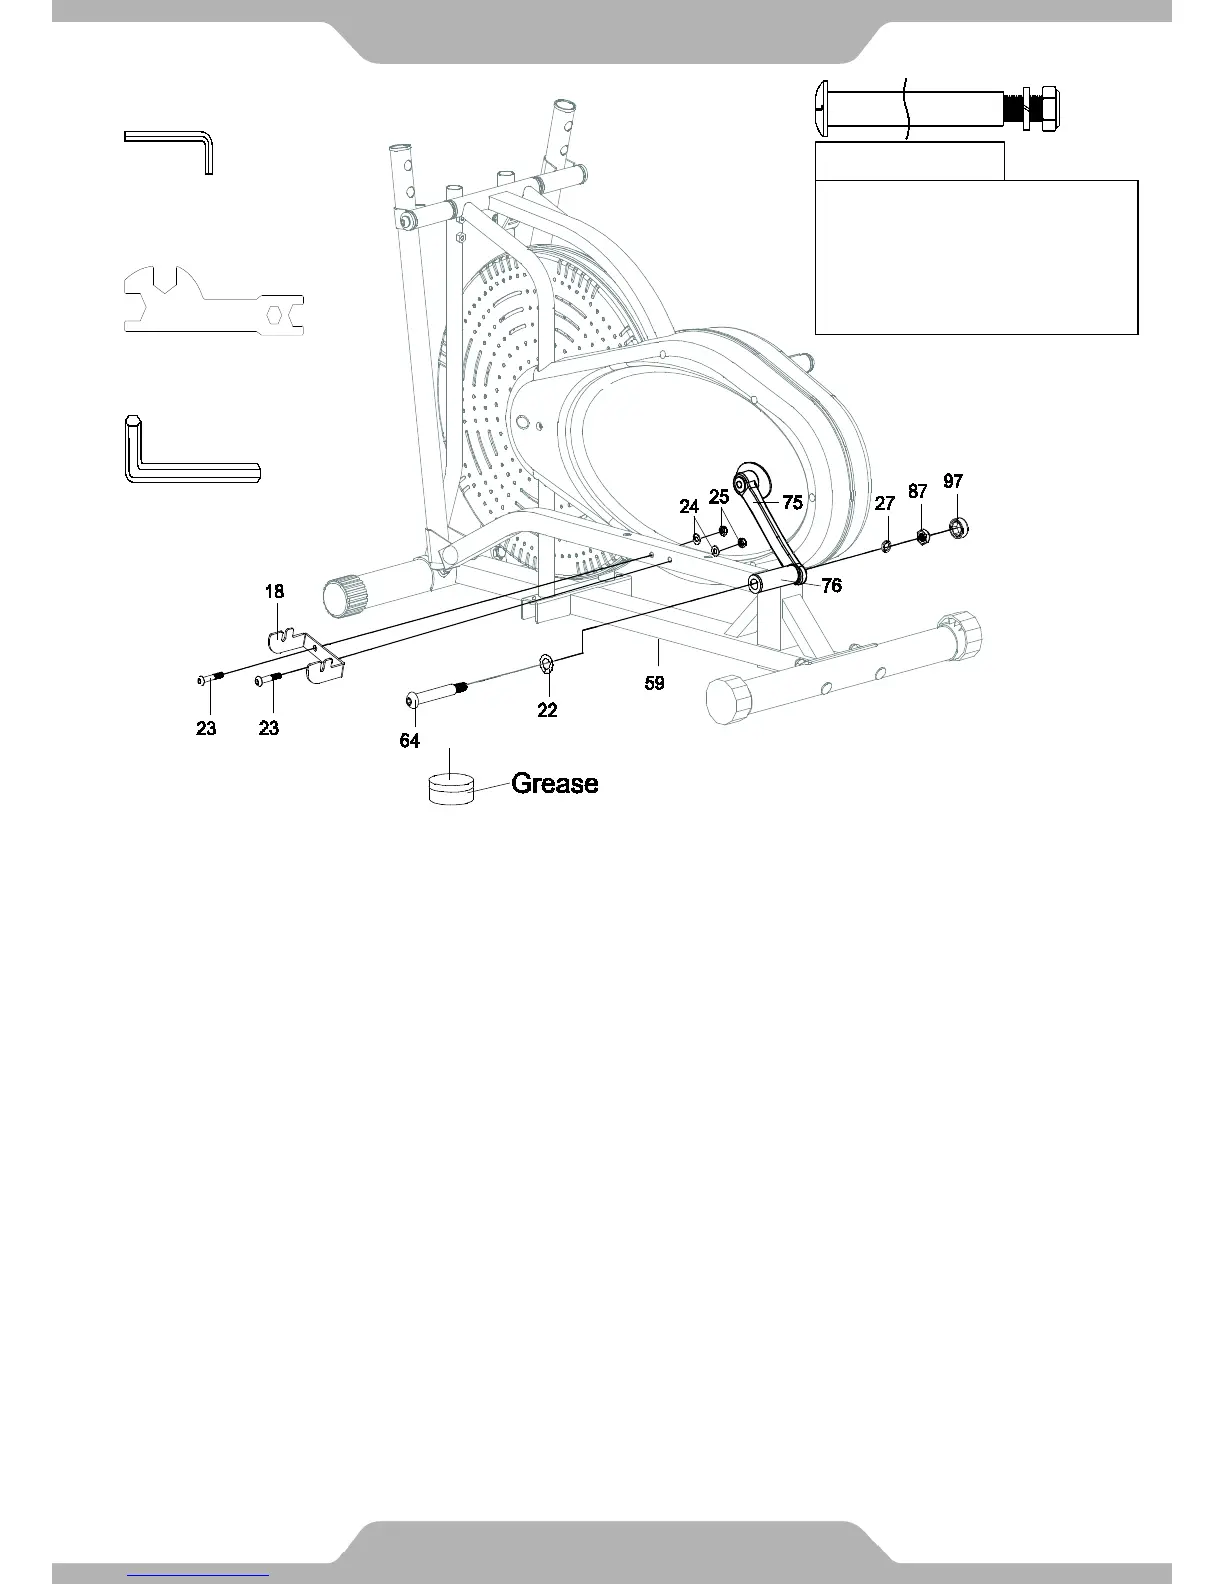
4. Foot Pedal Support Bracket and Left Crank Bolt Installation:
Attach the Foot Pedal Support Bracket (18) onto the left side of the Left Foot Bar (76) using two
Bolts (23), two Washers (24), and two Nylon Nuts (25). Use the Open-Ended Flat Wrench and
6mm Allen Wrench to tighten the Foot Pedal Support Bracket (18) to the Left Foot Bar (76).
Lubricate the Left Crank Bolt (64) with some of the grease provided. Insert the Left Crank Bolt
(64) and one Wave Washer (22) through the left holes of the Left Foot Bar (76). Raise the rear
end of the Left Foot Bar (76) and align it with the threaded hold of the Left Crank (75).
Make sure the Left Crank Bolt (64) is level and straight as you insert it through the threaded hole
of the Left Crank (75). Turn the Left Crank Bolt (64) counter-clockwise by hand until it is
firm. After hand tightening, completely tighten the Left Crank Bolt (64) with the 8mm Allen
Wrench provided. Put one Spring Washer (27) and one Left Nylon Nut (87) on to the threaded
end of the Left Crank Bolt (64). Use the Open-Ended Wrench on the Left Nylon Nut (87) and the
8mm Allen Wrench on the Left Crank Bolt (64) simultaneously to tighten the Left Nylon Nut
(87).
Cover the Left Nylon Nut (87) with one Cap (97).
Read the note on next page regarding tightening guidelines. Refer to the illustration
showing the correct installation of the Left Crank Bolt (64). See Figure F on the next page.
14
L for left bolt
Important:
Installing left bolt into left
crank can only be done
by turning left
(COUNTER-CLOCKWISE).
Tools:
6mm Allen Wrench
Open-Ended Flat Wrench
8mm Allen Wrench
ASSEMBLY