EasyManua.ls Logo

ProGear 300LS User Manual

ProGear 300LS
32 pages
To Next Page IconTo Next Page
Page #1 background imageLoading...
Page #1 background image
IMPORTANT: Read all the instructions carefully before using this product. Retain
this owner’s manual for future reference.
The specifications of this product may vary from this photo and, subject to change without
notice.
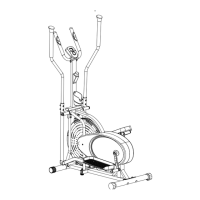
Air Elliptical
1307.7-110216

Questions and Answers:

ProGear 300LS Specifications

General IconGeneral
BrandProGear
Model300LS
CategoryElliptical Trainer
LanguageEnglish

Summary

Service and Support Information

Label Placement Guide

Important Safety Guidelines

Overview Drawing and Parts Identification

Parts List

Hardware and Tools Pack Contents

Assembly Instructions

Front/Rear Stabilizers and Adjustable Levelers Installation

Install front and rear stabilizers and adjustable levelers to the mainframe using bolts, washers, and nuts.

Handrails, Foot Bars and Rotation Rod Installation

Attach handrails, foot bars, and rotation rod to the mainframe using bolts, nuts, and washers.

Foot Pedal Support Bracket and Right Crank Bolt Installation

Attach the foot pedal support bracket and right crank bolt using bolts, washers, and nylon nuts.

Foot Pedal Support Bracket and Left Crank Bolt Installation

Install the foot pedal support bracket and left crank bolt using bolts, washers, and nylon nuts.

Right and Left Foot Pedals Installation

Attach the right and left foot pedals to the foot pedal support brackets using bolts and nylon nuts.

Right and Left Handrail Arms Installation

Install the right and left handrail arms to the lower handrails using bolts, washers, and cap nuts.

Support Frame Handlebar Installation

Mount the support frame handlebar to the mainframe using bolts, washers, and nuts.

Bottle Holder and Tension Control Knob Installation

Install the bottle holder and tension control knob onto the hand pulse support frame.

Hand Pulse Handlebar Installation

Mount the hand pulse handlebar to the support bracket of the hand pulse support frame.

Computer Console Installation

Connect and attach the computer console, sensor wires, and adjustable levelers.

Computer Console Operation

Using Your Computer Console

Activate the computer console by pressing the MODE button or pedaling.

Mode Button Functions

Use the MODE button to select functions and hold to reset data.

Computer Console Functions

Details the functions of SCAN, TIME, SPEED, DISTANCE, CALORIE, and PULSE displays.

Computer Console Battery Installation

Instructions for removing the cover, inserting batteries, and replacing the cover.

Tension Adjustment Guide

Adjusting the Tension Control Knob

Instructions on how to increase or decrease tension using the control knob.

Strap and Tension Adjustment Procedure

Procedure for adjusting the tension strap and control knob for optimal performance.

Level Adjustments for Stability

Adjusting the Rear Stabilizer End Cap

How to adjust the rear stabilizer end cap to level the equipment on a flat surface.

Adjusting the Adjustable Leveler

How to adjust the leveler to evenly distribute weight and ensure stability.

Moving the Elliptical Equipment

Transporting the Elliptical Equipment

Instructions on how to move the elliptical equipment using its wheels.

Maintenance and Care

Cleaning the Elliptical Equipment

Guidelines for cleaning the machine using a soft cloth and mild detergent.

Lubrication of Moving Parts

Instructions for lubricating moving parts to prevent squeaking and wear.

Proper Storage of Equipment

Advice on storing the elliptical equipment in a clean and dry environment.

Troubleshooting Common Issues

Computer Console Power Issues

Solutions for when the computer console fails to power up.

Computer Console Display Readings

Troubleshooting steps for when the console display shows no readings.

Squeaking Noise Troubleshooting

Identifying and fixing squeaking noises from the elliptical equipment.

Clicking Noise Troubleshooting

Resolving clicking noises, possibly related to loose chain or covers.

Equipment Stability Issues

Solutions for when the elliptical equipment is not sturdy enough.

Tension Adjustment Malfunction

Troubleshooting steps for when the tension adjustment mechanism does not work.

Loose Pedal Assembly

Ensuring proper tightness of bolts and nuts for the pedal assembly.

Sensor Reading Errors

Steps to realign the magnet sensor if readings are incorrect.

Product Warranty Information

Manufacturer's Limited Warranty

Details the warranty period for structural frame and other components.

Warranty Coverage Exclusions

Lists conditions and damages not covered by the product warranty.

Ordering Replacement Parts

Information on how to order replacement parts via email, including required details.

Parts Request Form

Related product manuals