Page 4
If you should need to replace the power converter for any reason,
follow these steps to safely remove the converter section.
Make sure all power is disconnected before proceeding.
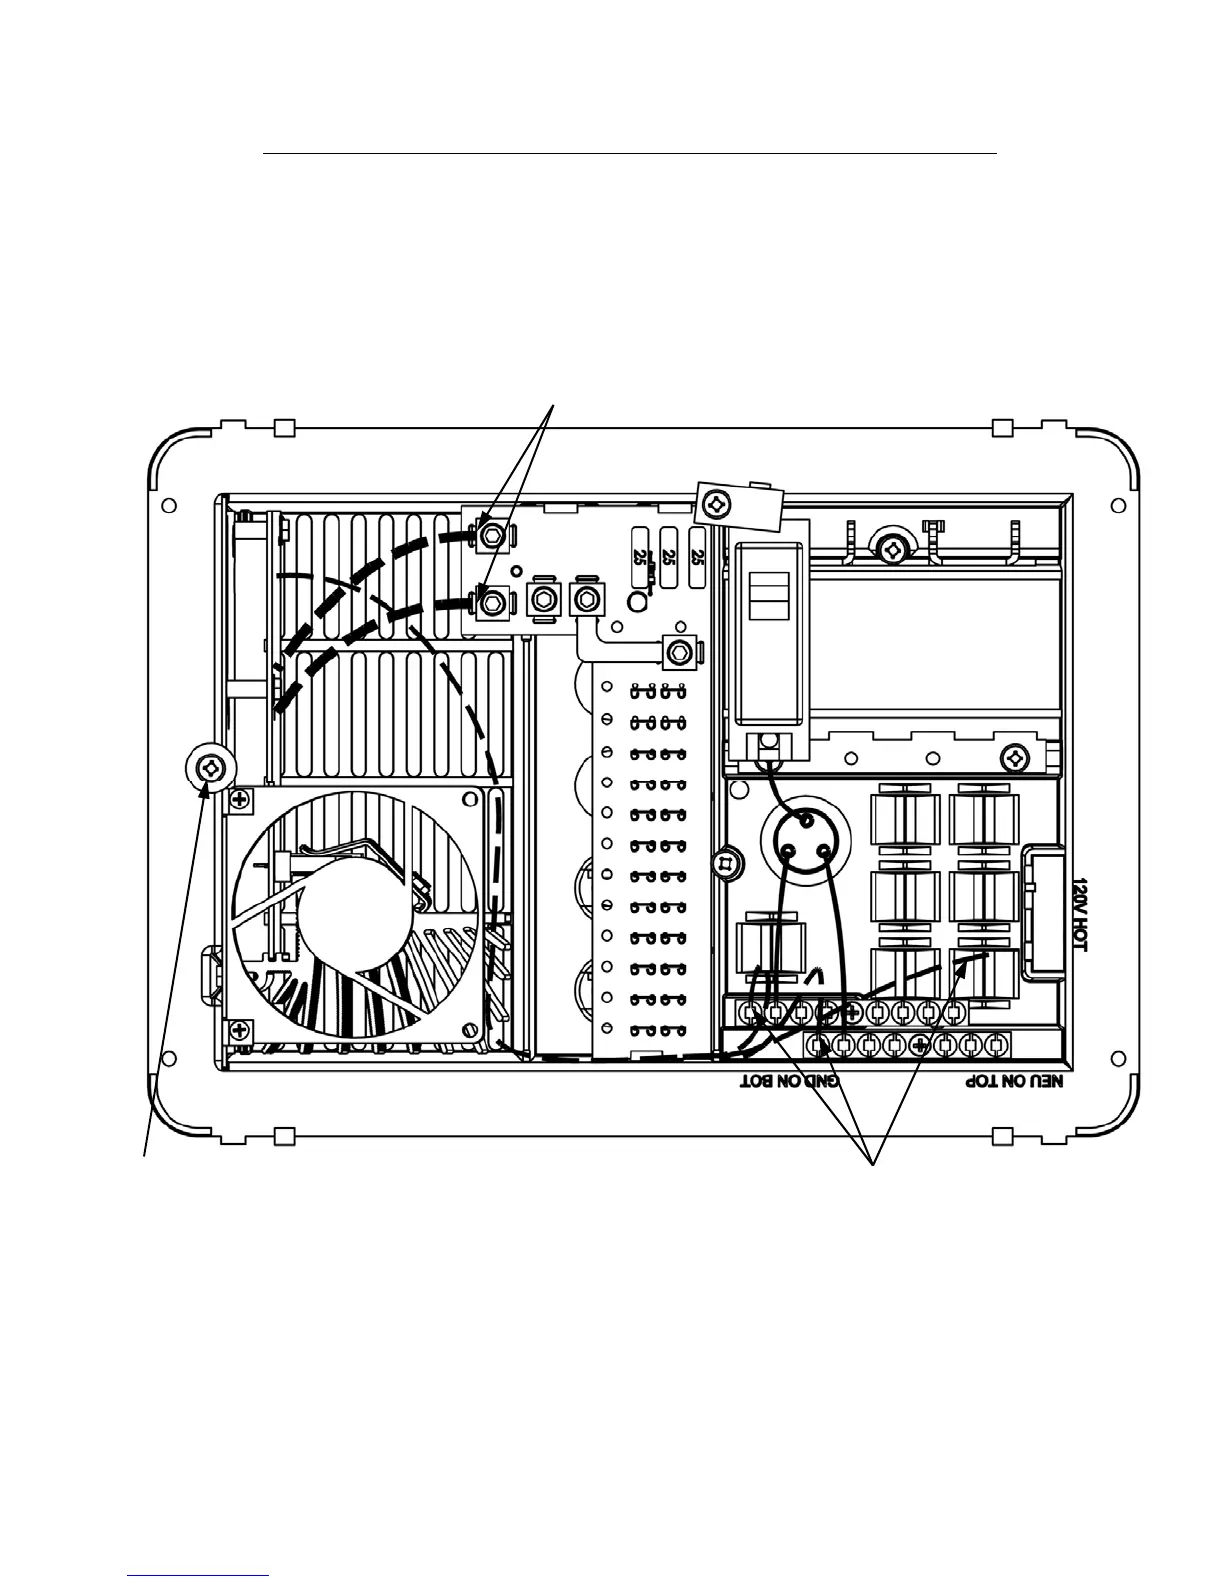
1. Remove the neutral, ground, and hot wires that lead to the converter on the AC side.
2. Remove the converter output wires from the DC board, ground and positive.
3. Finally unscrew the screw that holds the metal converter plate to the plastic housing.
For factory repairs, return only the converter section.
Make sure you use proper packaging to ensure the product’s safe arrival.
Do not replace the converter section unless the following checks have been performed:
1. Use an AC voltmeter to check for the proper voltage at the 120 VAC breaker that the converter is connected to.
This voltage should be between 105 and 130 volts.
2. Remove the reverse battery fuses and check the converter output from the CONVERTER GND to the
CONVERTER POS terminals on the DC board. This should be 13.6 VDC.
3. Check the Reverse Battery fuses . These fuses will only blow if the battery or DC output leads were connected in
reverse, even for a moment. If they are blown check the polarity of the battery connections before replacing them.
4. If the Converter output is not present and there is AC to the converter , the converter is defective.
Disconnect converter
wires from DC board.
Disconnect converter wires from
breaker, NEU, and GND bar
connections.
Remove screw that secures metal plate to housing.