5
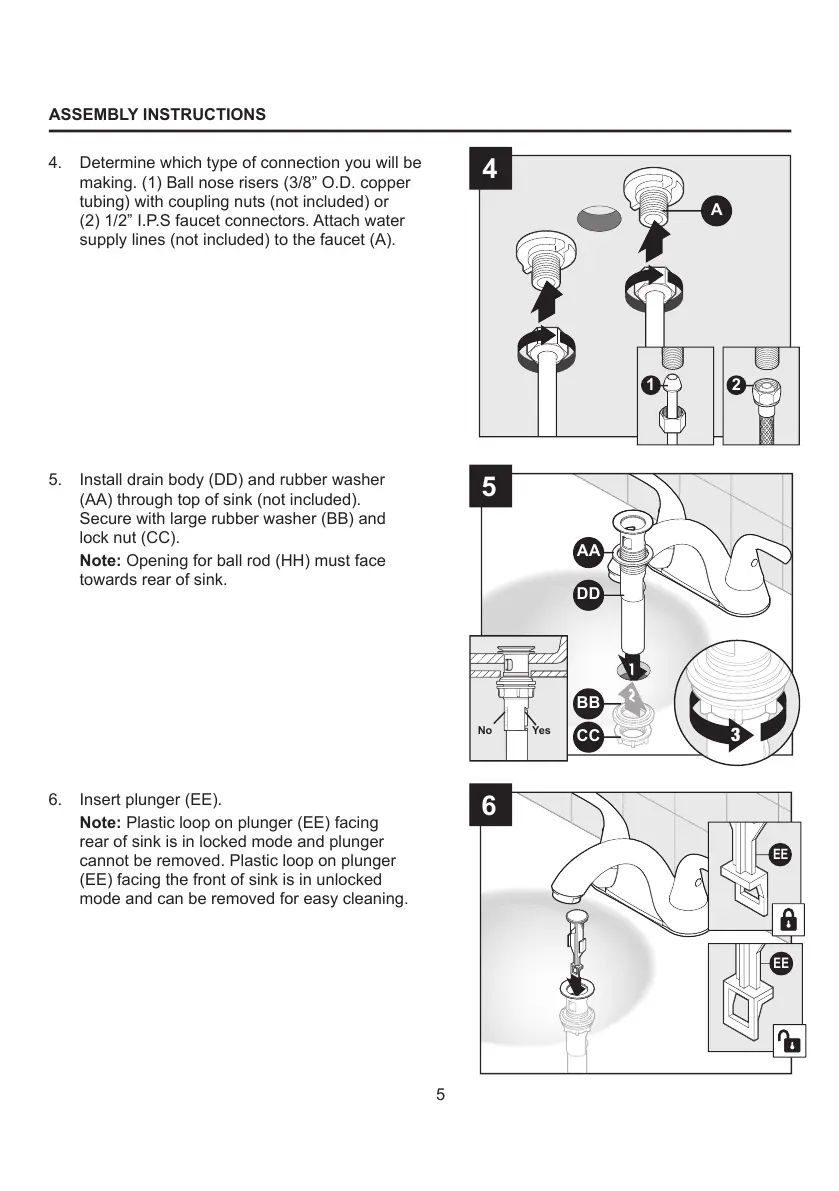
A
1 2
1
2
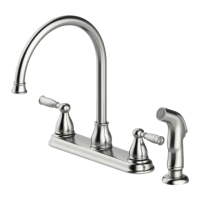
4. Determine which type of connection you will be
making. (1) Ball nose risers (3/8” O.D. copper
tubing) with coupling nuts (not included) or
(2) 1/2” I.P.S faucet connectors. Attach water
supply lines (not included) to the faucet (A).
ASSEMBLY INSTRUCTIONS
5
4
6
6. Insert plunger (EE).
Note: Plastic loop on plunger (EE) facing
rear of sink is in locked mode and plunger
cannot be removed. Plastic loop on plunger
(EE) facing the front of sink is in unlocked
mode and can be removed for easy cleaning.
AA
DD
BB
CC
EE
EE
5. Install drain body (DD) and rubber washer
(AA) through top of sink (not included).
Secure with large rubber washer (BB) and
lock nut (CC).
Note: Opening for ball rod (HH) must face
towards rear of sink.
No Yes