EN
11
4.3. Connecting electrical projection screens
Important!
– The connection of the wiring may only be performed by a qualified electrotechnical fitter.
– Make sure that the circuits which will be worked on are completely voltage-free before
the electrical connections are made.
– Carefully read section 2 ‘Safety information’ first.
4.3.1. Mounting wall switch
1 . First determine the position of the wall switch. Install out of the reach of children
and at a minimum height of 1.5 meters from the floor.
2. Loosen the rotary knob.
3. Unscrew the nuts under the rotary knob and remove the mechanism from the
case.
4. Mount the mechanism to the wall with two screws.
5. Replace the case and tighten the nuts.
6. Replace the rotary knob.
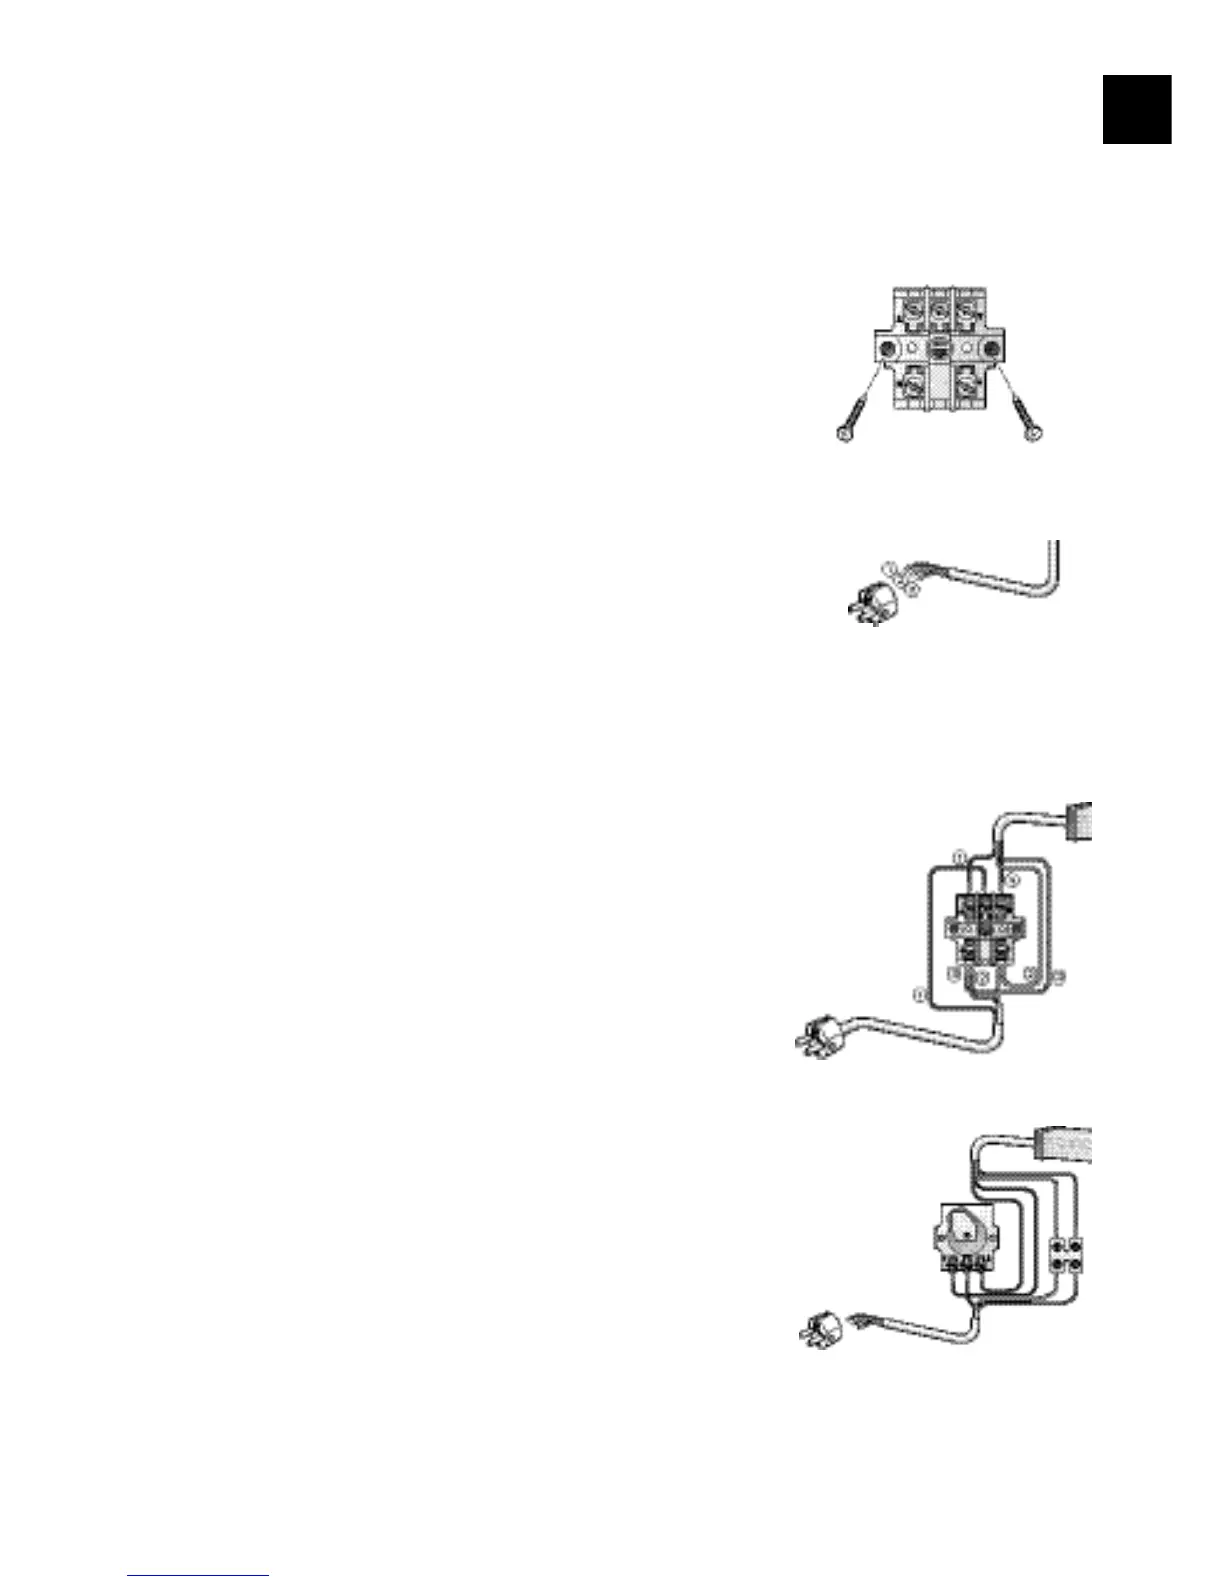
4.3.2. Wiring
General
1 = brown wire (L - live - voltage)
2 = yellow / green wire (e earth)
3 = blue wire (N - neutral)
4 = black wire (switch wire)
A plug may be connected to the feed wire when using the wall switch. The feed wires
may also be connected directly to the electric mains.
4.3.3. Electrical screens without built-in IR or RF remote control
(Elpro RF electrol, Cinelpro, Compact electrol, Cinema and
Slimscreen electrol)
1 Connect the various wires as shown in the diagram to the right.
2. Replace the case on the wall switch.
3. Plug the plug into the socket or apply voltage to the circuit concerned again.
• In the event of incorrect rotation direction: ensure that the circuit involved is
voltage-free and swap the brown and black motor wires.
Important! It is not necessary to connect an earth wire with the SlimScreen electrol
screens. This is due to the double insulated motor.
4.3.4. Connect key switch
Projection screens wider than 5 meters must always be protected from unauthorised
use. This may be done by using a key operated switch.
Connect the various wires as shown in the diagram to the right.
T
S