12
4.3.5. Electrical screens with built-in IR or RF receiver
(Elpro RF electrol, Cinelpro RF electrol, Compact RF electrol,
Cinema RF electrol, VariVision electrol)
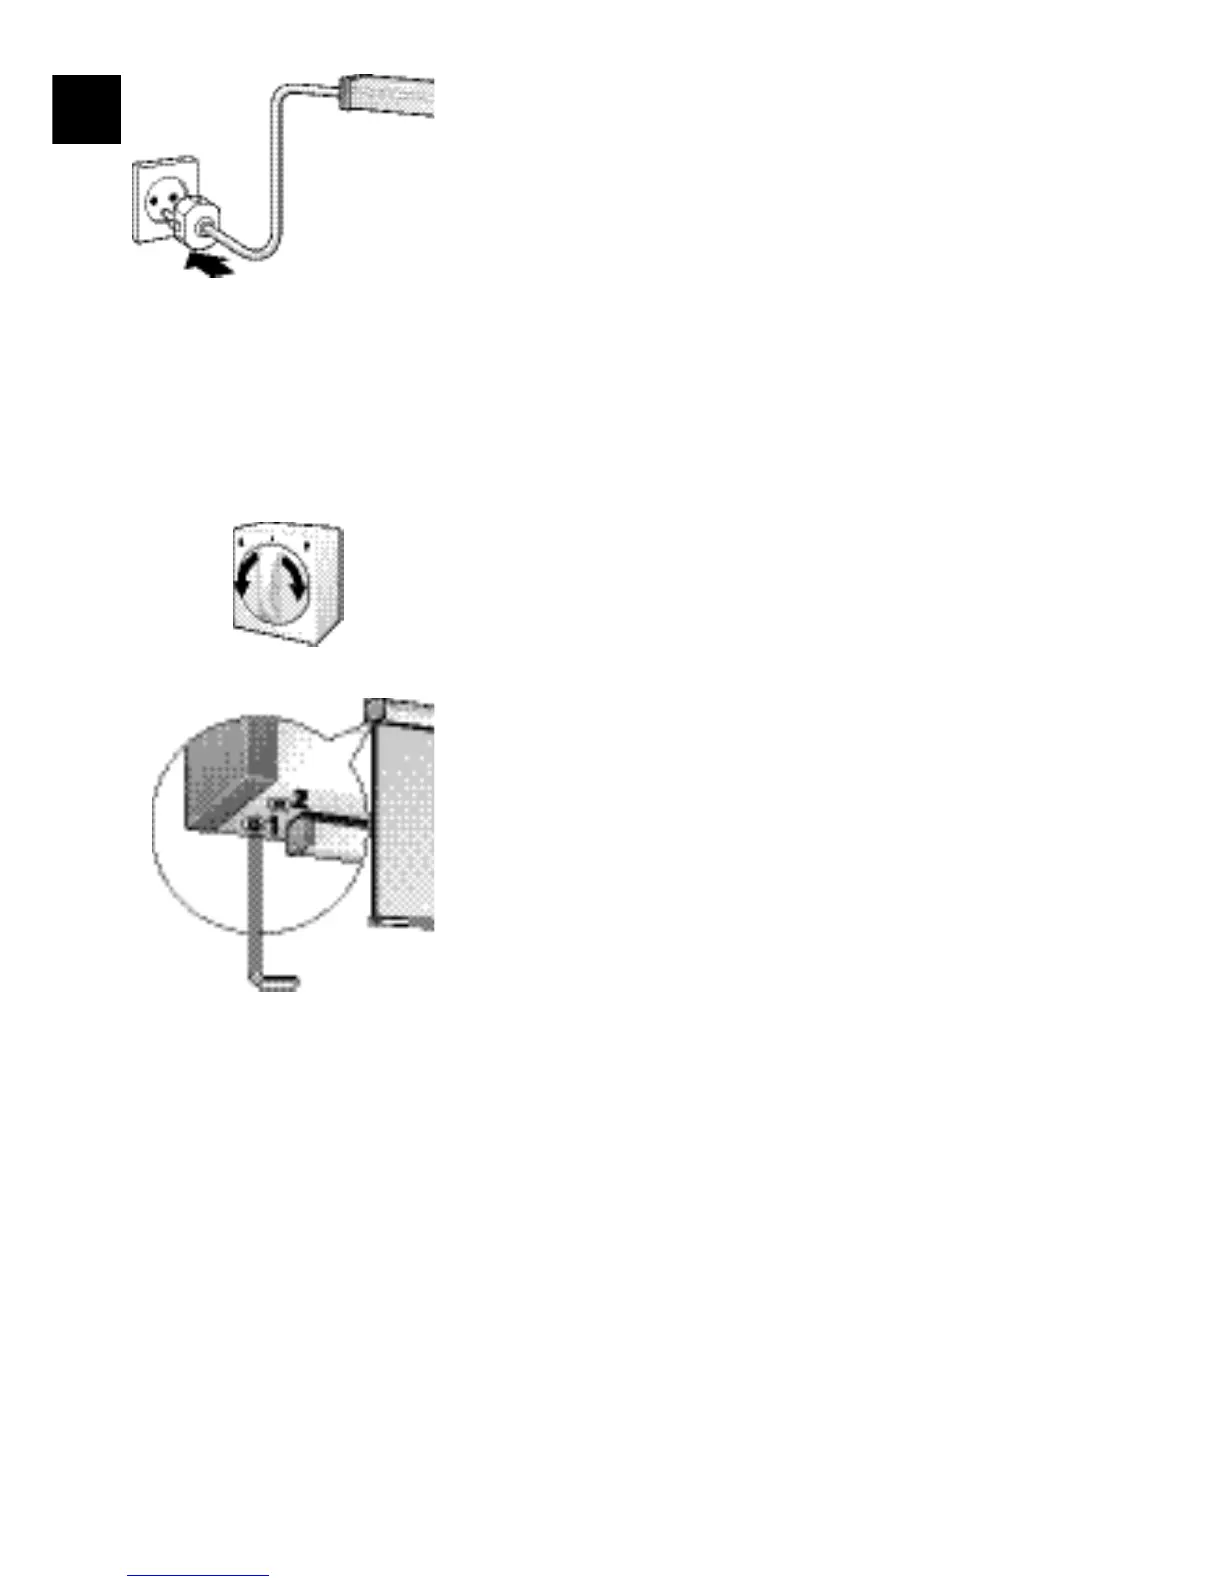
• Connect a plug (not included) and plug it into the socket.
• The screens may also be connected directly to the electric mains.
Warning! Screens with a built-in remote control must be connected to the electric mains
using a plug. The plug must be easily accessible to ensure that the screen can be
made voltage-free if necessary.
4.4 Adjusting final position of electrical screens
The electrical screens come equipped with an automatic stop for unrolling and
retracting. The final positions (top/bottom) are adjusted during the production
process.
Top final position: screen fully retracted;
Bottom final position: screen fully unrolled.
These final positions may be adjusted manually by the user.
4.4.1. Electrical screens without built-in IR or RF remote control
(Elpro RF electrol, Cinelpro, Compact electrol, Cinema and
Slimscreen electrol)
• Test to make sure the screen unrolls and retracts.
• Turn the wall switch to the right (4) to allow the screen to unroll to the
bottom final position.
• Turn the wall switch to the left (3) to allow the screen to unroll to the top final
position.
1 Adjusting screw bottom final stop
Sets the bottom final position of the screen.
2 Adjusting screw top final stop
Sets the top final position of the screen.
Allow the screen to unroll further (bottom final stop):
• Turn the adjusting screw counterclockwise (to the left) to allow the screen to
unroll further (never more than 5 cm past the factory setting!). Use the hexhead
screw wrench to do this (no. 4).
• Test the new position by allowing the screen to unroll and then retract a short
distance.
Allow the screen to unroll a shorter distance (bottom final stop):
• Turn the adjusting screw clockwise (to the right) to allow the screen to unroll a
shorter distance. Use the hexhead screw wrench to do this (no. 4).
• Test the new position by allowing the screen to unroll and then retract a short
distance.
Important! If you allow the screen to retract too far, you risk damaging the screen and the
motor.
The screen may not retract into the case completely (top final stop):
• Turn the adjusting screw clockwise (to the right) 2 to allow the screen to retract a
shorter distance. Use the hexhead screw wrench to do this (no. 4).
EN
S
S