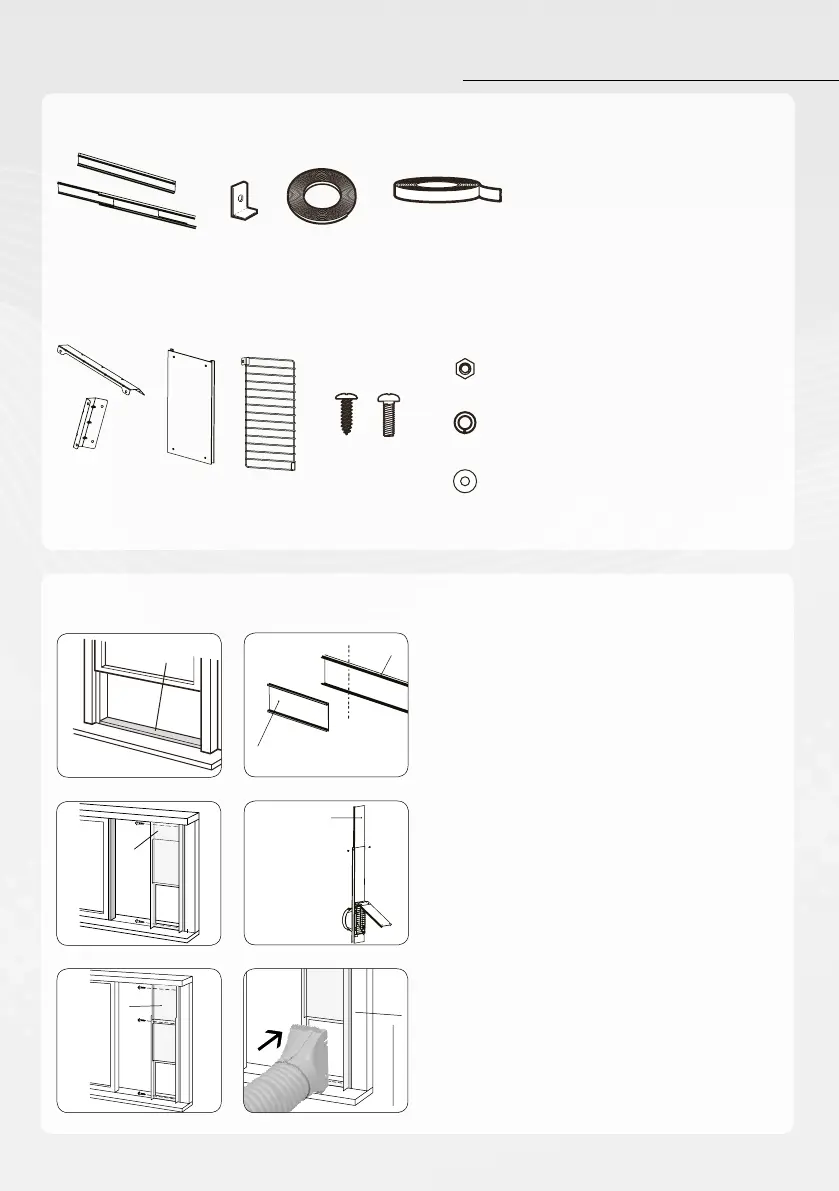
WINDOW PANEL INSTALLATION
Installation in a sliding sash window of less than 20.5“ (520 mm) height
Window panel installation accessories
Optional accessories
1. Cut the sponge B (adhesive) to a proper
length and attach it to the window sash.
2. Remove the adjustment panel (a) from the
window panel (b), and cut the window panel
to the same width as the window.
3. Open the window sash and place the
window panel on the window frame. Secure
the window panel (b) to the window frame
with 2 screws.
4. Slide the adjustment panel to fit the window
frame height.
5. Secure the window panel to the window
frame with 3 screws.
6. Set the joint of the heat discharge pipe
into the opening of the window panel and
tighten it.
1.
3.
B
1
5
2
6
3
7
4
8 9
10
11
12
2.
a
b
b
5.
a
6.
4.
a
1 Window frame (3)
2 Window fastener
3 Sponge A
4 Sponge B (2)
5 Support (2)
6 Rain shield
7 Protective grille
8 Screw (2)
9 Bolt (4x)
10 Washer (4x)
11 Spring washer (4x)
12 Nut (4x)