12 |
PROLINE
RANGE HOODS
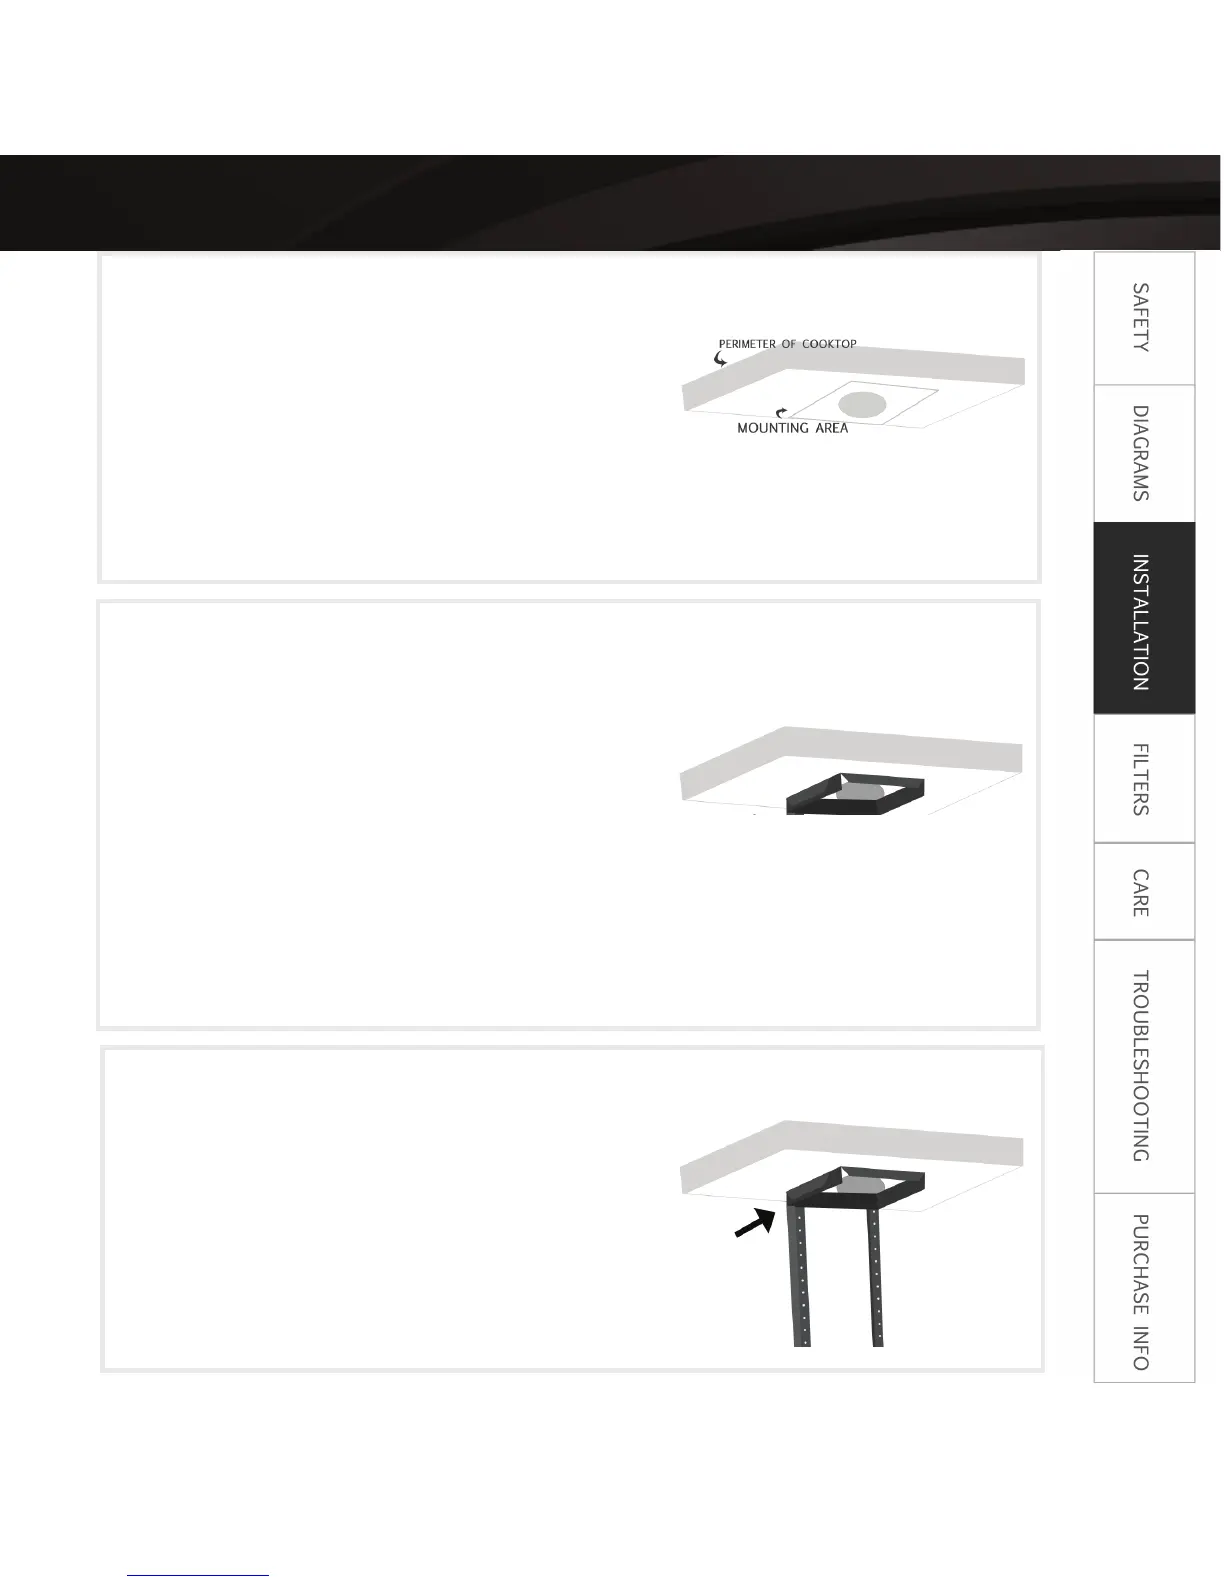
island hood installation
step 1
step 2
step 3
♦ place brackets vertically inside the 4
corners of the ceiling bracket
♦ extend the brackets to the appropri-
ate length. (the bottom of the hood
should be 28”-36” above the cooktop)
♦ screw all support brackets to the ceil-
ing mounting bracket
Mark ceiling
♦ find and mark the center point directly above your
cooktop
♦ place the ceiling bracket on the ceiling around
the center point. (Make sure it is square with your
cooktop).
♦ trace the outline of the ceiling bracket onto the
ceiling
♦ trace a circle where the ducting will go
♦ mark the 4 corners where you will drill holes
Install ceiling bracket
♦ drill holes into 4 ceiling marks from Step 1.
♦ cut out a hole in the ceiling where the ducting
will go (if you are venting to the outside of your
home)
♦ place chimney bracket against ceiling and screw
into place
♦ drop the ducting and electrical work through the
ceiling (if you are venting to the outside of your
home)
*ceiling bracket must be mounted to a weight-bearing ceiling able to support at least twice the weight of the hood.*
Install support brackets