3
4
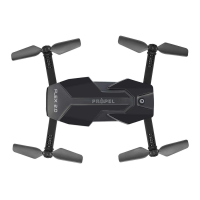
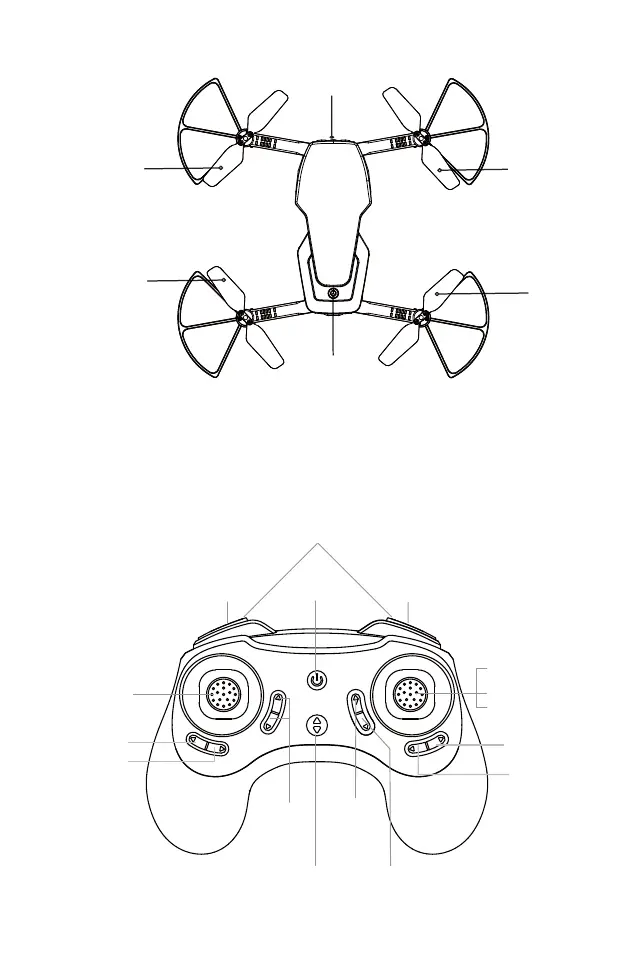
CONTROLLER DIAGRAM
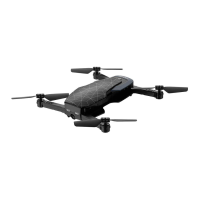
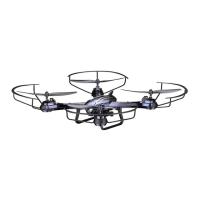
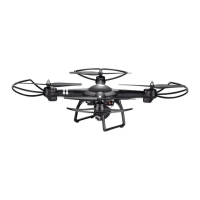
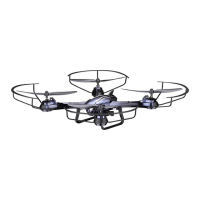
Propeller A
Camera
Propeller B
Propeller B
Propeller A
Power Button
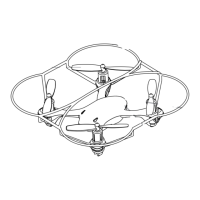
SNAP 2.0™ DIAGRAM
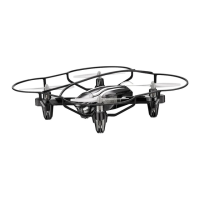
D1
DO NOT FLY YOUR SNAP 2.0™ IN FOUL WEATHER!
WARNING
FLIGHT PREPARATION
s6ERIFYTHATTHEREAREh!!!vBATTERIESINSIDETHEREMOTECONTROLUNITANDTHE3.!0»BATTERYHASBEEN
fully charged.
s-AKESURETOBEINALARGEOPENSPACEPREFERABLYAFIELDORAPARKWITHANOPENRADIUSOFATLEASTFEET
s-AKESURETOSTARTYOURDRONEONACLEANFLATLEVELSURFACEBEFORETAKEOFF
s
IMPORTANT! Until you have experience in flying your SNAP 2.0™, it is not advised to use in any rate of
wind. Pick a day with zero wind or extremely light wind condition when learning how to fly.
SYNCING YOUR SNAP 2.0™
Important! When syncing your SNAP 2.0™ with the controller always make sure that the drone is on
a flat level surface and that your digital trim settings are in the center position.
1. Before starting, make sure that the power SNAP 2.0™ on your controller is off and the battery is removed
from the SNAP 2.0™. Make sure that there are no other 2.4G devices in the area.
2. Insert the battery into the SNAP 2.0™ and set it down on a flat level surface. Push down the power button
and hold for a few seconds (see diagram D1).The red and white LED lights on the drone should begin to flash
rapidly.
3. Quickly turn ON the remote and you will notice that the top red LED light on the face of the controller
should also be flashing. The lights on the drone will flash slower.
4. Push the throttle stick all the way up until it stops and then pull it back all the way down to the
bottom(see diagram below). When pushing the stick up or pulling the stick down you should hear a
high-pitched beep both ways. The indicating lights on the drone and controller will stop flashing and stay
solid on.
You have successfully synced your SNAP 2.0™ and are ready to fly. If this doesn’t happen, repeat steps
1-4 again.
s
TIP 1: Try not to leave too much time between putting your battery into the
drone and turning on the controller or your syncing window will time-out.
s4)03YNCINGYOURDRONEINDOORSORINTHESHADEWILLMAKEITEASIERTOSEETHE
LED light indicators on both the controller and the drone.
Move the control stick all the way up
and all the way down, you should
hear two beeps.
Power Button
Speed Setting Button
360˚ Stunt Rolls Button
Emergency Stop
/./&&
Power Indicator
!54/3TART,AND
Throttle Trim
Moving
Forward
Trim
Moving
Backward
Trim
4HROTTLE9AW
Direction Control
Press down to take photo
Press down & hold
to take video
Turning Right Trim
Turning Left Trim
Banking Right Trim
Banking Left Trim
The flashing red LED light will
become solid when you are synced.
 Loading...