12 - Skystar
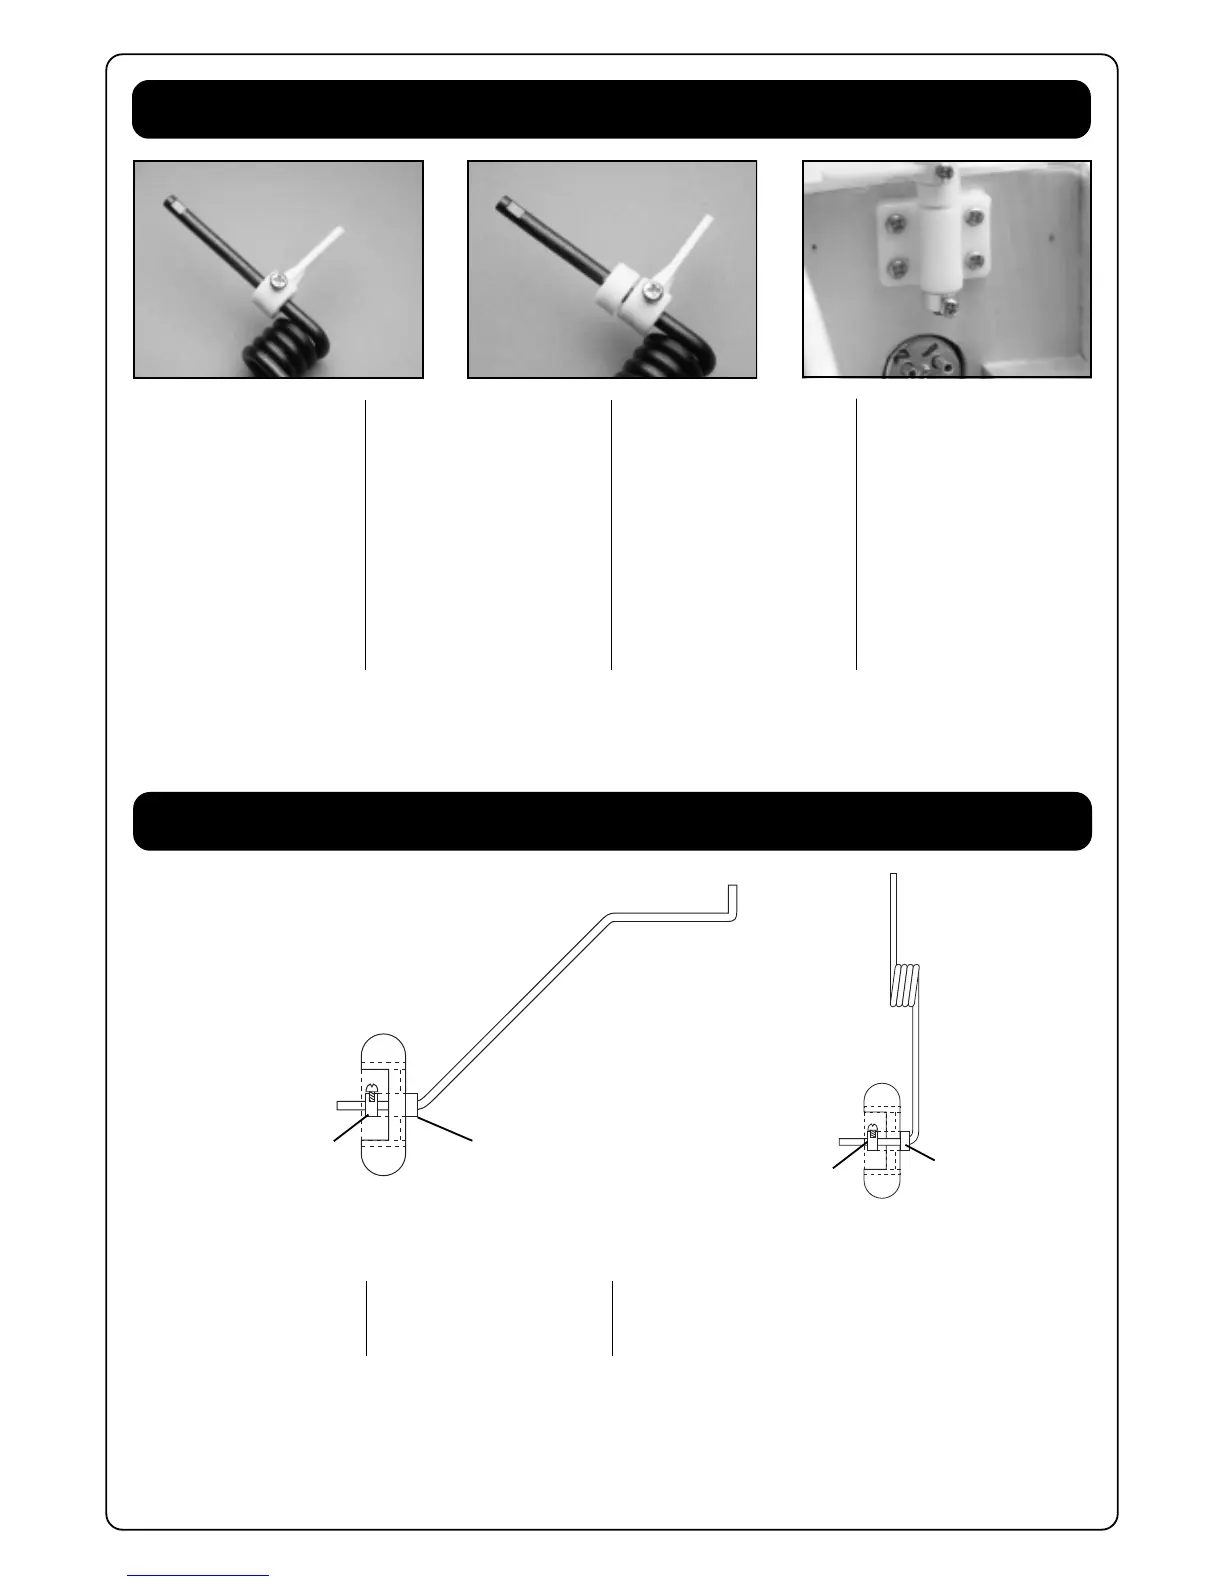
Installing the noseleg / Monteren van het voorste landingsgestel /
Installation du train avant
Slide the control arm over the
noseleg as shown and fix it with
a M3X6 screw.
Slide a plastic spacer on top of
the control arm.
Assemble the noseleg into the
holder and lock into position with
a brass collet and a M3X6 screw.
(Pic. 25-26-27)
Schuif de stuurarm over de
wielpoot zoals afgebeeld en
schroef deze vast met een M3X6
schroef.
Schuif vervolgens een platiek
afstandsbus over de wielpoot.
Monteer de wielpoot in de voorste
wielhouder en fixeer deze met een
messing stopper en een M3X6
schroef.
(Pic. 25-26-27)
Mounting the wheels / Monteren van de wielen /
Montage des roues
Fix the wheels on the
undercarriages as shown
(Drw. 10-11).
Bevestig de wielen zoals
afgebeeld op de tekening. (Drw.
10-11)
Plastic spacer
Kunststof afstandsbus
Entretoise plastique
Brass wheel collet
Messing wielstopper
Bague d’arrêt
Brass wheel collet
Messing wielstopper
Bague d’arrêt
Plastic spacer
Kunststof afstandsbus
Entretoise plastique
Drw. 10 Drw. 11
Pic. 25 Pic. 26
Pic. 27
Glissez le levier de contrôle sur la
jambe de train et bloquez -le avec
la vis M3x6mm.
Glissez l’entretoise en plastique
au-dessus du levier de contrôle.
Montez la jambe dans son sup-
port et maintenez en place avec
une bague d’arrêt et une vis
M3x6mm.
(Pic. 25-26-27)
Montez les roues comme illustré
(Drw. 10-11).