Skystar - 13
Assembling the fuel tank / Monteren van de brandstoftank /
Montage du réservoir
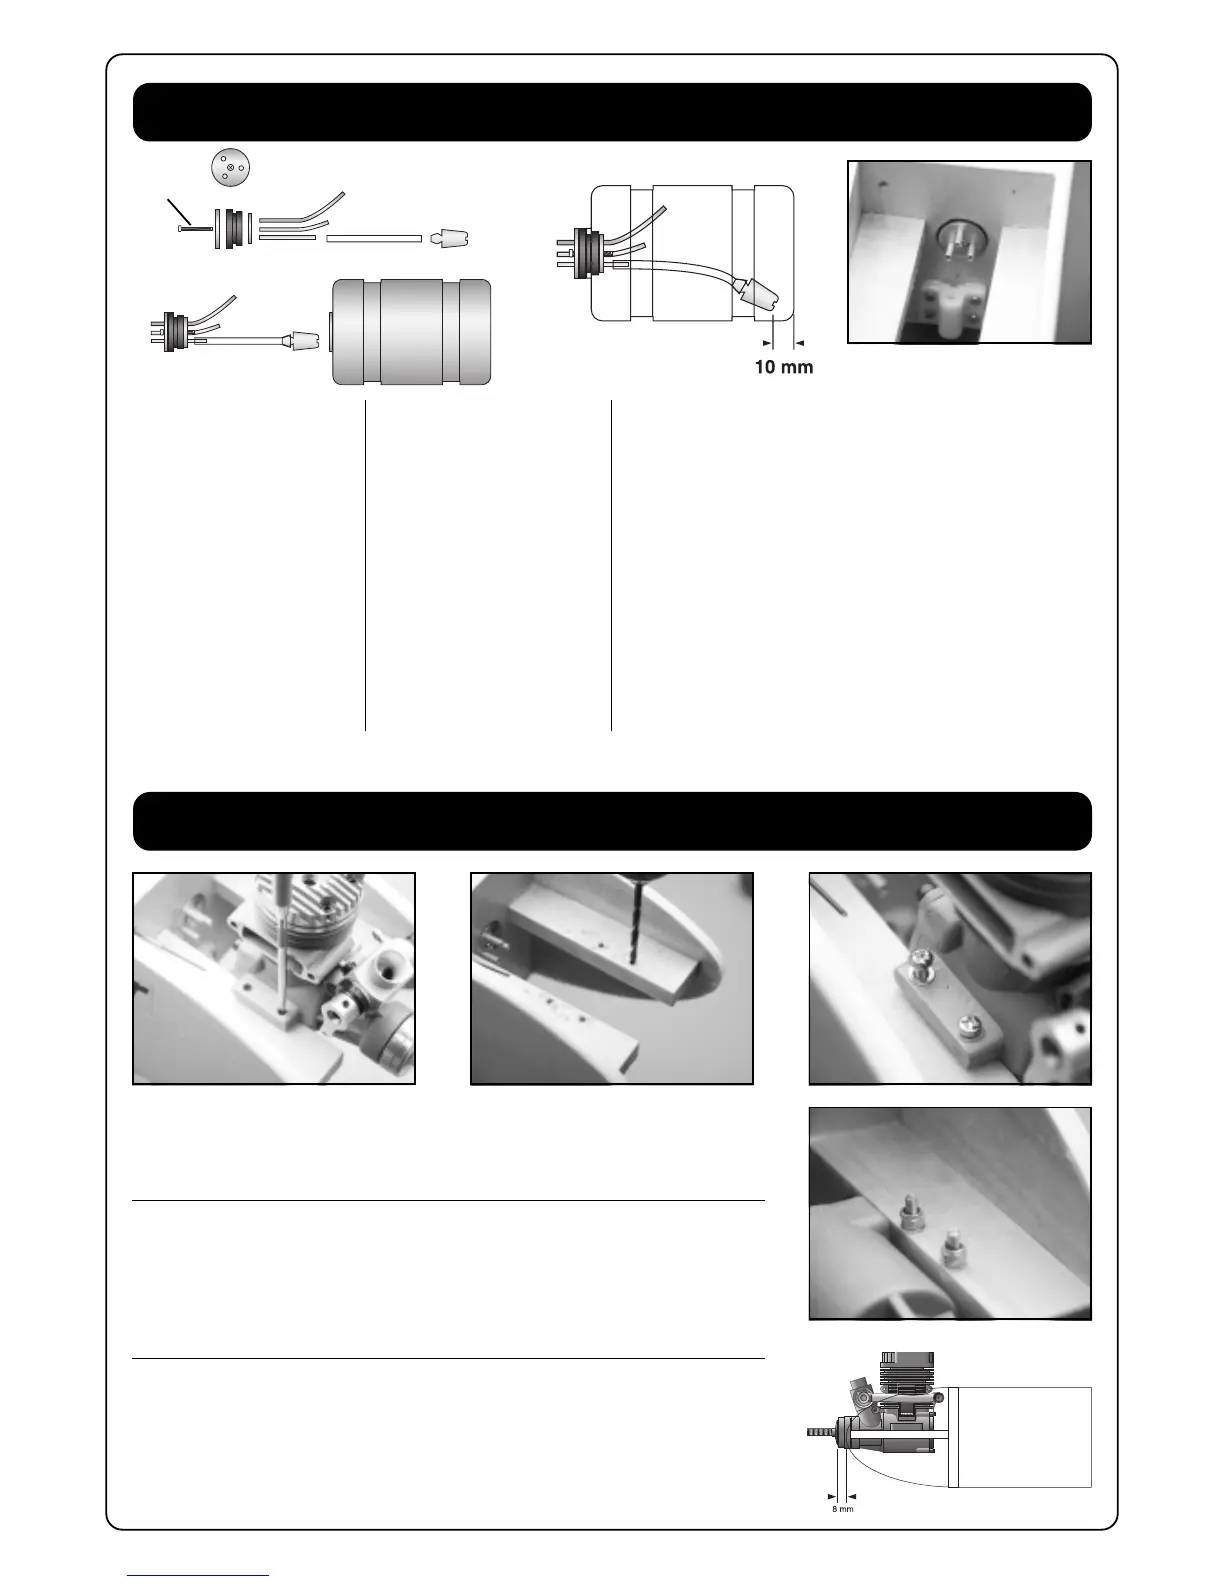
Assemble the fuel tank as shown.
Warning: the silicon tube with the
metal clunk need to be about 10
mm shorter than the length of the
fuel tank. The clunk need a 100%
free movement inside the tank in
all positions.
(Drw. 12)
Mount the fuel tank in the fuse-
lage. The rubber cap must fit into
the opening of the firewall. The
fuel tank can be held in place in-
side the fuselage with packing
foam. (Pic. 28)
Monteer de brandstoftank zoals
afgebeeld.
Let op: de slang met met de clunk
moet iets korter zijn dan de lengte
van de tank. De clunk moet in alle
posities vrij kunnen bewegen.
(Drw. 12)
Plaats de brandstoftank in de
romp. De rubber dop moet door
het gat van de motorspant komen.
De tank kan gefixeerd worden met
schuimrubber.
(Pic. 28)
Installing the engine / Monteren van de motor /
Installation du moteur
Place your engine on the motor mount as shown in Pic. 29 and drawing (Drw. 13).
Mark the mounting position of the engine using a sharp point.(Pic. 29)
Remove the engine and drill 4 holes of 3mm at the marked positions. (Pic. 30)
To mount the engine we use 4X M3X25 screws with washers and M3 nylstop nuts. (Pic. 31-32)
Plaats de motor op de motordrager zoals afgebeeld op foto Pic. 29 en tekening (Drw. 13).
Neem een puntslag en duid de gaten van de motor aan op de houten motordrager. (Pic. 29)
Neem de motor weg en boor 4 gaten op de aangeduide plaatsen met een spiraalboor van
3mm. (Pic. 30)
Voor het bevestigen van de motor gebruiken we 4X M3X25 schroeven met rondellen en M3
Nylstop moeren.(Pic. 31-32)
M3X20
TOP
Drw. 12
Pic. 28
Pic. 29
Pic. 30
Pic. 31
Pic. 32
Drw. 13
Assemblez le réservoir comme
illustré.
Attention: le tube silicone avec le
plongeur doit-être 10mm plus
court que la longueur du réservoir.
Le plongeur doit pouvoir bouger
dans toutes les positions
(Drw.12).
Installez le réservoir dans le fuse-
lage. Le capuchon du réservoir
doit entrer dans le logement
prévu. Le réservoir est Bloqué
dans le fuselage à l’aide de
mousse.(Pic. 28)
Installez le moteur sur le support comme montré (Pic.29) et illustration (Drw.13).
Utilisez une pointe pour marquer les endroits de perçage (Pic.29)
Enlevez le moteur et forez 4 trous de 3mm sur vos marques (Pic.30).
Fixez le moteur sur le support avec les 4 vis de M3x25mm, les rondelles M3 et les écrous
nylstop M3 (Pic. 31-32).
 Loading...