Skystar - 17
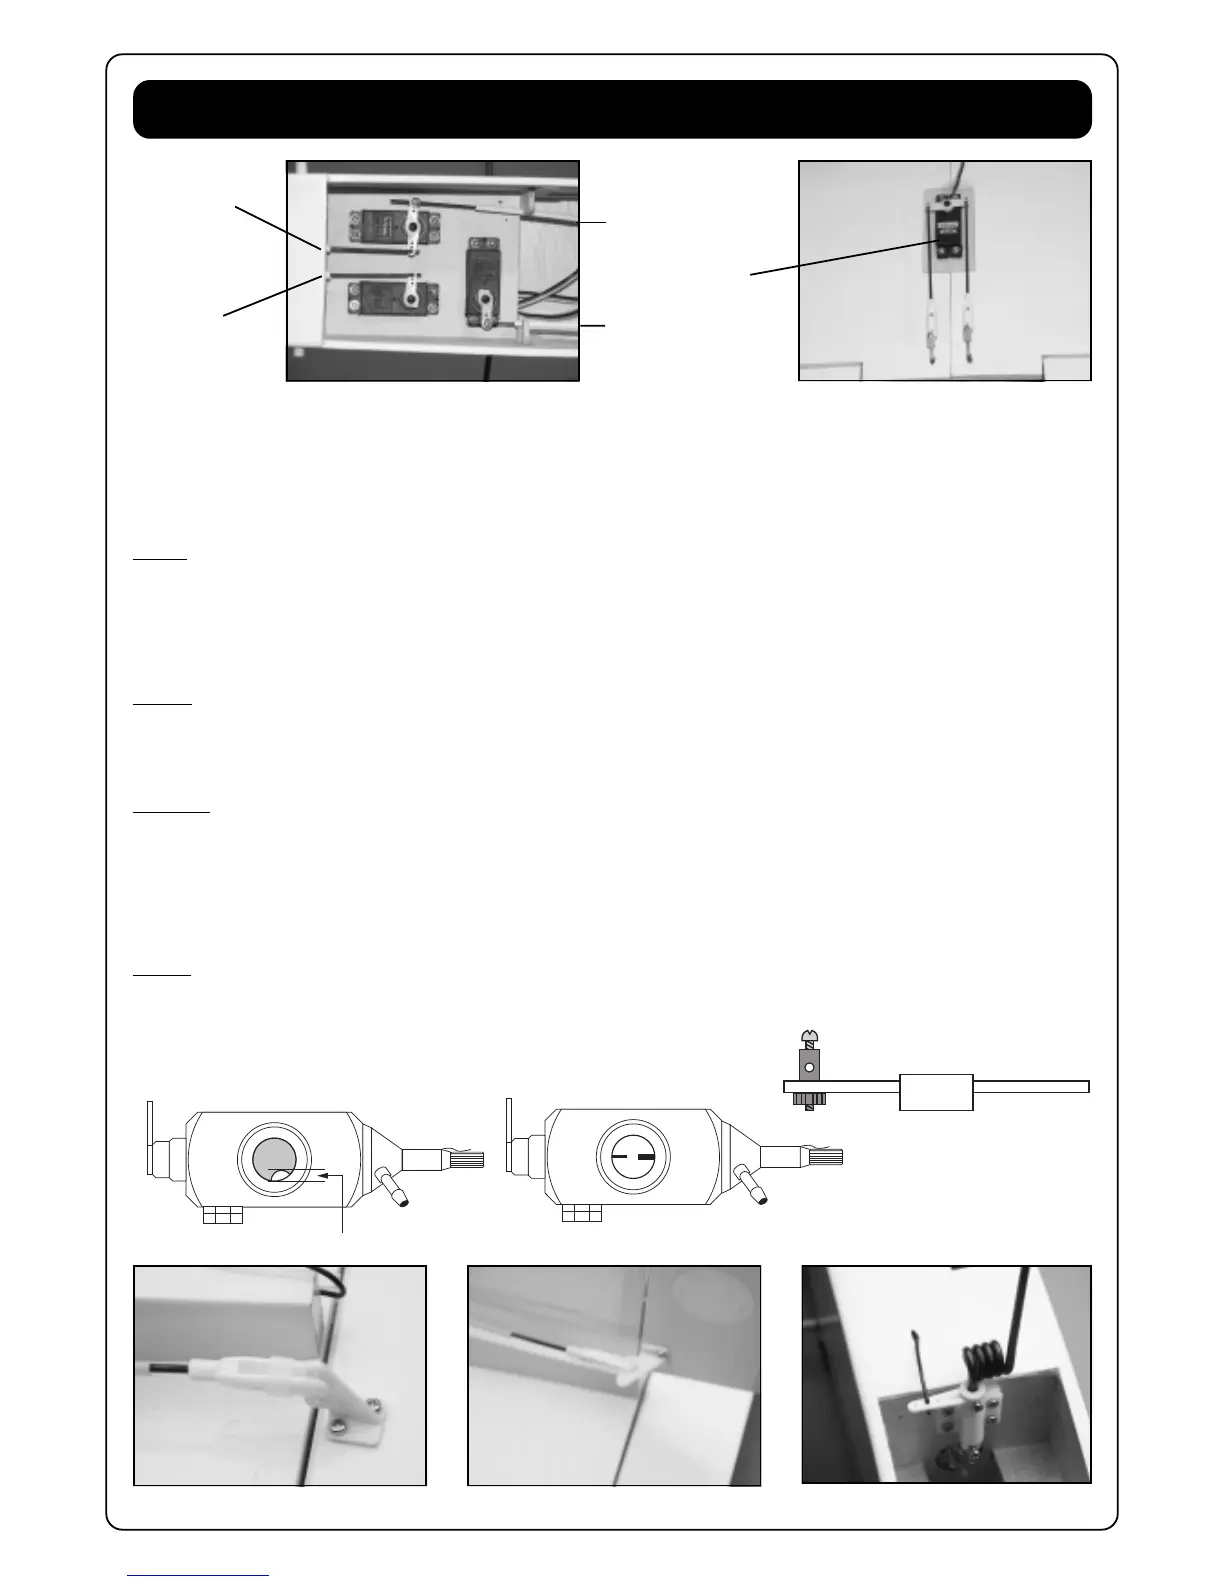
Connecting the push rods
Before you start to connect the push rods to the servos, you need to check that the servos are in their neutral position.
Turn-on your transmitter and receiver. The sticks and the trims on the transmitter have to be in the center position. If all sticks and trims are in the
center position, the arms on the servos have to be perfectly horizontal or vertical. If the servo horn is not perfectly horizontal or vertical aligned,
remove the servo horn and align it to the correct position.
Now you are ready to connect the push rods.
Rudder:
Remove the servo horn from the rudder servo. On the servo horn you need to mount the brass rod connector to connect the push rod from the
steerable noseleg (Drw. 22).
Slide the rudder push rod inside the plastic tube going to the rudder. Connect the end with the Z-bend to the rudder servo horn.
On the other end you can mount the plastic snap link and connect the plastic snap link to the rudder control horn. Adjust the length of the push
rod by turning on the plastic snap link till the rudder is straight (Pic. 47-50).
Slide the push rod from the steerable noseleg into the brass rod connector from the rudder servo and fix it with a M3X6 screw (Pic. 51).
Elevator:
Remove the servo horn from the elevator servo.
Slide the elevator push rod inside the plastic tube going to the elevator. Connect the end with the Z-bend to the elevator servo horn.
On the other end you can mount the plastic snap link and connect the plastic snap link to the elevator control horn. Adjust the length of the push
rod by turning on the plastic snap link till the elevator is level (Pic. 47-49).
Carburator:
Remove the servo horn from the throttle servo. On the servo horn you need to mount the brass rod connector to connect the push rod from the
carburator. (Pic. 47)
Slide the throttle push rod inside the plastic tube going to the carburator. Slide the push rod from the carburator into the brass rod connector from
the throttle servo and fix it with a M3X6 screw (Drw. 22).
When your throttle stick is in the idle position, the carburator should be slightly open (Drw. 20). When your throttle stick is in the full power position,
the carburator should be opened completely (Drw. 21). When you move your throttle stick to the idle position as well your trim completely down,
the carburator should be closed completely.
Ailerons:
Prepare 2 M2 push rods with a Z-bend with a plastic snap link on the threaded end.
Connect the push rods as shown in Pic. 48.
To the noseleg
To the carburator
To the elevator
To the rudder
Aileron servo
Elevator control horn Rudder control horn Noseleg
Pic. 47
Drw. 20
Pic. 48
Pic. 49
Pic. 50
Pic. 51
Drw. 21
Drw. 22
 Loading...