The RAIL™ BOLT is the main component of the RAIL™ marker. In order to achieve the best
possible performance of the RAIL™ it is essential that the RAIL™ BOLT is kept clean, well lubed
and in good working order.
The RAIL™ BOLT should be cleaned and re-lubed after each day of use.
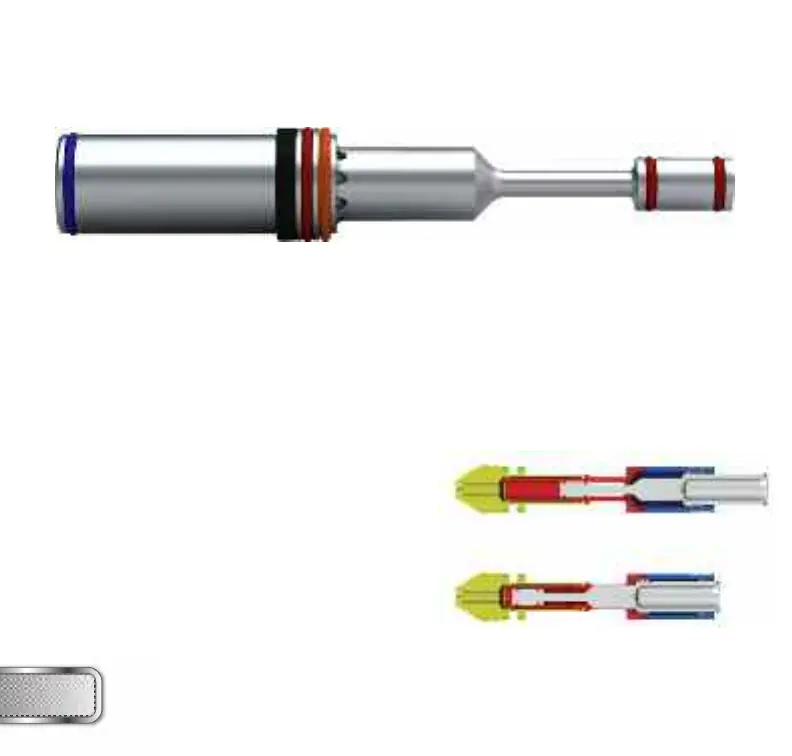
There are 4 parts in the RAIL™ BOLT kit that mount together as one unit. To remove the RAIL™
BOLT from your RAIL™, use a 1/4" allen key and turn the Back Cap out 2 full turns counter
clockwise. Now pull out the complete RAIL™ bolt kit from the RAIL™.
To dis-assemble the RAIL™ BOLT kit you unthread the front most part called the Can and the
Manifold from each other. Then pull out the actual moving bolt from inside these pieces. Notice
that to separate the Can and the Bolt you need to remove
the bolt tip O-ring before the bolt is able to slide through
the Can.
HOW DOES IT WORK
Air is supplied into two points on the RAIL™ BOLT. In the
back air is routed through the Back Cap and Manifold
and fills up the supply chamber around the Manifold. In
the front air is routed through the solenoid into the Can.
This air pushes against the Sail on the Bolt, which keeps
the bolt in the back position.
FORWARD POSITION
RAIL
™
BOLT
ASSEMBLY AND MAINTENANCE
BACK POSITION
W W W . P R O T O P A I N T B A L L . C O M
14