Operation
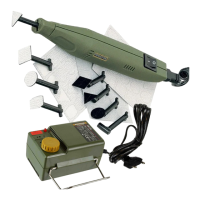
Clamping and replacing sandpaper
Important
Remove mains plug beforehand.
1. Cut sandpaper to size 60 x 105 mm.
2. Raise clamping block using thumb until a gap
is formed (Fig. 2).
3. Insert sandpaper between clamping block
and sanding plate.
4. Release clamping block; the paper is clam-
ped automatically by means of three pins.
5. Fold sandpaper over the edges and repeat
clamping procedure on the opposite side.
Note:
In order to obtain good sanding results, the
sandpaper must be clamped in position under
the maximum possible tension.
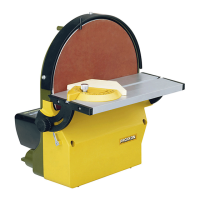
Working with the tool
Important
In case of heavy dust generation or harmful
dust particles, wear a dust mask and protective
goggles.
1. Switch on tool at switch 1 (Fig. 3) and set the
appropriate speed for the work at knob 2.
Note:
- Do not tilt the tool
- Never use excessive pressure. Only correct,
uniform speed produces optimum sanding
results.
Precision sanding = high speed
Rough sanding = low speed
- Select low speed when sanding heat sensiti-
ve material.
- Replace sandpaper when working on diffe-
rent materials.
Maintenance
1. Following each use, clean attached sanding
dust from tool using a dry paintbrush.
EC Declaration of Conformity
We assume sole liability for ensuring that this
product conforms to the following EC guideli-
nes:
• EC Machine Guideline 98/037/EEC
• DIN EN 50144-1/2002
• DIN EN 50144-2-10/2001
Jörg Wagner MSc
PROXXON S.A.
(Equipment Safety Division)
- 7 -