Attaching The Linkage Arms
1. Team lift the rack into place (approximately 20” from the wall) and begin attaching the linkage arms
starting at the top.
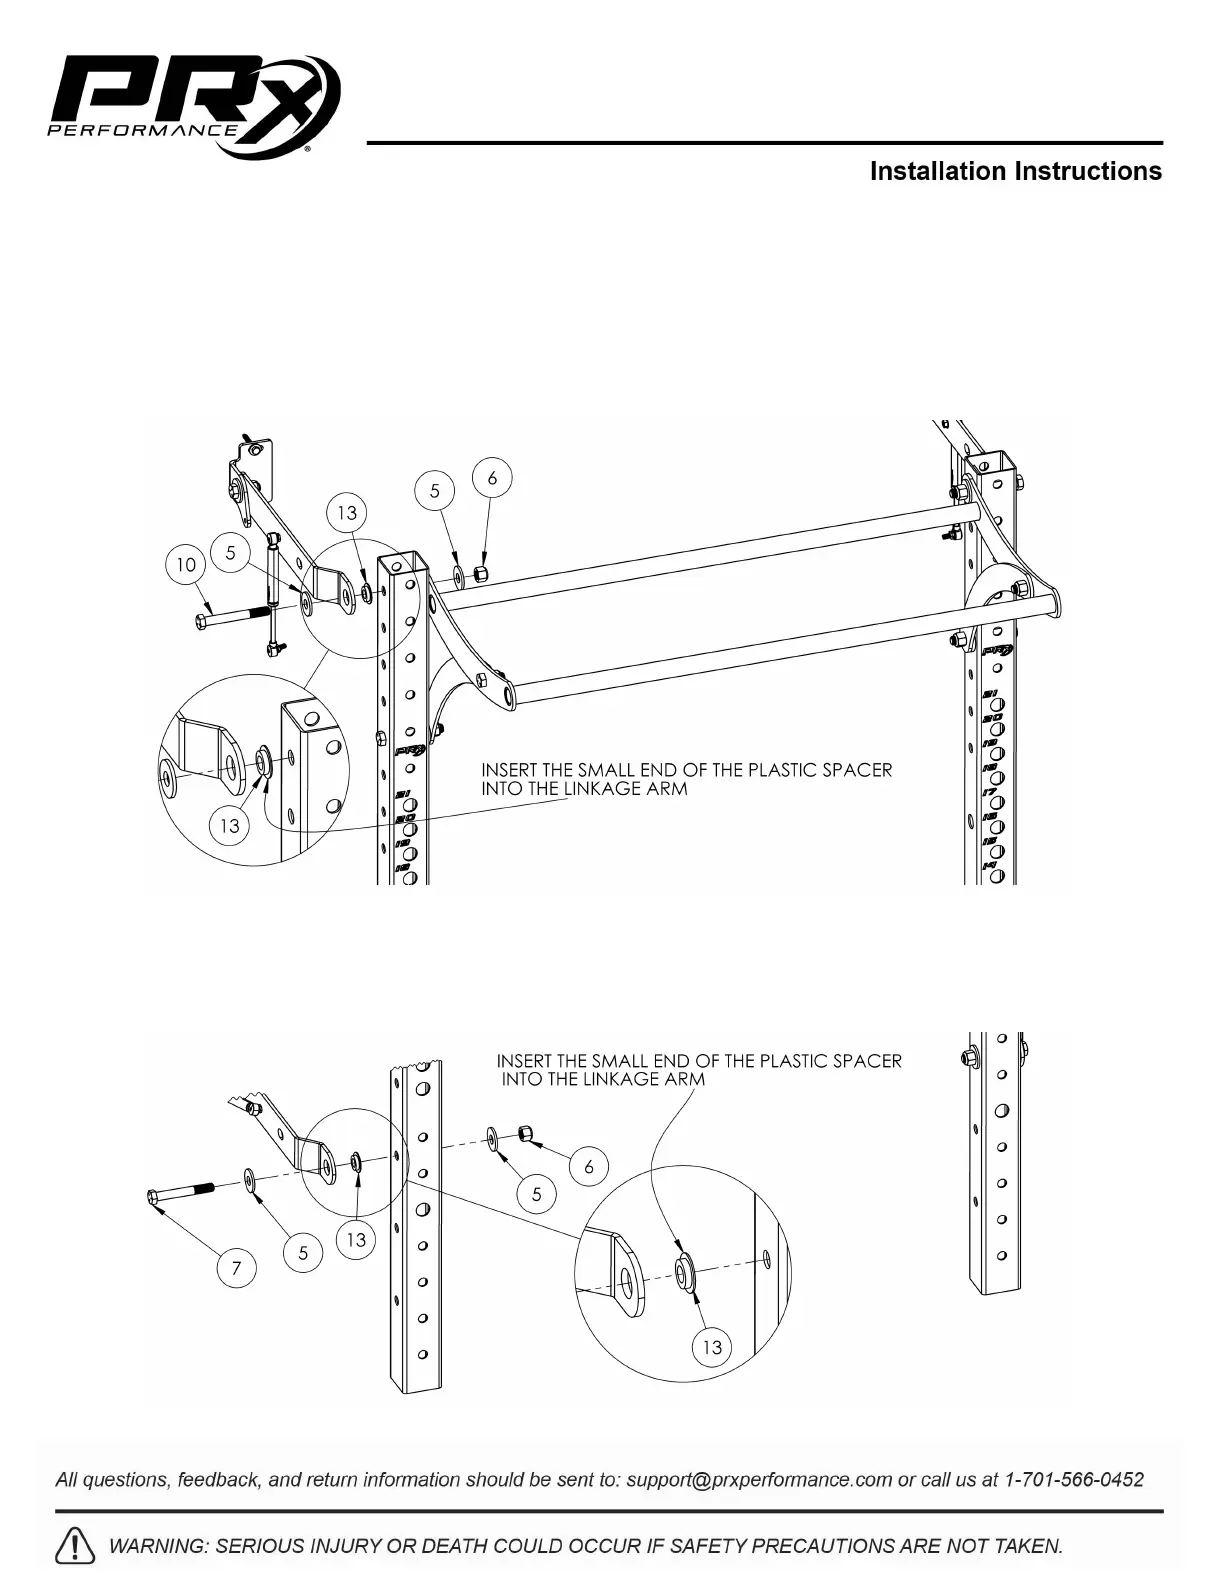
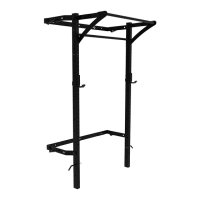
2. Undo one 5/8” x 5” hex bolt (10) and bolt the linkage arm to the upright through the kipping bar using
the 5/8” x 5” hex bolt (10), two 5/8” flat washers (5), one plastic spacer (13) and one 5/8” locknut (6)
(Figure 9). Repeat this with the other side.
Figure 9: Bolting the Rack to the Upper Linkage Arms
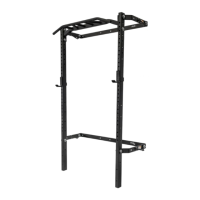
3. Bolt the lower linkage arm on the upright using the 5/8” x 4-1/2” hex bolt (7), two 5/8” flat washers (5),
one plastic spacer (13) and one 5/8” locknut (6) (Figure 10). Repeat this on the other side.
Figure 10: Bolting the Rack to the Lower Linkage Arms