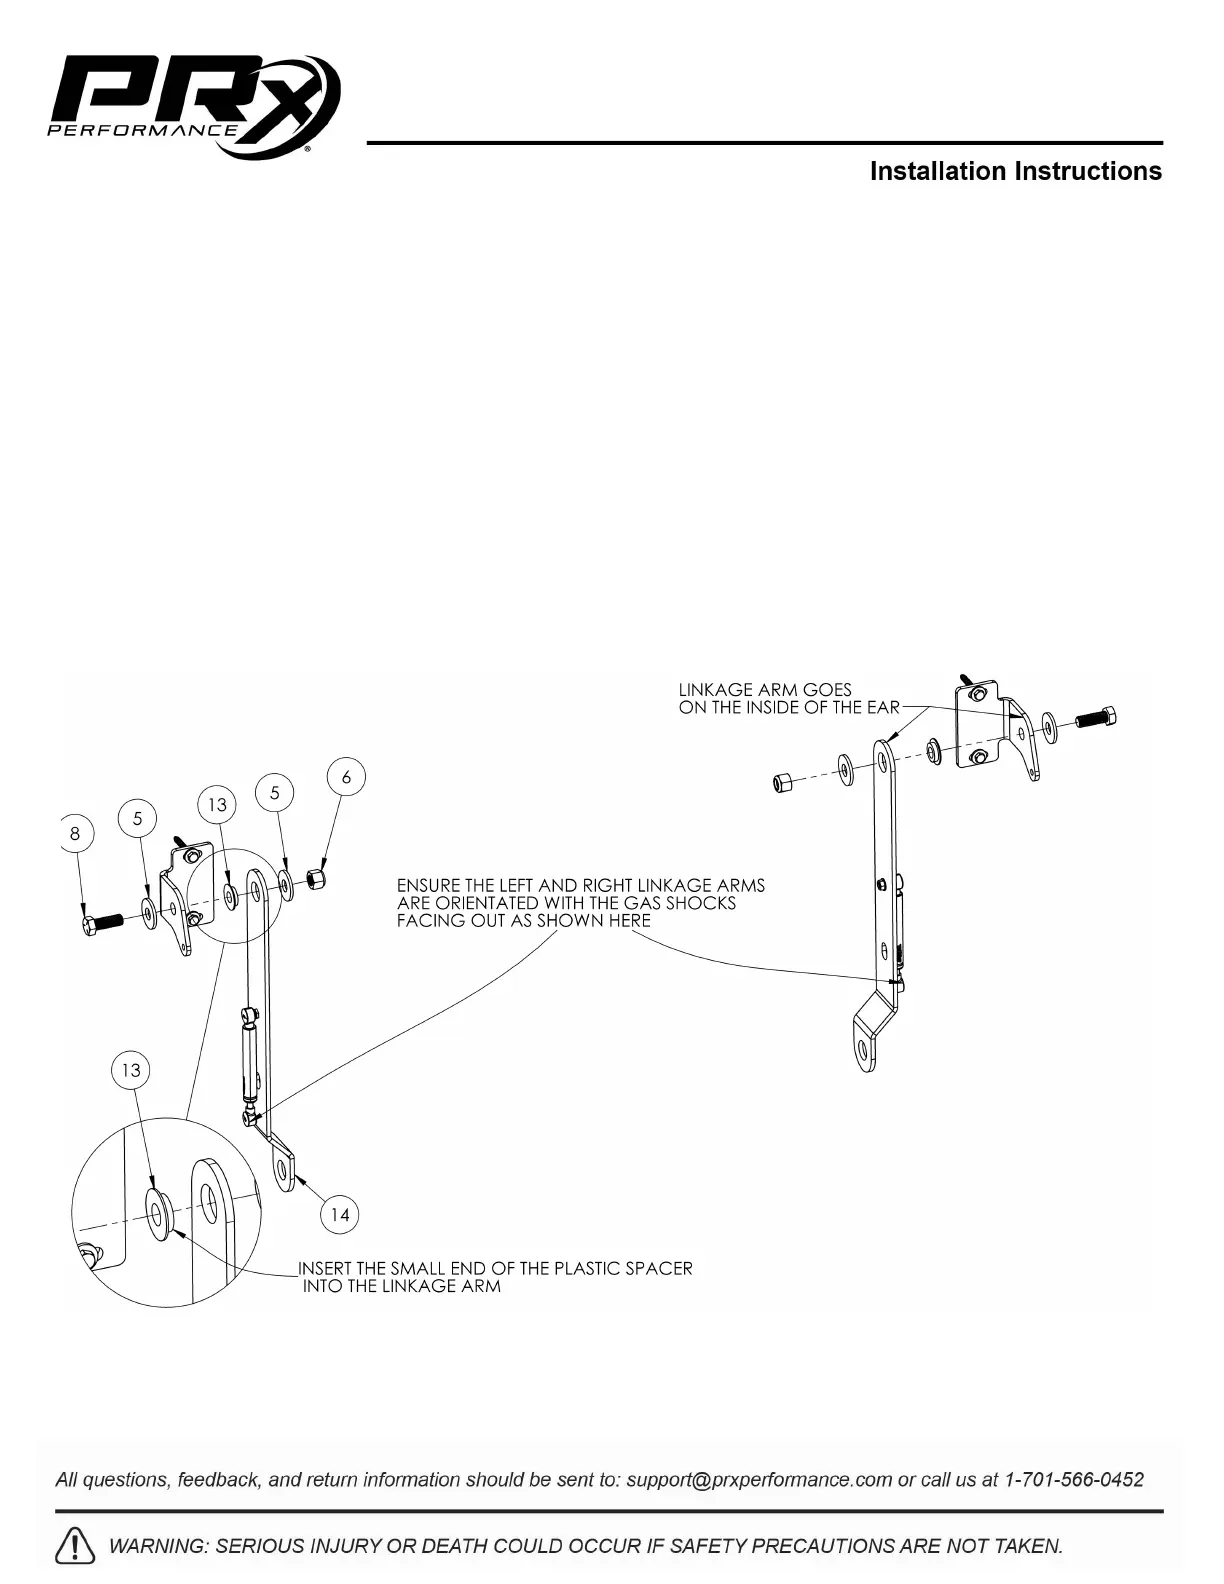
Installing the Linkage Arms
1. Place the small side of the plastic spacer (13) into the linkage arm (14) (Figure 6).
2. Place the linkage arm with the plastic spacer facing the inside of the wall bracket “ear”.
3. Attach the linkage arm to the wall bracket using a 1-3/4” hex head bolt (8) and 5/8” washer (5) on
the outside of the wall bracket “ear” and a 5/8” washer (5) and 5/8” lock nut (6) on the inside of the
linkage arm.
4. Tighten using a 15/16” socket and 15/16” wrench.
NOTE: DO NOT attach the gas shocks to the wall brackets.
5. Repeat steps 1-4 with the other 3 linkage arms.
NOTE: DO NOT over tighten any of the pivot points. This may result in the rack feeling “stiff”
moving up and down. It should move up and down freely.
Figure 6: Bolting on the Linkage Arms