ENGLISH
ENGLISH
Starting Operation
Powering on and image setting
• Open the lens cover (10).
• Press the ON/OFF button (1) briey to power the device on.
• Set the pupillary distance by squeezing the eyepieces together or pulling
farther apart while holding the adjustment rings (6).
• Get a sharp image of the symbols on the display by rotating the optical
adjustment ring of the eyepieces (7).
• Rotate the lens focus ring (8) to focus on target.
• Select the calibration mode: manual (M), semi-automatic (SA) or automatic
(A) in the main menu (enter the menu by long pressing the MENU button (3)).
• Press the ON/OFF button (1) briey to calibrate the image (close the lens
cover for manual calibration if the calibration mode is (SA) or (M)).
• Select the operating mode (Forest / Rocks/ / User Mode). Hold
down the DOWN button (5) to call up a Menu item. Press the DOWN button
(5) briey to switch modes. The USER MODE allows you to set and save user
brightness and contrast parameters.
• Adjust the brightness, display contrast, smooth digital zoom in the quick
menu (activate by briey pressing the MENU button (3).
• Turn off the riescope by long pressing the ON/OFF button (1) after use.
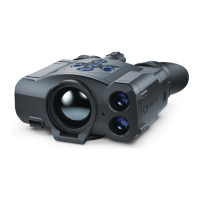
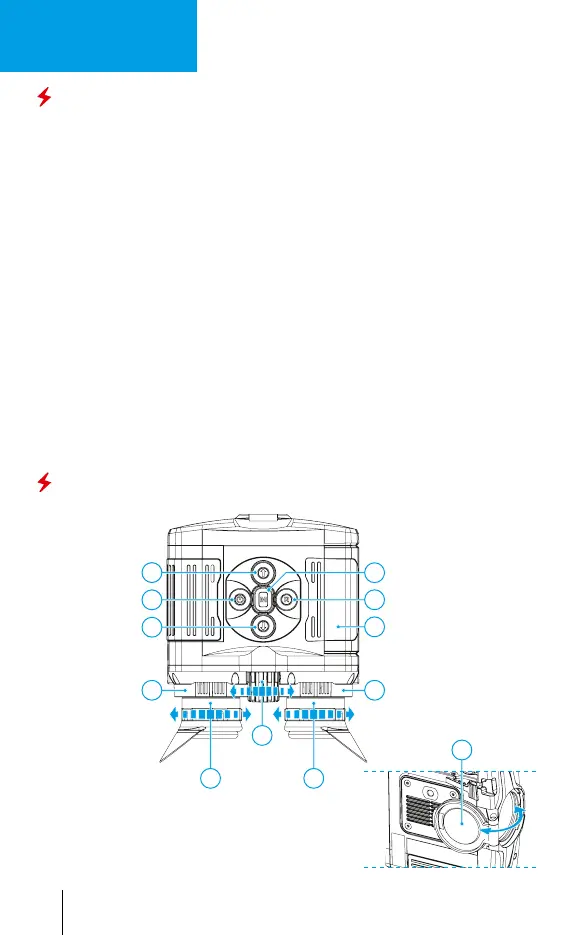
Components and Controls
9
3
5
8
77
10
66
1
2
4
Dioptre
adjustment rings
Lens focusing ring
Interpupillary
distance
adjustment
rings
Button ON/OFF
Recording button REC
Battery Pack
Navigation
button DOWN
Interpupillary
distance
adjustment
rings
Lens cover
Navigation
button UP
Button MENU
1
 Loading...