131
ACCOLADE thermal imaging binoculars are supplied with a
rechargeable Li-Ion Battery Pack IPS5 which allows operation for up to
7 hours. Please remember to charge the Battery Pack before first use.
6
Charging:
132
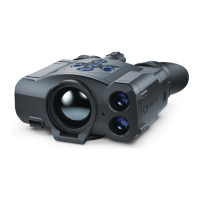
Lift the lever (10).
Install the battery (9) all the
way into the dedicated slot on
the device housing so that
element F (Pic.3 on the flyleaf)
appears from below.
Fix the battery by clicking the
lever.
Installing the Battery Pack:
Only use the charger supplied with your binoculars.
When keeping the battery for a long period, the battery should
not be fully charged or fully discharged.
Do not charge the battery immediately after bringing the
battery from cold environment to a warm one. Wait for 30-40
minutes for the battery to get warm.
Charge the Battery Pack at a temperature from 0 °C to +45 °C.
Otherwise batter's life will decrease significantly.
Do not leave a battery unattended while charging.
Safety measures:
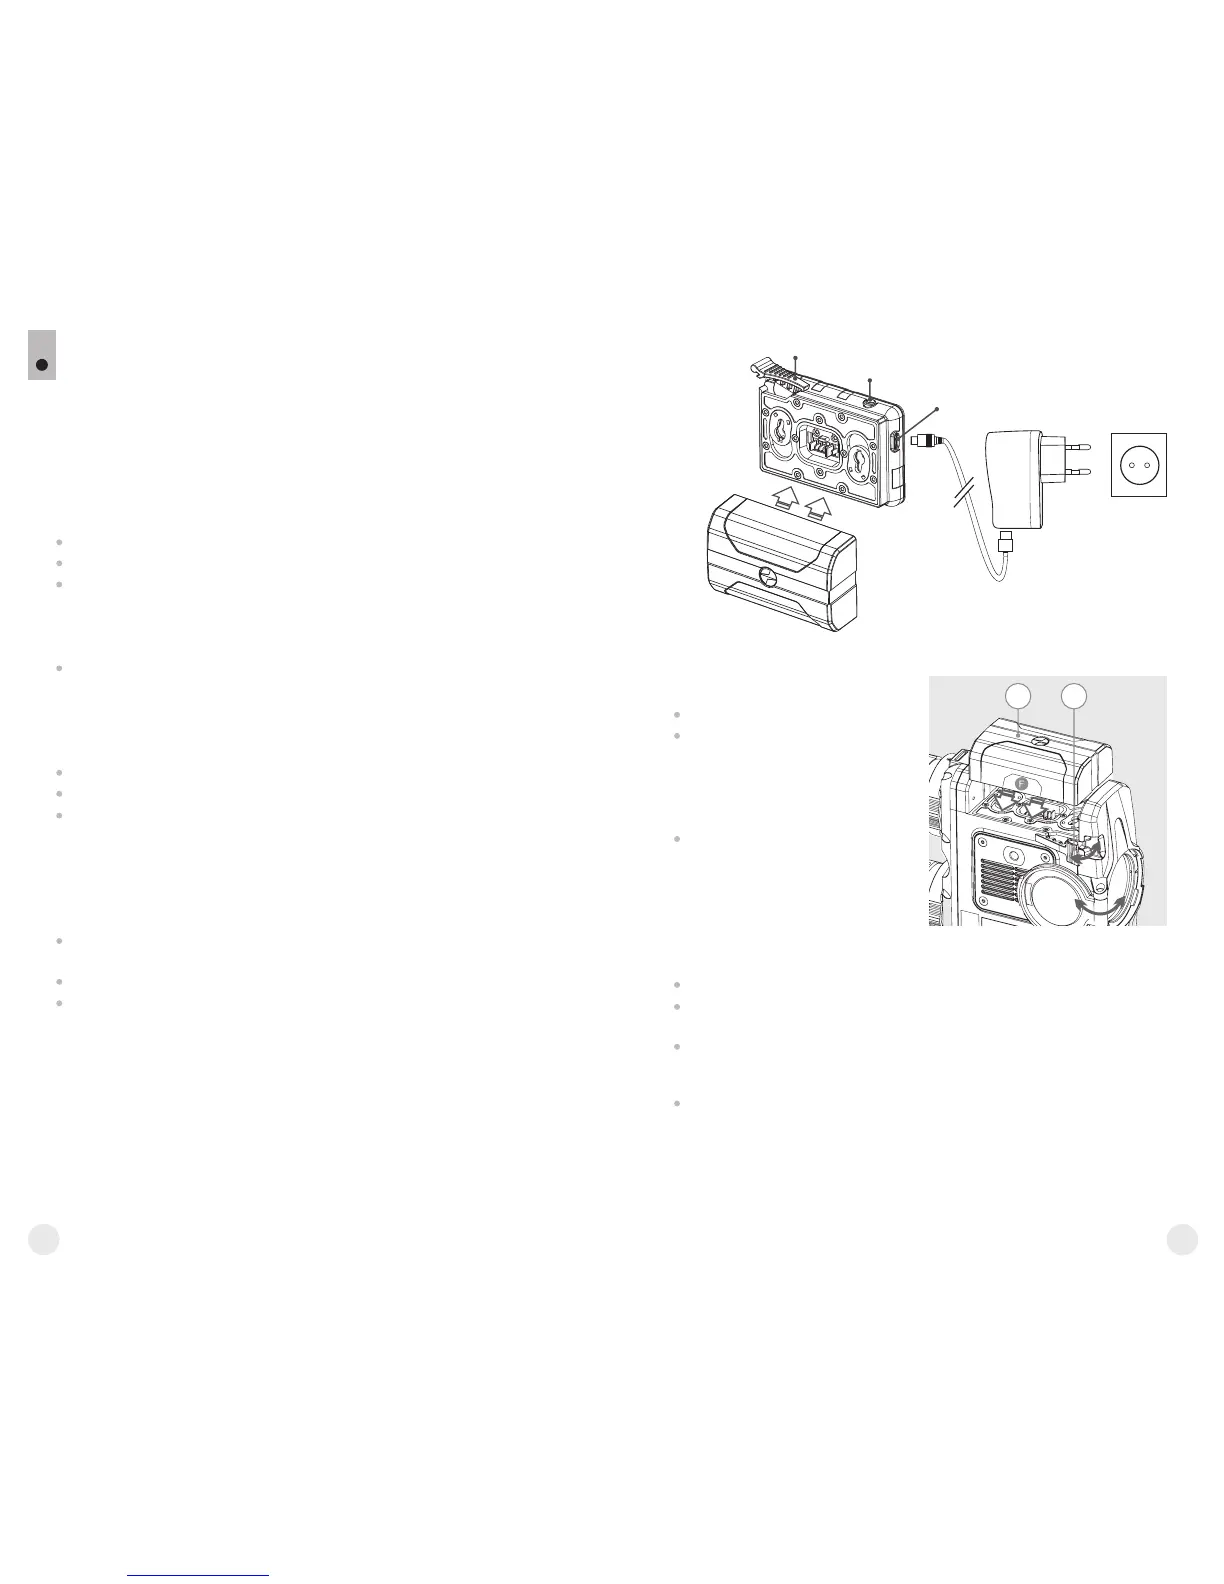
C
D
E
Charging
base
Battery Pack
Charger
220V socket
109
Pic. 3
Pic. 2
USING THE BATTERY PACK
Lift the lever (C) of the charging base.
Remove the protective cover from the Battery Pack.
Install the Battery Pack into the charging base by inserting the pins
(A) of the battery into the grooves (B) of the charger – the Pulsar logo
on the battery Pack should be located closer to the lever; click the
lever (C)(Pic.3).
Upon installation, a green LED indicator (D) on the charging base
will start to glow and begin flashing:
- once if the battery charge ranges from 0% to 50%;
- twice if the battery charge ranges from 51% to 75%;
- three times if the battery charge ranges from 75% to 100%;
If the indicator lights green continuously, the battery is fully charged.
You can remove the battery from the charger by lifting the lever (10).
If the indicator of the charger lights red continuously upon battery
installation, probably the battery's charge level is lower than
acceptable (the battery has been long in deep discharge). Keep the
battery in the charger for a long time (up to several hours), remove
and re-insert it. If the indicator starts blinking green, the battery is
good; if it keeps lighting red it's defective. Do not use the battery!
Connect the Micro-USB plug of the USB cable to the port (E) of the
charger.
Connect the Micro-USB plug to the charger.
Insert the plug of the charger to the 220V socket.