EasyManuals Logo

Pulsar Axion 2 LRF XQ35 User Manual

Pulsar Axion 2 LRF XQ35
63 pages
To Next Page IconTo Next Page
To Previous Page IconTo Previous Page
Page #21 background imageLoading...
Page #21 background image
Powering on and Image Setting
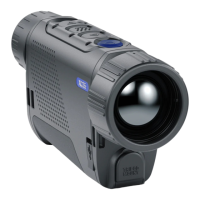
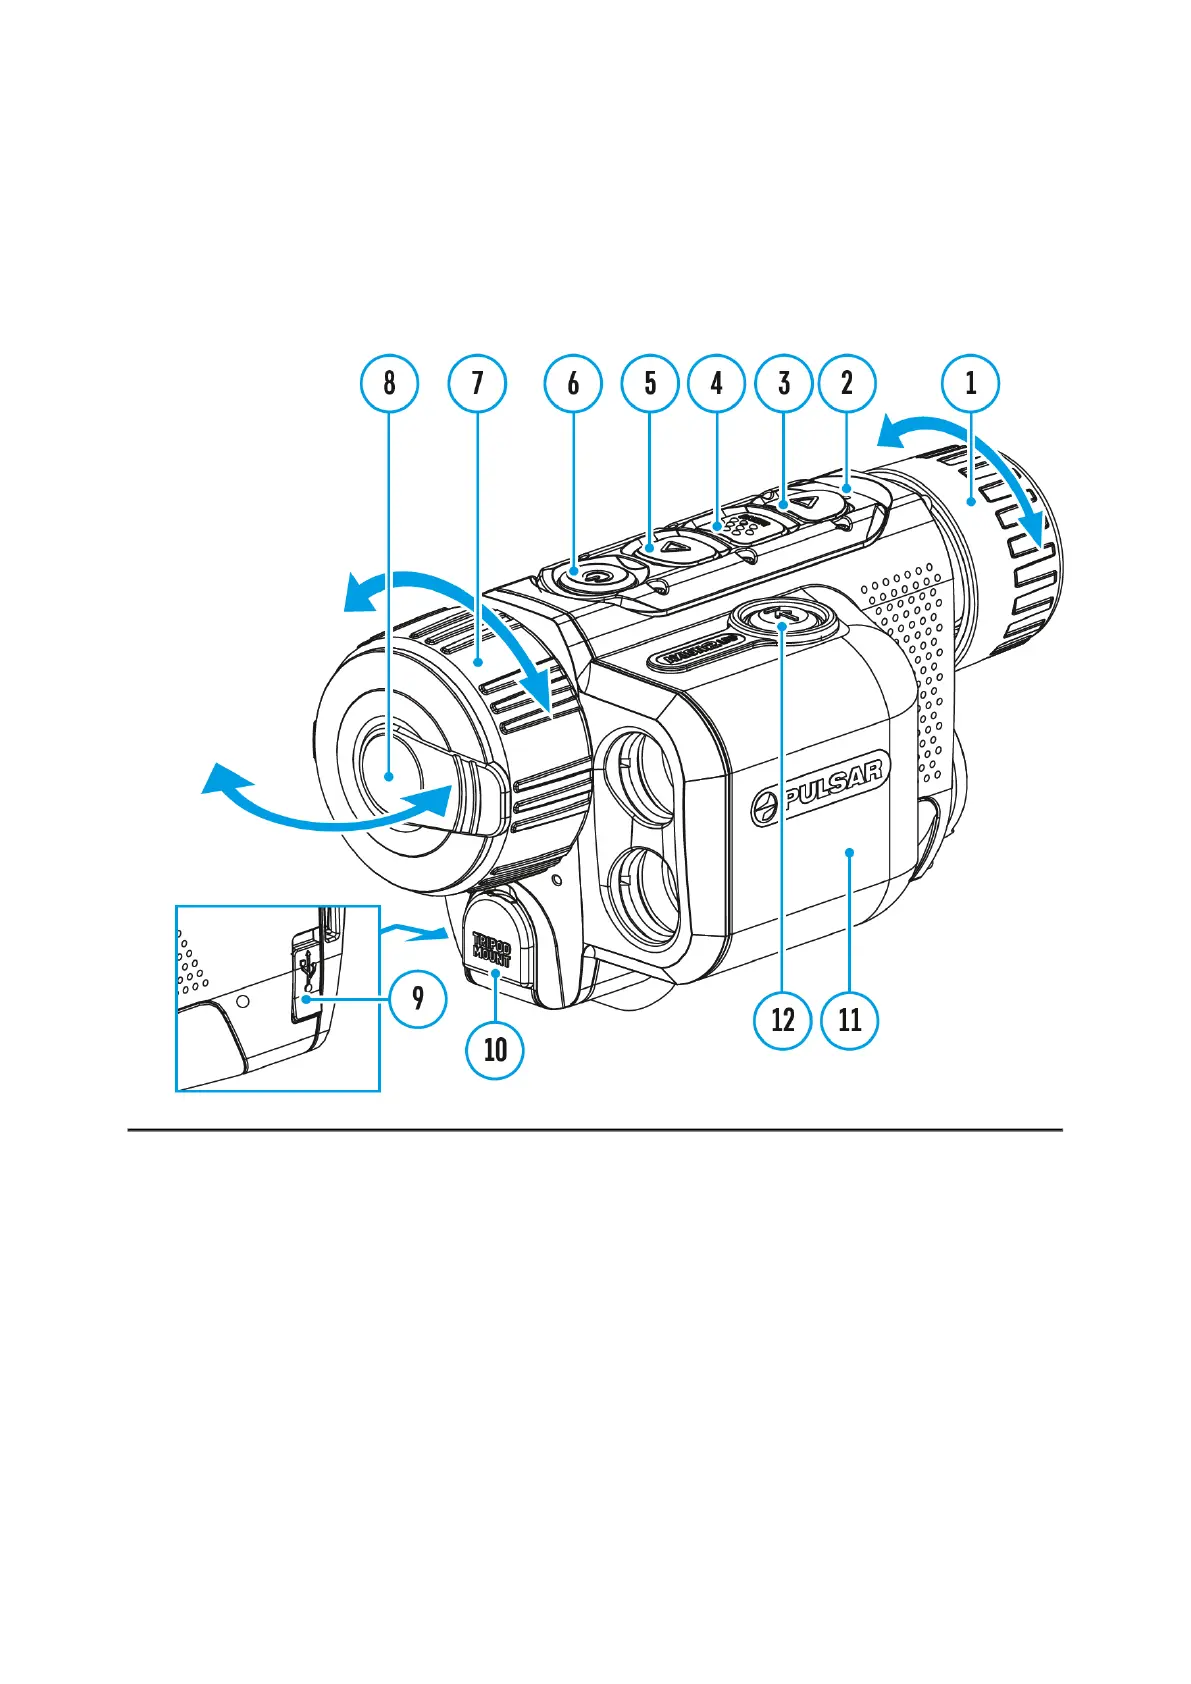
Show device diagram
1.
Open the lens cover (8). The lens cover can be secured to the strap using the
built-in magnet.
2.
Press the ON/OFF (6)button briefly to turn on the device.
3.
Adjust the eyepiece focus ring (1) of the device until the symbols on the display
are sharp.
4.
Rotate the lens focus ring (7) to focus on the object being observed.
5.
Enter the main menu with a long press of the MENU (4) button and select the
desired calibration mode: Manual (M), Semi-Automatic (SA) or Automatic (A).
6.
Calibrate the image by briefly pressing the ON/OFF (6)button.If the SA or A
calibration mode has been selected the microbolometer is closed with an internal
shutter automatically. However, if the M calibration mode has been selected you

Questions and Answers:

Question and Answer IconNeed help?

Do you have a question about the Pulsar Axion 2 LRF XQ35 and is the answer not in the manual?

Pulsar Axion 2 LRF XQ35 Specifications

General IconGeneral
Sensor Resolution384x288
Pixel Pitch17 µm
NETD<40 mK
Objective LensF35/1.0
Magnification2x - 8x
Display TypeAMOLED
Built-in memory16 GB
Wi-FiYes
Protection degreeIPX7
Weight0.35 kg
Laser RangefinderYes
Wavelength905 nm
Accuracy±1 m
Frame Rate50 Hz
Display Resolution640x400
Video / Photo resolution528x400
Video / Photo formatMP4, JPG
Frequency2.4 GHz
Battery TypeAPS5
Battery Life11 hours
LRF Range1000 m
Field of View10.7x8°
Operating temperature-25°C to +50°C

Related product manuals