To switch to contrast control, press briefly the “MODE” (12) button
(icon appears). Press briefly navigation buttons - “LEFT” (10) (decrease)
and “RIGHT” (11) (increase) to select contrast level (from 0 to 20).
Corresponding contrast level appears next to icon in the top right corner of the
display.
Point the unit at a warm object located at a certain distance, 100 meters, for
example.
Rotate the lens focus knob (3) until you achieve quality image.
After this adjustment no further dioptre adjustment should be required,
regardless of distance or other factors. Adjust image quality only with the lens
focus knob.
Operating mode
Calibration mode
Brightness setting of menu icons
Clock setup
Remote control activation
Defective pixel repair
MENU
11
The menu includes options as follows:
Status bar
The status bar shows information as follows:
Operating modes (“Rocks”, “Forest”, “Identification”)
Calibration mode (manual, semiautomatic, automatic)
Digital zoom x2 activated
Color inversion activated
Clock setup
Battery status
Operating modes
The unit features three automatic operating modes: “Rocks” (enhanced
contrast), “Forest” (low contrast) and “Identification” (improved detail
rendering).
Each mode includes optimal combination of parameters (brightness, contrast,
gain etc.) to deliver best possible image in specific viewing conditions.
Press and hold down the “MODE” (12) button for two seconds to enter the
menu.
Press briefly “MODE” to confirm your choice.
Icon of the selected mode is shown on the status bar.
12
13
Press and hold down the “RIGHT” (11) button for two seconds to activate 2x
digital zoom (available only if the unit is used as a monocular).
Icon appears on the status bar.
Press and hold down the “LEFT” (10) button for two seconds to activate
colour inversion (functions “Hot white” and “Hot black”). When function
“White hot” is used, warm objects are represented in shades of bright colour;
“Black hot” represents objects in shades of dark colour.
Press and hold down “ON/OFF” (9) for two seconds to switch off the unit.
Other functions
Calibration modes
Please see section 8 “Operation” for details.
Press and hold down the “MODE” (12) button for two seconds to enter the
menu.
Press briefly navigation buttons - “LEFT” (10) and “RIGHT” (11) to select
icon
Select brightness level (1 to 10) with navigation buttons.
To exit the main menu, hold down the “MODE” button for two seconds or
wait 10 seconds to exit automatically.
Press and hold down the “MODE” (12) button for two seconds to enter the
menu.
Press briefly navigation buttons - “LEFT” (10) and “RIGHT” (11) to select
icon . Press “MODE”.
Select time format “24” or “AM/PM” with navigation buttons.
Press “MODE” to proceed to hour setup. Set with navigation buttons.
Press “MODE” again to proceed to minute setup. Set with navigation
buttons.
To exit the main menu, hold down the “MODE” button for two seconds or
wait 10 seconds to exit automatically.
Remote control activation
The wireless remote control duplicates activation of unit, color inversion and
image calibration.
It has three buttons:
When operating the thermal imager, there is a possibility of defective (dead)
pixels (bright or dark dots with constant brightness) appearing on the detector
which are visible on the image.
Thermal unit CORE allows you to repair defective pixels on the detector
(microbolometer) using a software-based method.
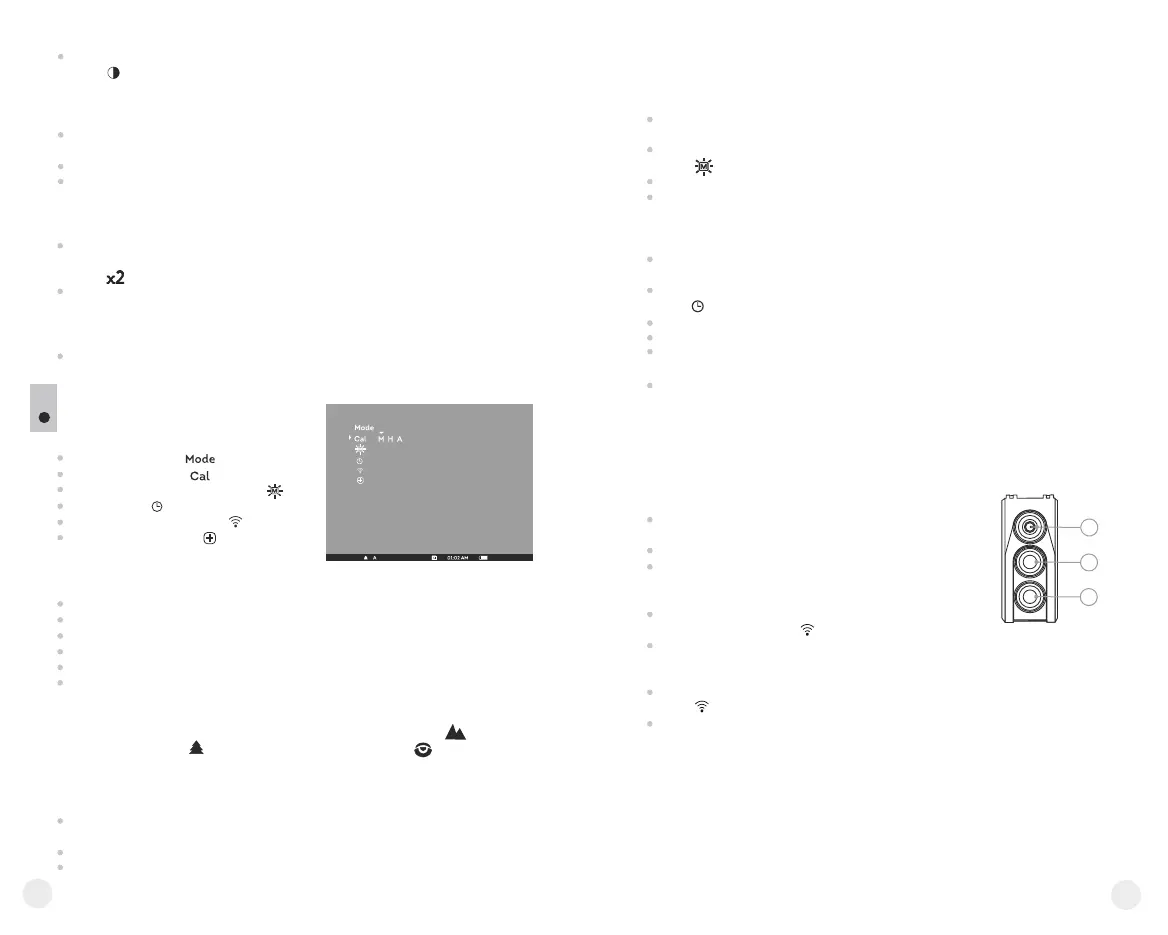
The remote control has three buttons:
Button “ON” (22) – turning on/off the unit
(on – brief press/off – long press (2 sec)).
Button (23) - color inversion
Button “CAL” (24) – image calibration
To start using the wireless remote control you will need
to activate it:
Turn on the scope and select menu option
“RC activation”(icon ).
Press “MODE” (12) button, message “WAIT” will appear and countdown
will start within which you need to press and hold for two seconds any RC
button.
If the activation is successful, message “Complete” will appear next to
icon . The RC is ready for use.
If the RC does not work, replace the battery. To do this, unscrew the
screws on the rear panel of the RC, remove the cover, pull out the old
battery and insert a new CR2032 battery.
24
23
22
Brightness setting of menu icons
Clock setup
Defective pixel repair
 Loading...