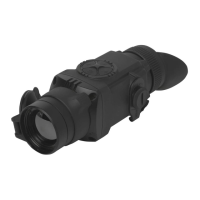
Open the lens cap (1).
Press briefly the “ON/OFF” (9) button to power on the unit, hold down the
“MODE” (12) button for two seconds to enter the menu.
Use the navigation buttons “LEFT” (10) and “RIGHT” (11) to select item
Cal. Select mode M. Press “MODE” to confirm. To exit the menu, press and
hold “MODE” for two seconds or wait 10 seconds for automatic exit.
Close the lens cap. Press the “ON/OFF” button to calibrate. The image will
freeze for 1-2 seconds. Then open the lens cap. Calibration is completed.
If you see image flaws (such as frozen image, vertical stripes etc.) re-
calibrate the unit with the lens cap closed.
Power on the unit, open the lens cap.
Hold down the “MODE” (12) button for two seconds to enter the menu.
Use the navigation buttons “LEFT” (10) and “RIGHT” (11) to select item
Cal. Select mode H. Press “MODE” to confirm.
Press the “ON/OFF” (9) button to calibrate. The image will freeze for 1-2
seconds and you will hear the sound of the internal shutter. Calibration is
completed.
Stage 3. Mounting CORE unit on a day device
Insert firmly the CORE unit with mounted attachment’s eyepiece into the
cover adapter so that the pins in adapter’s body enter grooves of the
attachment’s eyepiece. Turn the CORE unit counterclockwise to hear a click.
Tighten the screw (20) with the hex-nut wrench, to ensure that when turning
the lever, the adapter with insert tightly fits the objective lens of day device.
Mounting eyepiece on CORE unit
To mount the eyepiece on the unit, make sure that the lower salients (C) of the
eyepiece match the lower yellow salients (Fig. 8).
Insert the eyepiece into the unit’s body and turn the locking ring (5) clockwise.
10
11
Fig.7
Pic.8
correct
wrong
С
Having turned the unit on, please make sure that the line of horizon
of you day device is parallel to the upper and lower edges of the
display of the CORE monocular.
It is recommended that you degrease the objective lens of your day device
and the inner side of the insert before installing the cover adapter.
In automatic calibration mode the thermal imager calibrates by itself
according to the software algorythm. The detector (microbolometer) is
closed with the shutter automatically. User assisted calibration with the
“ON/OFF” button is allowed in this mode.
Power on the unit, open the lens cap.
Hold down the “MODE” button for two seconds to enter the menu.
Use the navigation buttons “LEFT” (10) and “RIGHT” (11) to select item
Cal. Select mode A. Press MODE to confirm.
At the moment of the automatic calibration the image will freeze for 1-2
seconds and you will hear the sound of the internal shutter.
Note: time intervals between calibrations depend on the heat of the
detector. The unit may require calibration more frequently on activation.
Focusing and adjusting the image
Open the lens cap (1).
Adjust sharp image of icons on the status bar by turning the eyepiece
diopter adjustment ring (4).
To control display brightness, press briefly navigation buttons - “LEFT” (10)
(decrease) and “RIGHT” (11) (increase). Selected brightness level (from 0
to 20) appears next to icon in the top right corner of the display.
OPERATION. CALIBRATION.
10
Manual (silent) calibration mode
Power on the unit with “ON/OFF” (9) button. In case of low battery icon
will start flashing on the status bar.
Do the image calibration. Calibration levels background temperature of
the microbolometer and eliminates image flaws.ee calibration modes are
available: manual (M), semiautomatic (H) and automatic (А).
Semiautomatic calibration mode
Automatic calibration mode
 Loading...