ENGLISH
• Turn on the thermal imaging module by briey pressing the ON button (9).
• Turn on the device and align the image centre on the Krypton XG50 display
with the image centre of the daylight optical device by carefully tilting the
thermal imaging module.
• Align the top and bottom display boundaries of the Krypton XG50 parallel to
the horizontal line of the daylight optical device’s reticle.
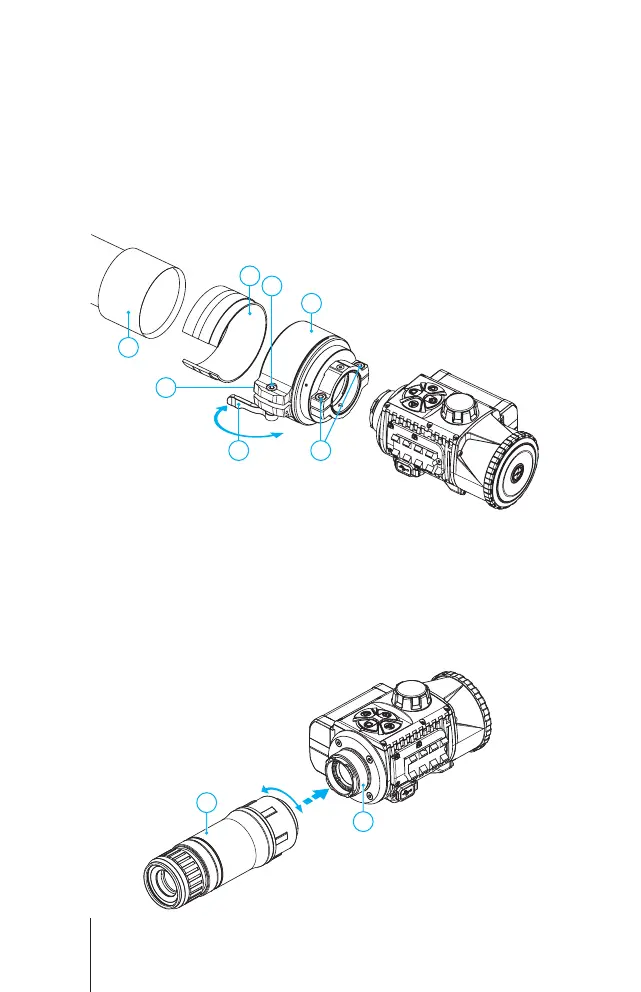
• Having reached the best possible position of the thermal imaging module,
tighten the two screws (16) until stop. The clamping force should be 7 N·m
(use a torque screwdriver to check).
Open
Close
13
14
18
15
19 16
17
Installing Pulsar 5x30 B Monocular on to the Krypton XG50
The Pulsar 5x30 B monocular (21) allows you to transform the Krypton XG50
into a hand-held thermal imager with 5x magnication.
• Align the tabs on the monocular with the slots of the mount (20).
• Turn the monocular clockwise to secure it on the thermal imaging module.
• To remove the monocular, turn it counterclockwise and disconnect from the
thermal imaging module.
Note: the monocular can be installed on a thermal imaging module with an
adapter already installed.
20
21
5

 Loading...