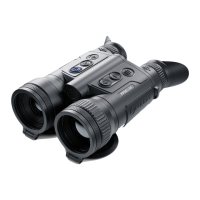
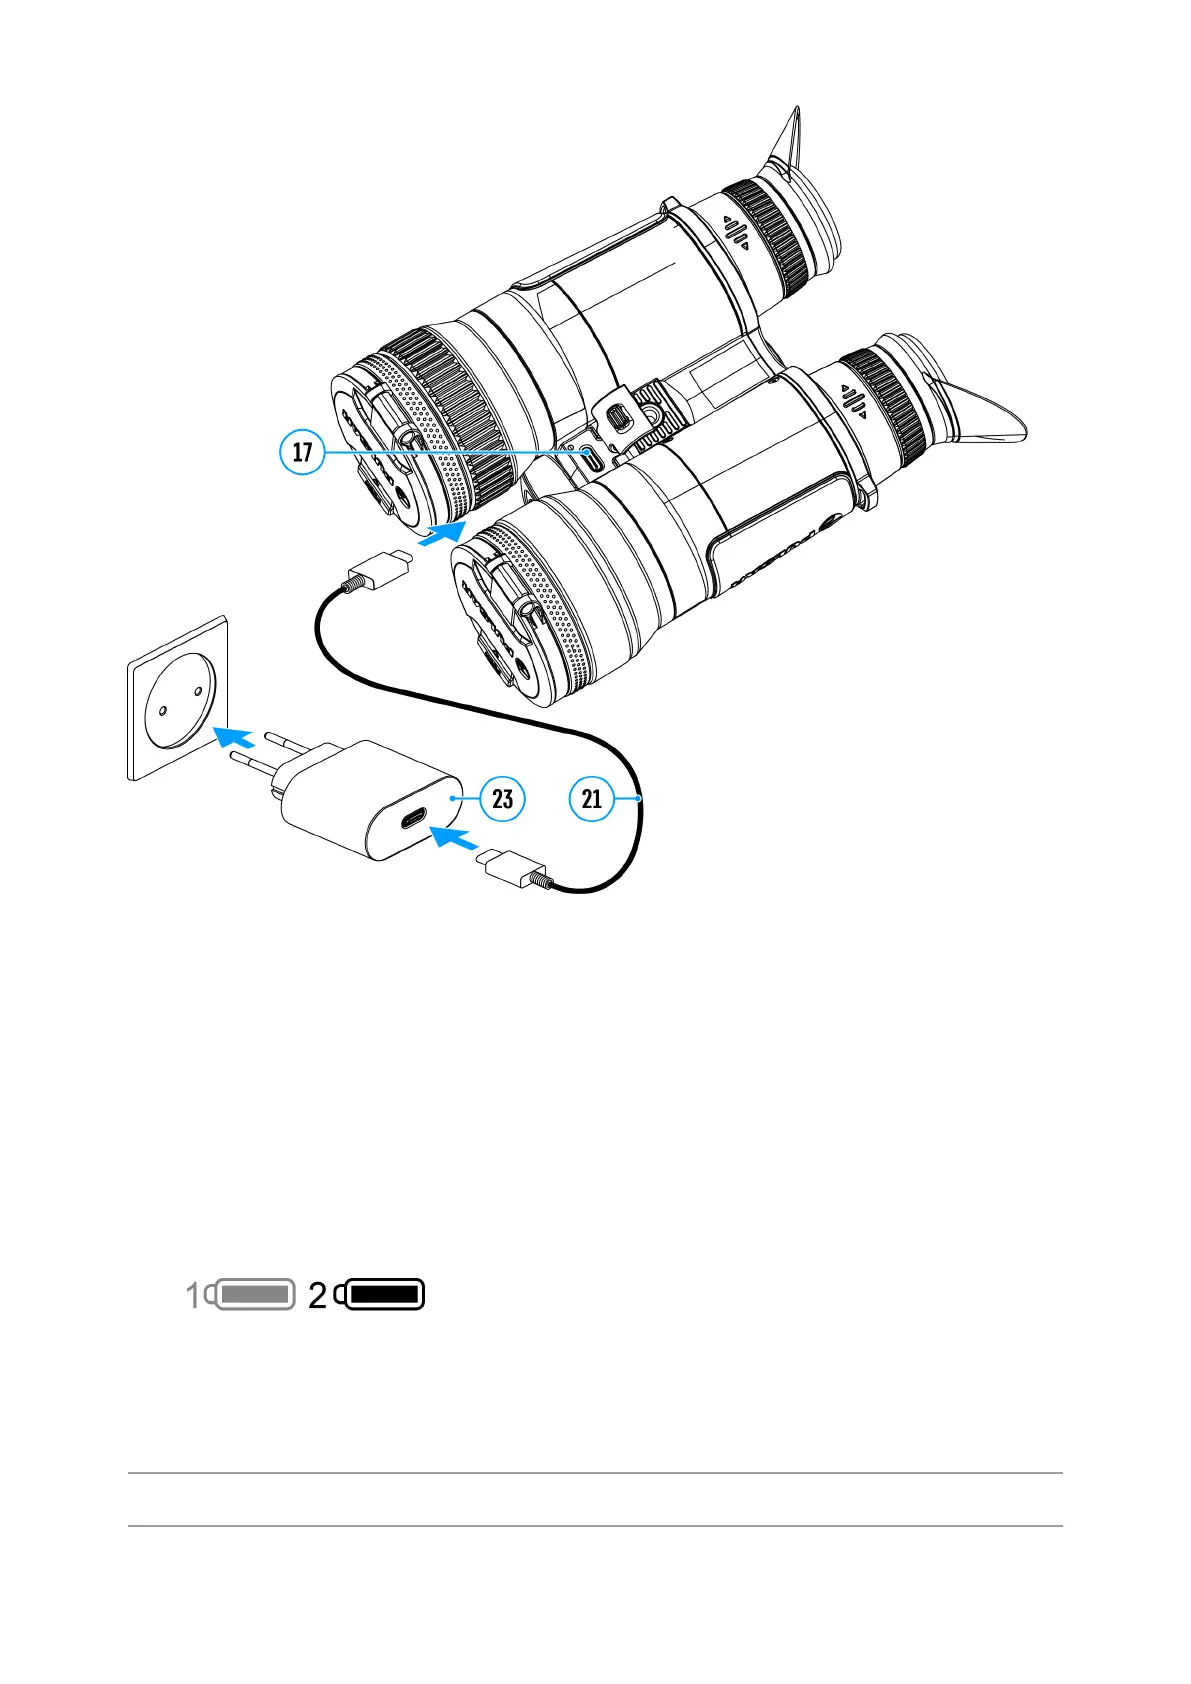
1.
Install the APS 3 battery (11) in the battery compartment (14) of the
device.
2.
Connect the USB Type-C cable (21) to the USB Type-C connector (17)
of the device.
3.
Connect the other end of the USB cable (21) to the Power Adapter (23)
by removing the USB Type-A adapter.
4.
Plug the Power Adapter (23) into a 100-240 V socket.
5.
Wait until the batteries are fully charged (indication in the status bar:
; 1 - built-in battery, 2 - removable battery).
Note: next to the battery compartment (14) on the device body there is a
light-emitting diode (25) to indicate the battery charge level when the
device is switched off.
(25) LED indication Battery status
 Loading...