8
Device Setup
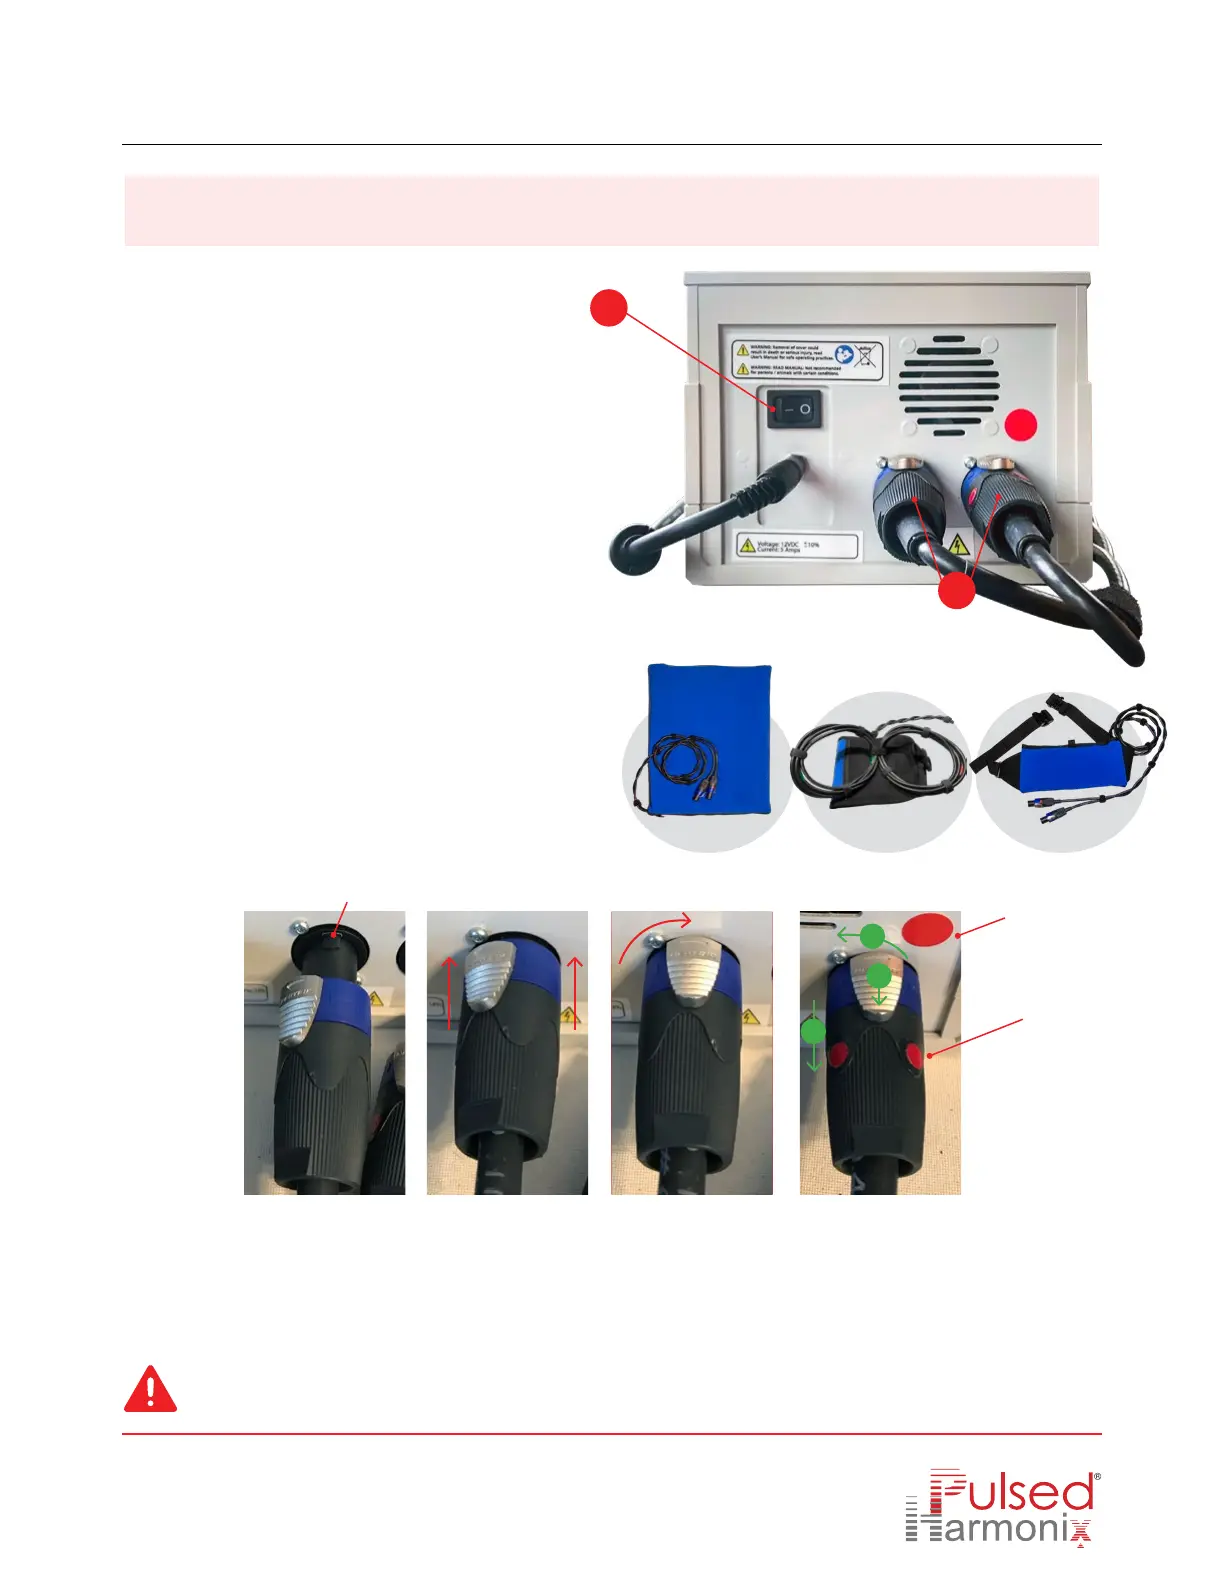
Connecting the device
Note: If a custom coil configuration is desired, remove the coil from the Mitt cover, and separate the coils (red tape
bundle and green tape bundle) to the BUTTERFLY shape. See the PHx
®
website video: “How to use the TruePulse A2500”.
Power
switch
Applicator connectors
See how to connect applicator
correctly below.
2
3
1.
Connect device to wall.
2A.
Choose an applicator coil. Select Mat, Mitt, or
Pouch, then plug the connector receptacles on
the back of the A2500 (p
ut the dual connection
deal here).
2B.
Connect the connector receptacles. Each coil
has 2 connectors, make sure the connector with
the red dot is plugged into the socket with the
red
dot (shown in
Image 4
).
Mitt
Mat Pouch
Groove
Insert groove into
grove opening
Push connector in
towards the device
Turn clockwise until
you hear a “click”
Red dot
Connector
red dot
Same procedure for
red dot connector.
3.
Turn on and set session intensity. Turn on power switch on the back of the device and set the desired time and
intensity levels on the front of the A2500. See next page for instructions.
To REMOVE connector, press down and slide the silver metal locking tab back and away from the A 2500 (see
green arrows on I
mage 4
).
Make sure the
red dot connector
is plugged into
the red dot side
1
2
3
Image 1 Image 2 Image 3 Image 4
Our power cord is a system that automatically adjust to any changes in global power supply and converts the current to 12v DC input.
Power cord substantially reduces EMI and other frequencies to levels that are far below U.S. government approved maximum levels.