Venture TEC Rack Instruction Guide
9
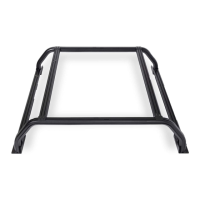
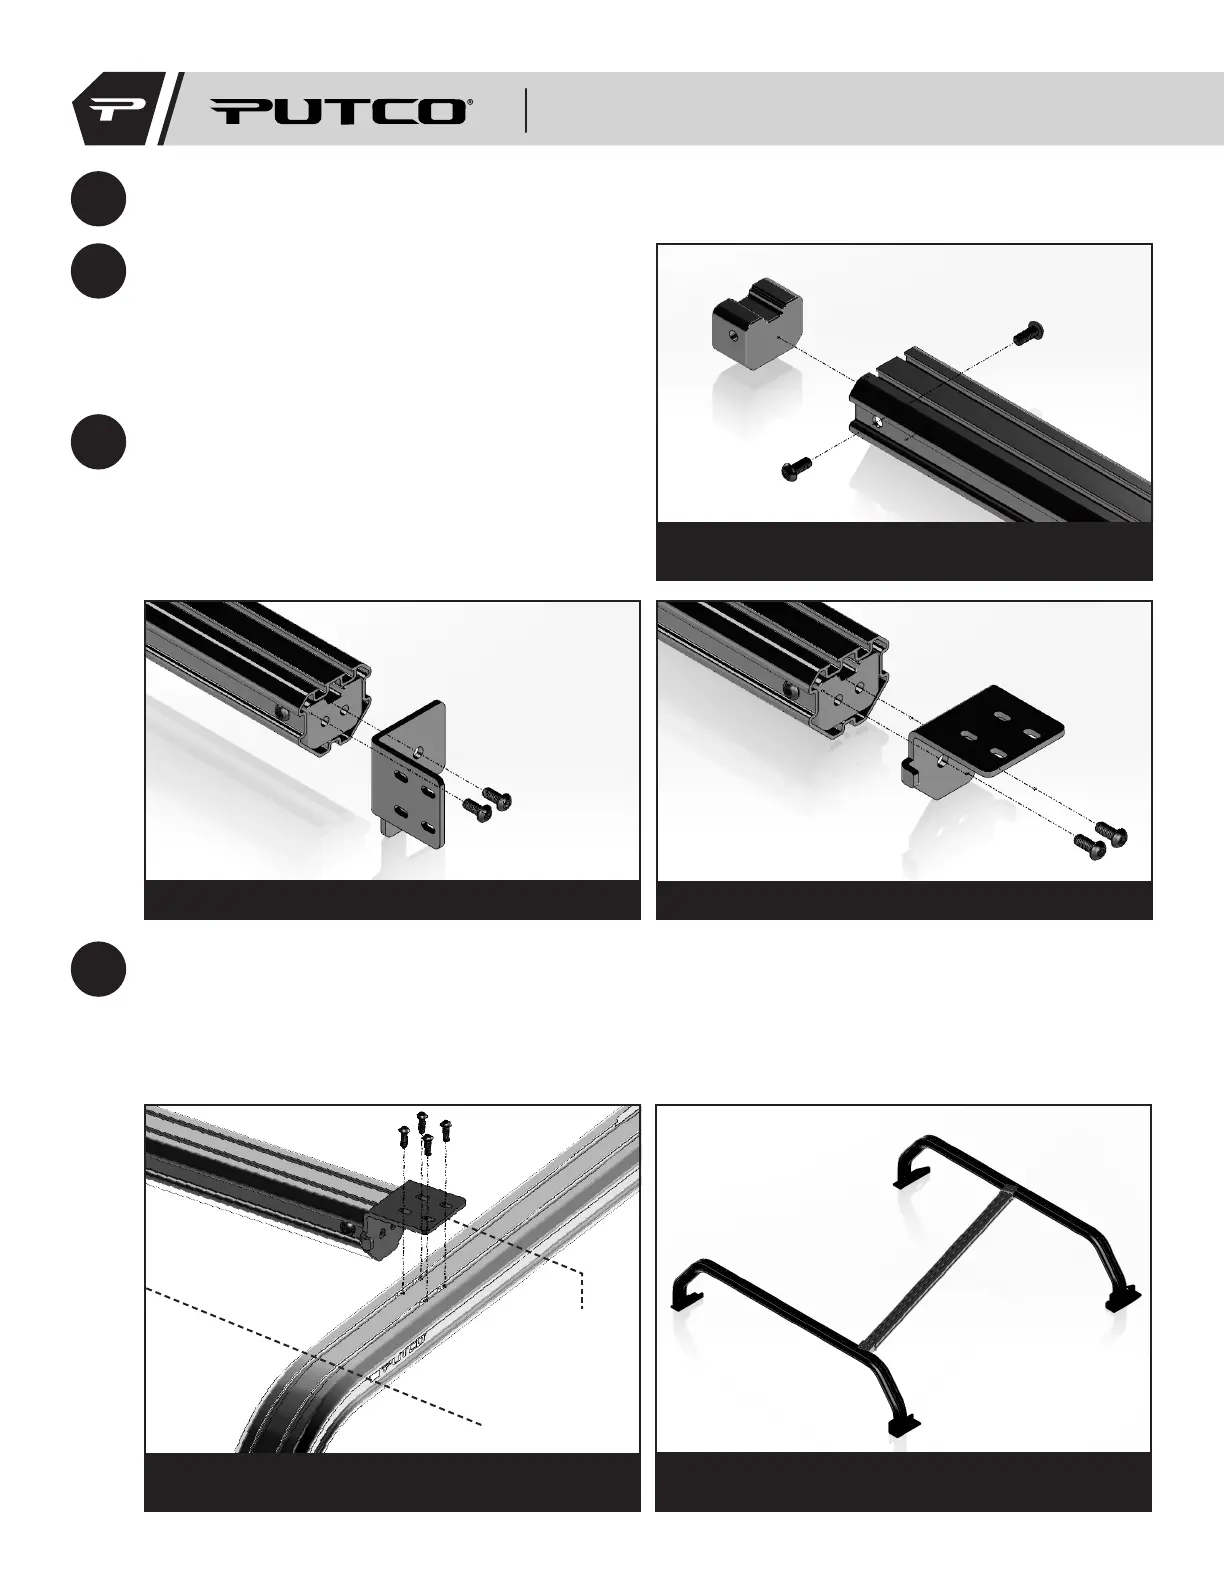
Locate the four support tubes. Slide CoreTec
threaded insert into tube. The offset threaded
holes should be towards the inside of the rail
(Figure 6). Fasten it into place using 3/8” x 5/8”
bolts. When properly installed, the CoreTec
insert should be flush with the end of the tube.
Figure 6: Diagram showing proper threaded
insert installation
10
Locate the rail mounting brackets for the rack.
Position the rail mounting brackets as shown
in Figures 7 and 8. Figure 7 shows the correct
setup for the brackets that mount on the side
of the hoops, and Figure 8 shows the correct
setup for brackets that mount on the top of the
hoops.
Figure 7: Proper side mounting bracket installation Figure 8: Proper top mounting bracket installation
8
Repeat step 7 for the rear hoop. Note: Rear hoop is etched and has tie-down holes in mounting
plate.
11
Locate the tubes that will sit at the top of the rack. Position the bracket so that the outside edge
of the bracket sits at the start of the bent edge of the hoop as shown in Figure 9. The easiest way
to get the tubes into place is to get one side in and then insert the other side diagonally so that
the tabs on the bracket fit into the channel of the hoop as shown in Figure 10. vSlide the square
nuts under the mounting holes in the bracket, and thread in the ¼“-20 x ½” bolts. Repeat the
process for the other tube.
Bend of Hoop
Outside Edge
of Bracket
Figure 9: Diagram showing top tube installation
Figure 10: Diagram showing one side inserted
and the other side inserted diagonally.
184XXXI