Venture TEC Rack Instruction Guide
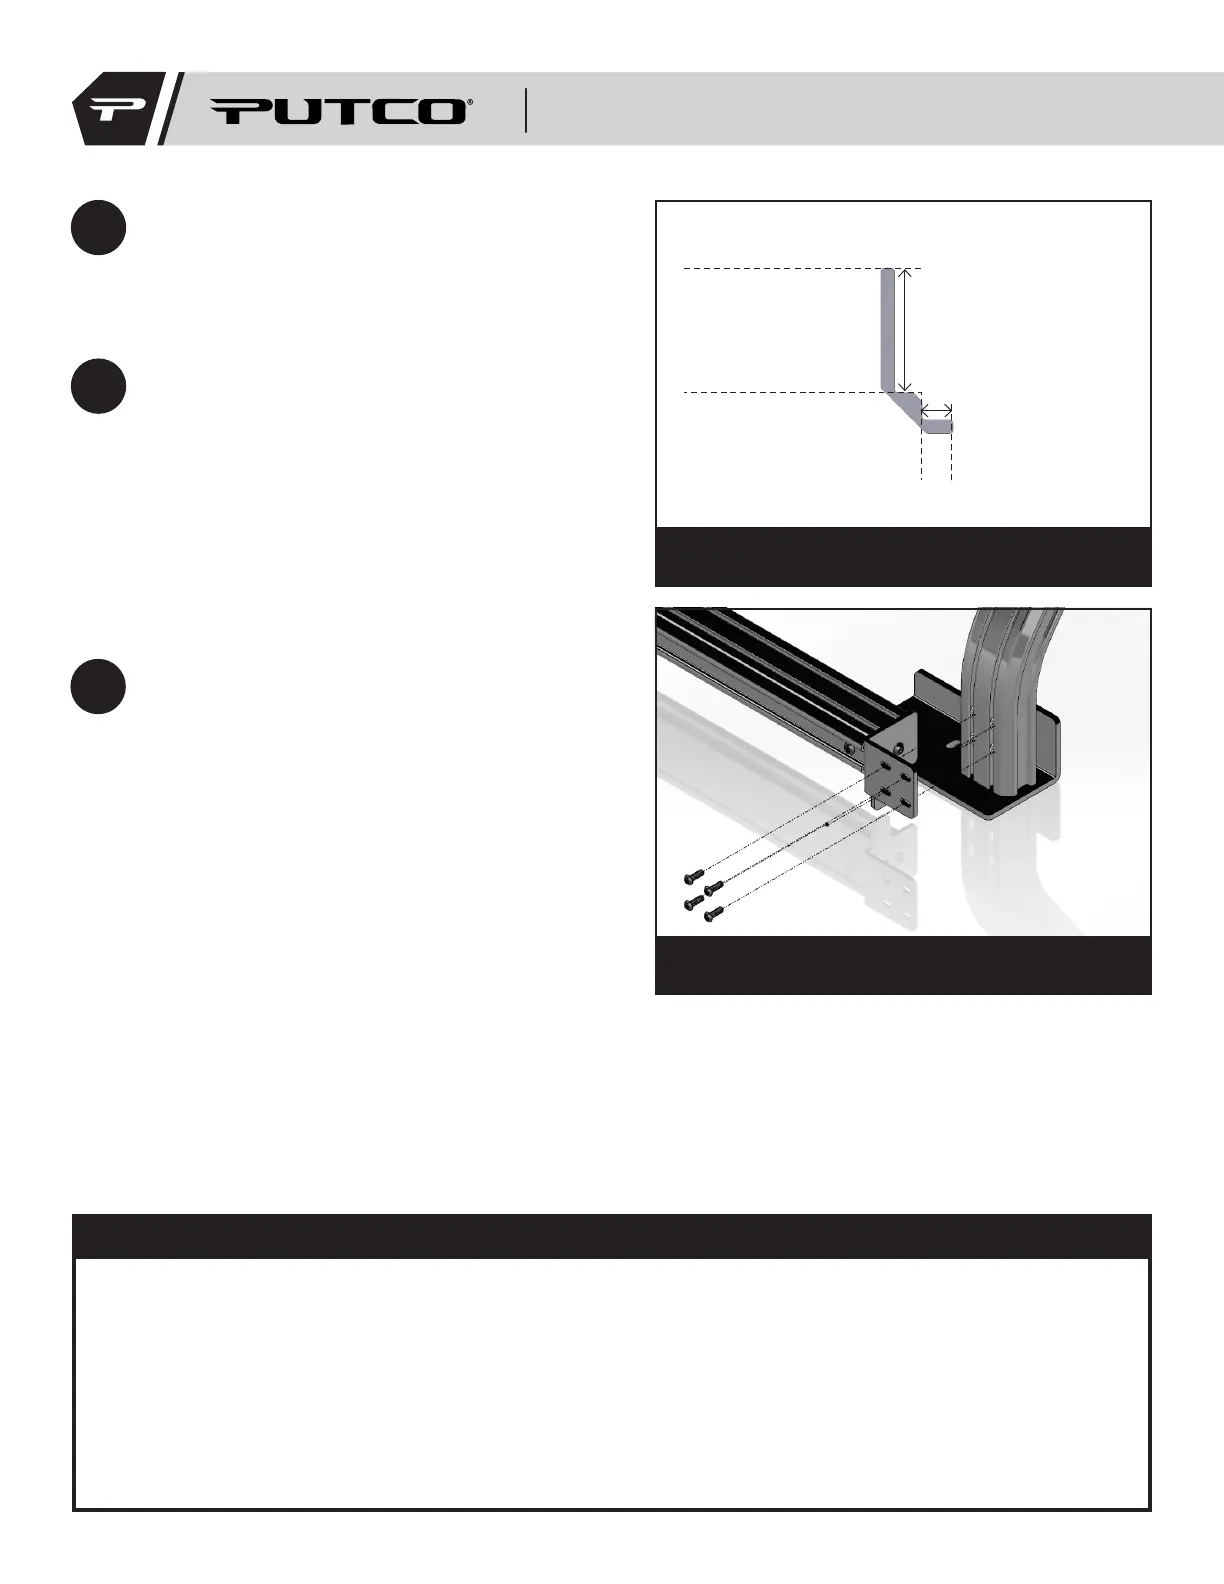
Upper Square Nut
Bottom Edge of Bracket
Lower Mounting Hole
Upper Mounting Hole
Bottom Edge
of Bracket
Lower
Square Nut
12
Before installing the tubes on the side of the
hoop, tighten the 3.25“ bolt on the front hoops,
as you will not be able to reach them once the
tubes are installed on the sides.
13
Locate the two side tubes. Starting with the
top mounting holes, use the alignment tool
to push square nuts into position by pressing
the lip of the tool against the bottom edge
of mounting bracket and the tip of the tool
against the square nut (Fig 11a). The long leg
is used to align the top mounting locations,
and the shorter leg is used to align the lower
mounting locations. Fasten 1/4”-20 bolts into
square nuts, as shown in Figure 11b.
Figure 11a: Diagram showing the alignment tool
Figure 11b: Diagram showing the correct side
tube mounting
14
Tighten the 3.25” bolt on the rear mounting
plates, and double check to make sure all
other hardware is tight.
• Make sure to periodically check that bolts are tight.
• Ensure that all accessories are securely mounted.
• Do not exceed maximum load recommended by vehicle manufacturer.
• Do not exceed maximum load rating of tent manufacturer, if applicable.
• Be aware of reduced clearance when accessories are mounted on top of the rack.
Your new Venture TEC Rack is now successfully installed
on your vehicle! Let the adventures begin!
WARNING:
184XXXI