74 75
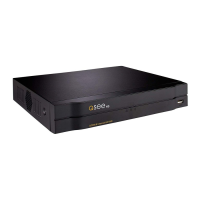
Information
This window shows both the current version of the sofware along with the camera’s serial
number in addition to an event log that the camera maintains.
PICTURE 4-31
PICTURE 4-32
Clicking on an event will bring up detailed information in the bottom window, including the
nature of the event.
You can back up the logs to your computer or clear the log file.
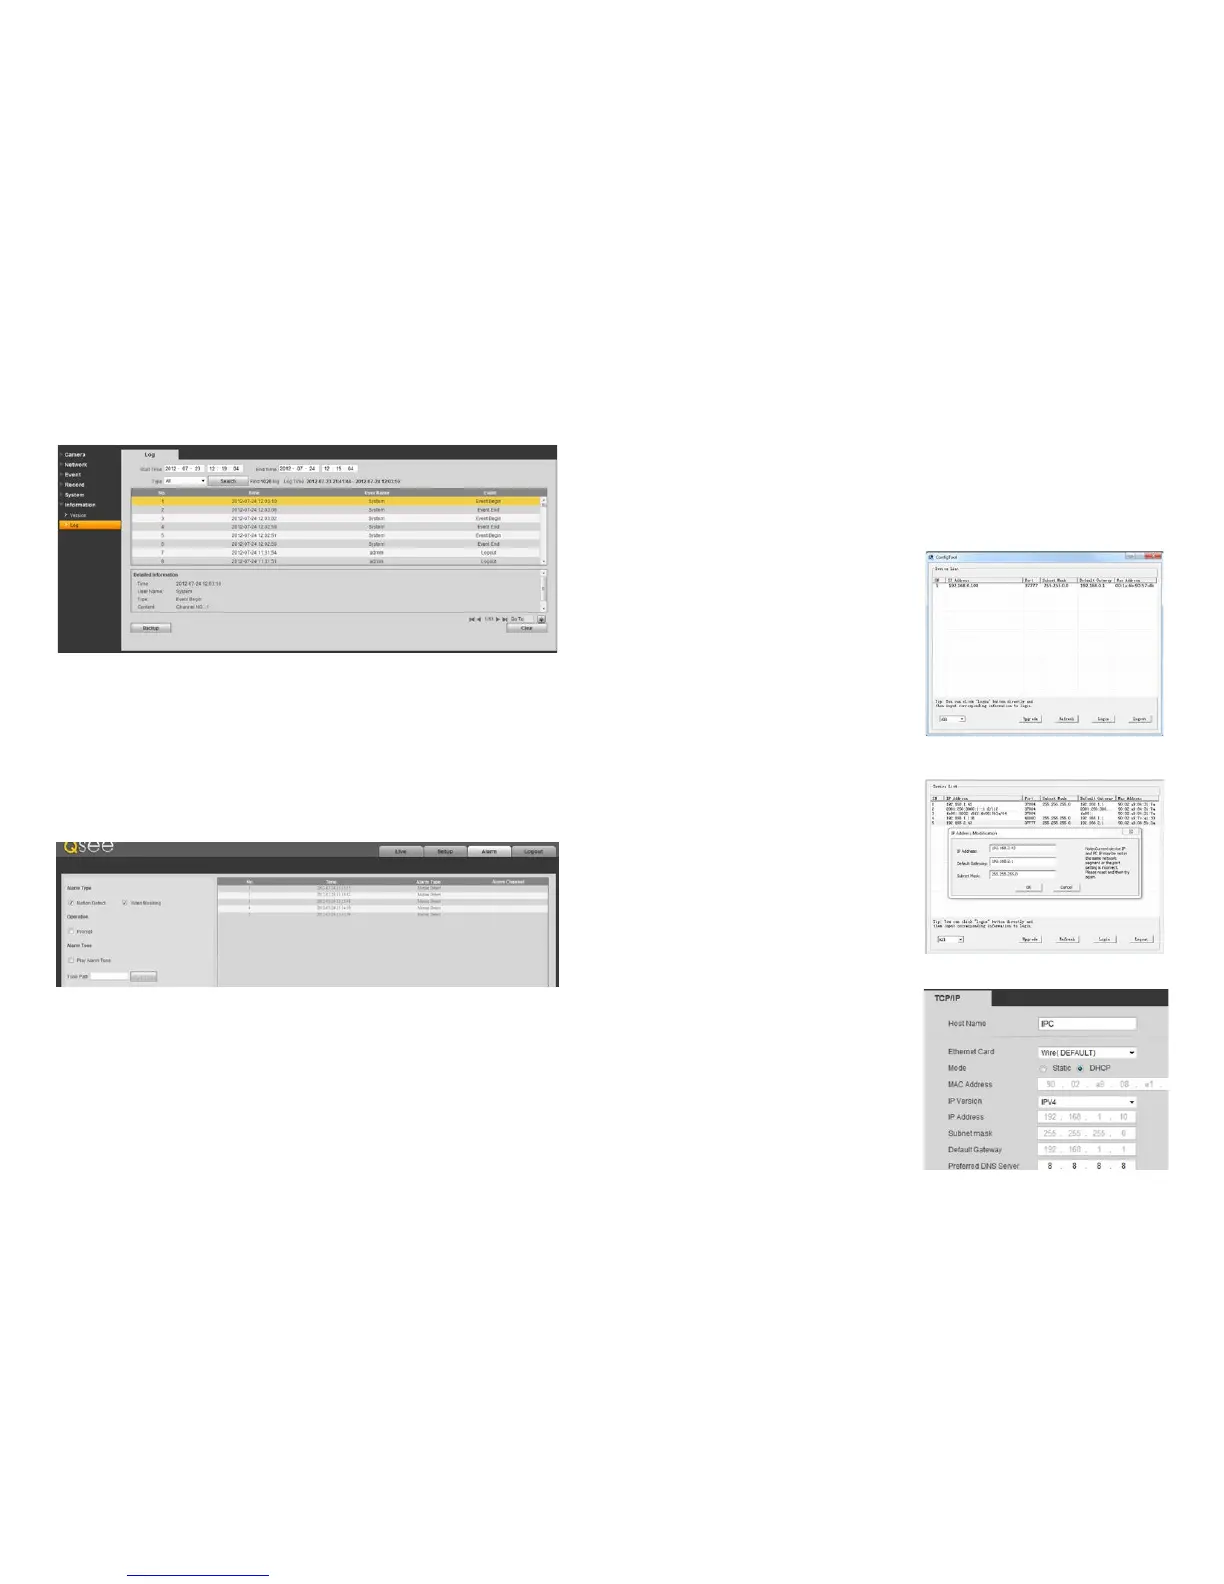
ALARM
The Alarm window contains a log of all events, which can be searched by selecting the
Alarm Type of interest.
You can also have the camera alert you of any events that occur while you’re monitoring it.
Select an audio file from your computer to serve as the alarm tone.
LOGOUT
Clicking this tab will log you out of the camera and return you to the Login window.
4.3 TROUBLESHOOTING CONNECTION ISSUES
ISSUES WITH DHCP
As long as you are connecting your camera to a router with DHCP enabled, you should not
have an issue connecting to your camera. The majority of routers do have the DHCP feature,
but some users disable this feature and manually assign IP addresses to the devices on their
network. The first step in resolving a connectivity issue, is to ensure that DHCP is active on
your router. You will need to consult your router’s manual for information on where this feature
is located.
If you have disabled DHCP and prefer
to manually assign IP addresses to your
network devices, you may do so using the
ConfigTool software. If you do not know
the correct IP information, you can use the
Windows IPCONFIG command to obtain the
needed information.
Double-click on the desired device to open
the camera’s Login window within Config
Tool to open the IP Address Modification
window.
PICTURE 4-33
PICTURE 4-34
PICTURE 4-34
Enter the IP address, default gateway and
subnet mask.
Click OK to save, and you will see the
information update in the Device List.
Right-click on the camera to open it in the
Web Service browser program and proceed
as described in Section 4.2, above.
Alternately, you may wish to turn on DHCP in
your router long enough to allow the camera
to obtain an IP address, which you can then
change to Static in the Web Service’s
Network TCP/IP window.
 Loading...
