11
SECURING WHEELCHAIR
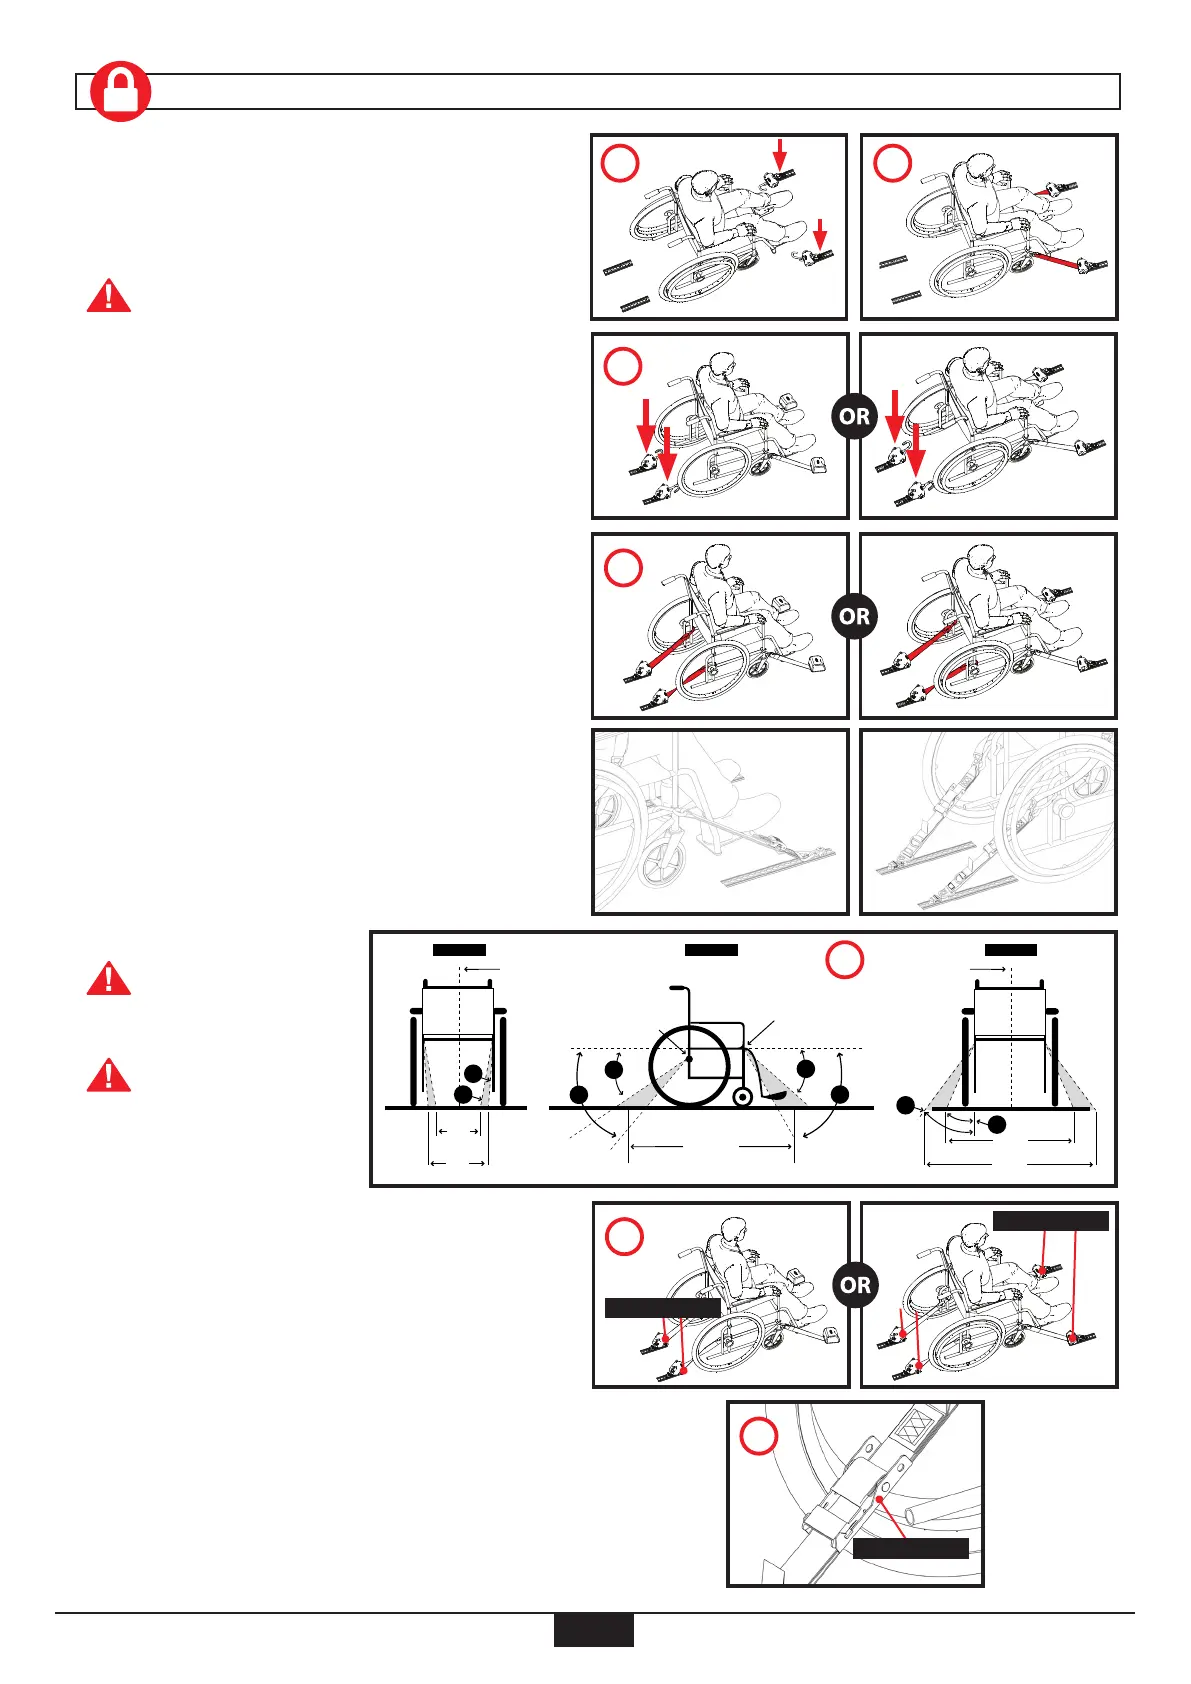
5. Attach Front Retractor or Manual Front Tiedown into
oor anchorage points and lock them in place (E).
If the KIT has 2 QRT-1 (Deluxe or Max) and
2 QRT350e or QRT550e Retractors (the bigger
retractors), ensure the 2 QRT-1 Retractor are
used at the front
6. Completely pull out each Webbing and attach J-hook to
solid frame member. (F).
MANUAL TIEDOWNS – Pull end of webbing loop to
remove slack in webbing strap.
7. Attach QRT Rear Retractors or Rear Manual Tiedowns
into oor anchorage points and lock them into place
(G).
8. Completely pull out each Webbing and attach hook to
solid frame member (H).
Keep loose articles
of clothing away
from retractors.
Make sure to follow
the tie down angles
in illustration (J).
9. QRT RETRACTORS: Move wheelchair forward and back
to remove webbing slack or manual tension webbing
with retractor knobs (K).
MANUAL M-SERIES TIEODOWNS: Pull on end of webbing
loop to remove slack.
MANUAL Q-5000 TIEDOWN: Pull adjuster back and forth
to remove slack in the webbing. Push down to lock into
place (L).
10. Lock wheelchair brakes (or power o electric chair).
E F
J
G
H
K
Retractor Knobs
Retractor Knobs
45º
30º
40º
60º
32º
20º
27”
(685mm)
34”
(865mm)
13”
(330mm)
15”
(380mm)
6º
11º
Please CONTACT Q’Straint® in the event that the vehicle’s geometry is outside the recommended installation instructions.
REAR VIEW SIDE VIEW FRONT VIEW
48” - 54”
(1220mm - 1520mm)
Wheelchair
Reference Plane
Wheelchair
Reference Plane
Front
Securement Points
Rear
Securement Points
L
Q-5000 Adjuster

 Loading...

