Package Contents
Package Contents
I. Install the Hardware
I. Install the Hardware
For 3.5-inch HDD
(4 screws required)
For 3.5-inch HDD
(4 screws required)
For 2.5-inch HDD
(3 screws required)
For 2.5-inch HDD
(3 screws required)
a
a
a
a
a
a
b
b
b
b
d
d
e
e
c
c
b
b
d
d
c
c
Enter
Select
Config. Disks?
>RAID5
Config. Disks?
>RAID5
Enter
Select
Config. Disks?
>RAID5
Config. Disks?
>RAID5
Hub/ Switch/ Router
Hub/ Switch/ Router
Laptop
Laptop
PC
PC
IV. System Configuration (Mac Users)
IV. System Configuration (Mac Users)
III. System Configuration (Windows Users)
III. System Configuration (Windows Users)
V. System Configuration (Linux Users)
V. System Configuration (Linux Users)
II. System Configuration (Touch-N-Go)
II. System Configuration (Touch-N-Go)
Install the hard drives.
Install the hard drives.
Insert the hard drive trays.
Insert the hard drive trays.
Turn on the Turbo NAS.
Turn on the Turbo NAS.
Connect the network cable and power.
Connect the network cable and power.
Select the RAID configuration.
Select the RAID configuration.
Execute the RAID configuration.
Execute the RAID configuration.
Execute the product CD-ROM.
Execute the product CD-ROM.
Execute the product CD-ROM.
Execute the product CD-ROM.
Install QNAP Finder.
Install QNAP Finder.
Install QFinder to configure your NAS.
Install QFinder to configure your NAS.
Follow the instructions to configure your NAS.
Follow the instructions to configure your NAS.
The NAS has been installed successfully.
The NAS has been installed successfully.
QNAP Finder detects the Turbo NAS.
QNAP Finder detects the Turbo NAS.
Configure your NAS from Linux by direct connection.
Configure your NAS from Linux by direct connection.
a
a
b
b
Laptop
Laptop
PC
PC
Quick Installation Guide
Quick Installation Guide
Hardware
Illustration
Hardware
Illustration
● Screw pack
●
螺絲包
●
螺丝包
●
ねじパック
●
나사 팩
● Screw pack
● Schrauben
● Paquet de vis
● Paquete de tornillos
● Pacote de parafusos
Turbo NAS
Turbo NAS
● Ethernet cable x 2
● RJ-45
網路纜線 x 2
● RJ-45
网络缆线 x 2
●
イーサネットケーブル x 2
●
이더넷 케이블 x 2
● Ethernet cable x 2
●
Ethernet-Kabel x 2
●
Câble Ethernet x 2
●
Cable Ethernet x 2
●
Cabo Ethernet x 2
● Hard disk lock
●
硬碟鎖
●
硬盘锁
●
ハードディスクロック
●
하드 디스크 잠금 열쇠
● Hard disk lock
●
Festplattenschlüssel
●
Verrou de disque dur
●
Candado para disco duro
●
Cadeado para Discos Rígidos
● Power cord
●
電源線
●
电源线
●
電源コード
●
전원 코드
● Power cord
● Netzkabel
● Cordon d’alimentation
● Cable de alimentación
● Cabo de Alimentação
CD-ROM
CD-ROM
● Quick Installation Guide
●
快速安裝指引
●
快速安装指引
●
クイックインストールガイド
●
빠른 설치 안내서
● Quick Installation Guide
●
Schnellinstallationsanleitung Flat
●
Guide d'installation rapide
●
Guía de Instalación Rápida
●
Guia de Instrução Rápida
English
繁體中文
简体中文 日本語
한글
1
One Touch Copy Button
自動備份按鈕
自动备份按钮
ワンタッチコピーボタン
원터치 복사 버튼
2
USB 2.0 USB 2.0 USB 2.0 USB 2.0 USB 2.0
3
Power Button
電源按鈕
电源按钮
電源ボタン
전원 버튼
4
LED Indicators: Status,
LAN, USB, eSATA,
HDD1-8
面板燈號:系統狀態、
網路、
USB
、
eSATA
、
HDD1-8
面板灯号:系统状态、
网络、USB、eSATA、
HDD1-8
LED インディケータ:ス
テータス、LAN、USB、
eSATA、HDD1-8
LED 표시자:상태, 네트워
크, USB, eSATA, 하드 디
스크1-8
5
Select Button
選擇
选择
選択
선택 버튼
6
Enter Button
輸入
输入
入力
엔터 버튼
7
K-Lock Security Slot
安全鎖
安全锁
ケンジントンセキュリティ
スロット
K-잠금 보안 슬롯
8
Power Connector
電源接頭
电源接头
電源コネクタ
전원 커넥터
9
eSATA x 2 eSATA x 2 eSATA x 2 eSATA x 2
eSATA x 2
10
Giga LAN x 2 Giga LAN x 2 Giga LAN x 2 Giga LAN x 2
Giga LAN x 2
11
Password & Network
Settings Reset Button
密碼及網路設定重置鈕
密码及网络设定重置钮
リセット・スイッチリセッ
ト・スイッチ
구성 재설정 스위치
12
VGA (Reserved)
VGA (
保留
)
VGA (保留)
VGA (確保)
VGA (예비 지정)
13
USB 2.0 x 4 USB 2.0 x 4 USB 2.0 x 4 USB 2.0 x 4
USB 2.0 x 4
English Deutsch Français Español Português
1
One Touch Copy Button
Kopiertaste Bouton copie intelligente
Botón de Copia
Instantánea
Botão de cópia com um
toque
2
USB 2.0 USB 2.0 USB 2.0 USB 2.0 USB 2.0
3
Power Button
Einschaltknopf Bouton d'alimentation Botón de Encendido Botão de Energia
4
LED Indicators: Status,
LAN, USB, eSATA, HDD1-8
LED-Anzeigen:Status,
LAN, USB, eSATA, HDD1-8
Voyants DEL: Etat, LAN,
USB, eSATA, HDD1-8
Indicadores LED: Estado,
LAN, USB, eSATA, HDD1-8
LED de identificação:
Status dos, LAN, USB,
eSATA, HDD1-8
5
Select Button
Auswahl Sélectionner Seleccionar Botão de Seleção
6
Enter Button
Eingabe Entrée Entrar Botão Entrar
7
K-Lock Security Slot
Knopf zum Zurücksetzen
der Konfiguration
Fente pour sécurité
Kensington
Ranura de Seguridad para
un dispositivo de Bloqueo
Kensington
Entrada de Segurança para
Trava K-Lock
8
Power Connector
Stromanschluss Prise d'alimentation Conector de Alimentación Conector do Cabo de Energia
9
eSATA x 2 eSATA x 2 eSATA x 2 eSATA x 2 eSATA x 2
10
Giga LAN x 2 Giga LAN x 2 Giga LAN x 2 Giga LAN x 2 Giga LAN x 2
11
Password & Network
Settings Reset Button
Konfigurations-
Rückstellschalter
Interrupteur de
réinitialisation
Botón de Restablecimiento
de la Confi guración
Botão Reset para Configurar
a Senha e a Rede
12
VGA (Reserved)
VGA (Reserviert) VGA (Réservé) VGA (Reservado) VGA (Reservado)
13
USB 2.0 x 4 USB 2.0 x 4 USB 2.0 x 4 USB 2.0 x 4 USB 2.0 x 4
E ncrypt Volume?
Yes >No
C hoose RAID5?
> Y e s N o
169.254.100.100
OK!
English
繁體中文
简体中文
日本語
한글
English
Deutsch
Français
Español
Português
Quick Installation Guide
Quick Installation Guide
P/N:51000-022667-RS V1.0
P/N:51000-022667-RS V1.0
E ncrypt Volume?
Yes >No
C hoose RAID5?
> Y e s N o
169.254.100.100
OK!
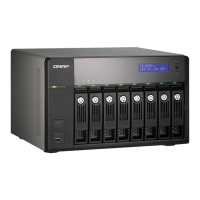
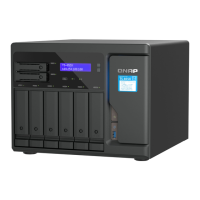
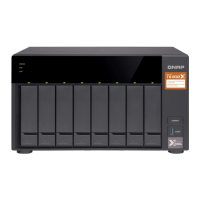
TS-859 Pro
TurboNAS
TS-859 Pro
TurboNAS
32 41 5 6 13117 128 109
32 41 5 6 13117 128 109
Note: Data encryption functions may not be available in
accordance to the legislative restrictions of some countries.
Note: Data encryption functions may not be available in
accordance to the legislative restrictions of some countries.
a
Install a hard disk on each tray. Make sure the disk
holes match the holes at the base of the disk tray and
lock the disk with the screws.
b
Insert the disk trays to the Turbo NAS and push the
disk trays to the end.
a
Execute the product CD-ROM, a model selection
menu is shown. Select your Turbo NAS model.
b
Click “Install QNAP Finder” and follow the instructions
to install QNAP Finder.
c
QNAP Finder detects the Turbo NAS on the network
and prompts you to perform quick setup. Click “Yes”
to continue.
a
Insert the product CD-ROM in your Mac and find the
directory QFinder4Mac. Then run QFinder4Mac.dmg.
b
Run QFinder and follow the instructions to finish the
configuration of the NAS.
a
Connect the NAS to the PC directly. Turn on the NAS.
b
Open a web browser and enter the IP address of the
NAS: http://169.254.100.100:8080/ (Make sure the IP
address of your PC is configured to the same subnet,
e.g. 169.254.100.1).
c
Follow the instructions to finish the configuration of
the NAS.
QNAP Turbo NAS provides an LCD panel for you to
perform the quick configuration in a few steps.
a
Select the RAID configuration
The system detects the number of hard drives installed
and prompts you to execute the default configuration.
Press “Enter” to confirm.
b
Execute the RAID configuration
The system prompts you to confirm the disk configuration.
Next, select to encrypt the disk volume or not. The
encryption cannot be removed. The default encryption
password is “admin”, which can be changed in the
web-based administration interface. After the quick
configuration, you can login the NAS by http://NAS IP:8080/
(Default login: admin, password: admin).
c
Connect the network cable and power cord. Then
plug in the power cord to the socket.
d
Turn on the server. The server beeps once. Please wait
for one minute until the server beeps another time.
The server has started up successfully.
Note that if you install a hard drive (new or used) which has
never been installed on the NAS before, the hard drive will
be formatted and partitioned automatically and all the disk
data will be cleared.
Abnormal shutdown will lead to longer startup time for
checking disk data in the next bootup. The checking process
may take up to several minutes depending on the hard disk
capacity.
Note: If the server is not found, click “Refresh” to try again.
If you are a Mac or Linux user and do not want to use
Touch-N-Go to configure your NAS, please refer to Sections
IV and V for system configuration.
Note: Please make sure that you have installed the hard
disk drive on the Turbo NAS.
a
Touch-N-Go: By a few simple steps from the front
LCD panel, you can configure the NAS without PC.
Please refer to Section II for the detailed information.
b
CD-ROM (Windows users): The CD-ROM in the
accessory box can help you have a full understanding
about the system configuration. You can also install
QNAP utilities from the CD-ROM. Please refer to
Section III for the detailed information.
I. Install the Hardware
III. System Configuration (Windows Users)
IV. System Configuration (Mac Users)
V. System Configuration (Linux Users)
II. System Configuration (Touch-N-Go)
e
After the system has been initialized, you can browse
the web administration of the NAS by entering
http://NAS IP:8080/ in your browser. Login the NAS
with the default administrator account (username:
admin, password: admin).
There are 2 options for you to configure your NAS.
English
1. The above description applies to quick installation only. For
advanced configuration by the LCD panel or information about
the web-based settings, please refer to the user manual.
2. If you are using a large-sized hard drive (e.g. 500GB or above)
for RAID configuration, the system may take a period of time
to execute RAID synchronization before it is able to operate at
full speed. During the synchronization, you can access the NAS
normally.
d
The quick configuration page is shown. Click “Next”
and follow the instructions to finish the configuration.
a
Installieren Sie auf jedem Einsatz eine Festplatte.
Vergewissern Sie sich, dass die Löcher der Disk auf den
Löchern des Einsatzes aufliegen; befestigen Sie die
Festplatte mit den Schrauben.
b
Schieben Sie die Laufwerkeinschübe bis zum Anschlag in
den Turbo NAS ein.
a
Führen Sie die Produkt-CD aus. Ein Modellauswahlmenü
wird geöffnet. Wählen Sie Ihr Turbo NAS-Modell aus.
b
Klicken Sie auf „QNAP-Finder installieren“ und folgen Sie
den Anleitungen zur Installation des QNAP-Finders.
c
QNAP Finder erkennt die Turbo NAS im Netzwerk und
fragt Sie, ob Sie die Schnelleinstellungausführen möchten.
Klicken Sie auf „Ja“, um fortzufahren.
a
Legen Sie die NAS CD-ROM in Ihren Mac ein. Suchen
Sie den Ordner QFinder4Mac. Führen Sie die Datei
QFinder4Mac.dmg aus.
b
Starten Sie QFinder und folgen Sie den Anleitungen, um die
Konfiguration des NAS fertigzustellen.configuration of the NAS.
a
Schließen Sie den NAS direkt am PC an. Schalten Sie den
NAS ein.
b
Öffnen Sie einen Webbrowser, geben Sie die IP-Adresse des
NAS ein:http://169.254.100.100:8080/ (Achten Sie darauf,
dass die IP-Adresse Ihres Computers auf dasselbe Subnetz
konfi guriert ist,z. B. 169.254.100.1).
c
Befolgen Sie die Anweisungen zur Fertigstellung der NAS-
Konfiguration.
Der QNAP Turbo NAS bietet Ihnen eine LCD-Konsole für die schnelle
Durchführung der Konfiguration in nur wenigen Schritten.
a
RAID-Konfiguration wählen
Das System erkennt die Anzahl der installierten Festplatten
und fragt Sie, ob Sie die Standardkonfiguration ausführen
möchten. Drücken Sie die „Enter“, um den Vorgang zu
bestätigen.
b
RAID-Konfiguration ausführen
Sie werden vom System aufgefordert, die Diskkonfiguration
zu bestätigen. Wählen Sie im nächsten Schritt, ob die Disk
verschlüsselt werden soll oder nicht. Die Verschlüsselung
kann nicht gelöscht werden. Das Herstellerpasswort für
c
Schließen Sie das Netzwerkkabel und Stromkabel an.
Verbinden Sie dann das Stromkabel mit einer Steckdose.
d
Schalten Sie den Server ein. Der Server gibt einmal einen
Piepton ab. Bitte warten Sie für ungefähr eine Minute, bis
der Server noch einmal einen Piepton abgibt. Das bedeutet,
dass der Server erfolgreich gestartet wurde.
Wenn Sie eine Festplatte (neu oder gebraucht) installieren,
welche vorher noch nicht auf dem NAS installiert war, beachten
Sie bitte, dass diese automatisch formatiert und unterteilt wird
und alle Daten der Festplatte gelöscht werden.
Ein falsches Ausschalten kann dazu führen, dass der nächste
Startvorgang viel länger dauert, da die Daten auf der Festplatte
geprüft werden. Je nach Festplattekapazität kann der
Prüfvorgang bis zu einigen Minuten dauern.
Hinweis: Falls die Turbo NAS nicht gefunden wurde, dann
klicken Sie bitte auf „Aktualisieren“, um es neu zu versuchen.
Wenn Sie als Mac-oder Linux-Benutzer die Touch-N-Go Funktion
zur Konfiguration Ihres NAS nicht anwenden möchten,
informieren Sie sich bitte in den Abschnitten IV und V über
die Systemkonfiguration.
Hinweis: Stellen Sie bitte sicher, dass die Festplatte in die Turbo
NAS eingebaut wurde.
a
Touch-N-Go: Sie können den NAS ohne PC mit ein paar
wenigen einfachen Schritten über die vordere LCD-
Konsole konfigurieren. Nähere Informationen finden Sie im
Abschnitt II.
b
CD-ROM (Windows-Benutzer): Die CD-ROM in der
Zubehörbox wird Ihnen einen vollständigen Überblick über
die Systemkonfiguration geben. Sie können von dieser
CD-ROM auch QNAP-Programme installieren. Nähere
Informationen finden Sie im Abschnitt III.
I. Hardware installieren
III. Systemkonfiguration (Windows-Benutzer)
IV. Systemkonfiguration (Mac-Benutzer)
V. Systemkonfiguration (Linux-Benutzer)
II. Systemkonfiguration (Touch-N-Go)
e
Nach der Initialisierung des Systems können Sie durch
Eingabe von http://NAS IP:8080/ in Ihren Browser die
Webadministration des NAS durchsuchen. Melden Sie
den NAS mit dem standardmäßigen Administratorkonto
(Benutzername: admin, Passwort: admin) an.
Sie haben 2 Möglichkeiten, Ihren NAS zu konfigurieren.
Deutsch
d
Die Schnellkonfigurationsseite wird angezeigt. Schließen
Sie die Konfiguration ab, indem Sie auf „Weiter“ klicken
und den Anweisungen auf dem Bildschirm folgen.
a
Installez un disque dur sur chaque plateau. Vérifiez que
tous les trous du disque dur sont alignés sur les trous situés
sur la base du plateau de disque dur et resserrez les vis pour
bloquer le disque.
b
Insérez les plateaux de disques dans le Turbo NAS et
enfoncez les plateaux de disques jusqu'au fond.
a
Exécutez le CD, un menu de sélection des modèles
apparaîtra. Sélectionnez votre modèle de Turbo NAS.
b
Cliquez sur «Installer QNAP Finder» et procédez selon les
instructions indiquées pour installer QNAP Finder.
c
QNAP Finder détectera Turbo NAS dans le réseau
et vous demandera si vous souhaitez effectuer une
configuration rapide. Cliquez sur
«
Oui
»
pour continuer.
a
Insérez le CD-ROM du NAS dans votre Mac et trouvez le
répertoire QFinder4Mac. Puis exécutez QFinder4Mac.dmg.
b
Exécutez QFinder et procédez selon les instructions
indiquées pour terminer la configuration du NAS.
a
Reliez directement le NAS au PC. Allumez le NAS.
b
Ouvrez un navigateur Internet et saisissez l’adresse IP du
NAS : http://169.254.100.100:8080/ (Vérifi ez que l’adresse
IP de votre PC est bien configurée sur le même sous-réseau,
par ex.: 169.254.100.1).
c
Suivez les instructions pour terminer la configuration du
NAS.
Le Turbo NAS de QNAP est doté d’un écran LCD pour que vous
puissiez procéder à une configuration rapide en quelques
étapes seulement.
a
Choisissez la configuration RAID
Le système détecte le nombre de disques durs installés et vous
demande si vous voulez exécuter la configuration par défaut.
Appuyez sur «Enter» pour confirmer.
b
Exécutez la configuration RAID
Le système vous demande de confirmer la configuration
du disque. Choisissez ensuite de chiffrer ou non le volume
disque. Le chiffrement ne peut pas être supprimé. Le mot
de passe de chiffrement par défaut est «admin», et peut
être modifié sur l’interface administration web. Une fois la
c
Reliez le câble réseau et le cordon d’alimentation. Branchez
ensuite le cordon d’alimentation sur la prise.
d
Mettez en marche le serveur. Le serveur bipera une fois.
Patientez environ une minute jusqu’à un deuxième bip. Le
serveur a démarré avec succès .
Si vous devez installer un disque dur (neuf ou usagé) n’ayant
jamais été installé sur le NAS auparavant, le disque dur sera
automatiquement formaté et partitionné et toutes les données
du disque seront effacées.
Une fermeture anormale ralentira considérablement le
prochain processus de démarrage pour vérifier les données
sur le disque. Le processus de vérification peut durer jusqu'à
plusieurs minutes, en fonction de la capacité du disque dur.
Remarque : Si Turbo NAS n'est pas trouvé, cliquez sur
«Actualiser» pour ré-essayer.
Si vous êtes sur Mac ou Linux et ne souhaitez pas utiliser la
méthode Touch-N-Go pour configurer votre NAS, veuillez
consulter les sections IV et V pour en savoir plus sur la
configuration du système.
Remarque: Assurez-vous d’avoir installé correctement le(s)
disque(s) dur(s) dans le NAS.
a
Touch-N-Go : vous pouvez configurer le NAS en quelques
étapes simples à partir de l’écran LCD sur la façade, sans
recourir au PC. Pour plus d’informations, voir la section
b
CD-ROM (utilisateurs Windows) : le CD-ROM livré dans
la boîte des accessoires peut vous aider à comprendre
parfaitement la configuration du système. Vous pouvez
également installer les utilitaires QNAP à partir de ce CD-
ROM. Pour plus d’informations, voir la section III.
I. Installer le matériel
III. Configuration du système (Utilisateurs Windows)
IV.
Configuration du système
(
Ut
ilisateurs Mac)
V.
Configuration du système
(Utilisateurs Linux )
II.
Configuration du système
(Touch-N-Go)
e
Une fois le système initialisé, vous pouvez parcourir
l
'administration web du NAS en saisissant http://NAS IP:8080/
dans votre navigateur. Utilisez le compte administrateur par
défaut (nom d’utilisateur : admin, mot de passe : admin)
pour identifier le NAS.
Vous disposez de 2 options pour configurer votre NAS.
Français
configuration rapide terminée, vous pouvez connecter le NAS
sur http://NAS IP:8080/ (Identifiant par défaut : admin, mot de
passe par défaut : admin).
1. Le description ci-dessus s'applique uniquement à l'installation
rapide. Pour la configuration avancée via l'écran LCD ou pour
des informations sur les paramètres basés sur le Web, veuillez
vous référer au manuel d'utilisation.
2. Si vous utilisez un disque dur de grande taille (par ex: 500GB
ou plus) pour la configuration RAID, le système peut prendre
un certain temps pour exécuter la synchronisation RAID avant
d'être capable de fonctionner à pleine vitesse. Pendant la
synchronisation, vous pouvez accéder au NAS normalement.
d
La page de configuration rapide s'affiche. Cliquez sur
«Suivant» et suivez les instructions pour parachever la
configuration.
a
Instale un disco duro en cada bandeja. Verifique que los
orificios del disco coincidan con los orificios de la base de la
bandeja del disco y asegure con los tornillos.
b
Inserte las bandejas de disco en el Turbo NAS y presione las
bandejas de disco hasta el final.
a
Ejecute el CD del producto, se mostrará un menú de
selección de modelo. Seleccione su modelo de Turbo NAS.
b
Haga clic en “Instalar QNAP Finder” y siga las instrucciones
para instalar QNAP Finder.
c
QNAP Finder detectará la Turbo NAS en la red y le
preguntará si quiere realizar la configuración rápida. Haga
clic en “Sí” para continuar.
a
Inserte el CD-ROM NAS en su Mac y busque el directorio
QFinder4Mac. Luego, ejecute QFinder4Mac.dmg.
b
Ejecute QFinder y siga las instrucciones para terminar la
configuración del NAS.
a
Conecte el NAS al PC directamente. Encienda el NAS.
b
Abra un explorador web e introduzca la dirección IP del
NAS: http://169.254.100.100:8080/ (Asegúrese de que
la dirección IP de su PC está configurada para la misma
subred, por ejemplo 169.254.100.1).
c
Siga las instrucciones para finalizar la configuración del
NAS.
QNAP Turbo NAS suministra un panel LCD para que usted
pueda hacer la configuración rápidamente.
a
Seleccionar la configuración RAID
El sistema detectará el número de discos duros instalados y
le preguntará si quiere ejecutar la configuración por defecto.
Pulse “Enter” (Intro) para confirmar.
b
Ejecutar la configuración RAID
El sistema le pide confirmar la configuración del disco. Luego,
seleccione cifrar el volumen del disco o no. El cifrado no se puede
eliminar. La contraseña de cifrado por defecto es “admin”, la
cual se puede cambiar en la interfase de administración basada
en la web. Después de la configuración rápida, puede iniciar
sesión en el NAS en http://NAS IP:8080/ (El nombre de usuario
por defecto para iniciar sesión es: admin y la contraseña: admin).
c
Conecte el cable de red y el de la alimentación eléctrica.
Luego conecte el cable de alimentación en la toma eléctrica.
d
Encienda el servidor. El servidor emitirá un pitido una sola
vez. Por favor, espere durante un minuto aproximadamente
hasta que el servidor vuelva a emitir un pitido. El servidor se
ha iniciado con éxito.
Tenga en cuenta que si va a instalar un disco duro (nuevo o
usado) que no se ha instalado previamente en el NAS, el disco
duro será formateado y particionado automáticamente y por lo
tanto todos los datos se eliminarán.
Un apagado anormal hará que el siguiente proceso de
encendido sea mucho más largo para comprobar los datos del
disco. El proceso de comprobación puede llevar varios minutos
dependiendo de la capacidad del disco duro.
Nota: Si Turbo NAS no se encuentra, haga clic en “Refresh”
(Refrescar) para intentarlo de nuevo.
Si usted es un usuario de Mac o Linux y no desea usar Touch-
N-Go para configurar su NAS, por favor consulte las secciones
IV y V sobre la configuración del sistema.
Nota: Por favor, asegúrese de tener instalada la unidad de
disco duro en la Turbo NAS.
a
Touch-N-Go: Siguiendo unos cuantos pasos sencillos desde
el panel LCD frontal, usted puede configurar el NAS sin
necesidad de una PC. Por favor consulte la sección II para
obtener información detallada.
b
CD-ROM (Usuarios de Windows): El CD-ROM que viene en
la caja de accesorios le puede ayudar a entender mejor los
pasos para configurar el sistema. También puede instalar
los utilitarios QNAP desde el CD-ROM. Por favor consulte la
sección II para obtener información detallada.
I. Instalación del Hardware
III.
Configuración del Sistema
(Usuarios de Windows)
IV. Configuración del Sistema (Usuarios de Mac )
V. Configuración del Sistema (Usuarios de Linux )
II. Configuración del Sistema (Touch-N-Go)
e
Después de que el sistema se haya iniciado, puede
buscar administración Web del NAS entrando a
http://NAS IP:8080/ en su navegador. Inicie sesión
en el NAS con la cuenta del administrador por defecto
(nombre de usuario: admin, contraseña: admin).
Existen 2 opciones para configurar su NAS.
Español
1. La descripción anterior se aplica sólo a la instalación rápida.
Para la configuración avanzada mediante el panel LCD o para
obtener información sobre las configuraciones basadas en
Web, por favor, consulte el manual de usuario.
2. Si está usando un disco duro de gran tamaño (p. ej. 500GB ó
más) para la configuración RAID, el sistema podrá tardar un
cierto período de tiempo en ejecutar la sincronización RAID
antes de que pueda funcionar a plena velocidad. Durante la
sincronización podrá acceder al NAS con total normalidad.
d
Se mostrará la página de configuración rápida. Haga clic
en “Siguiente” y siga las instrucciones para finalizar la
configuración.
a
Insira um disco rígido em cada prateleira. Assegure-se de
que os furos do disco coincidem com a base da prateleira do
disco e mantenha o disco no sítio com parafusos.
b
Insira as bandejas do disco no NAS. Pressione as bandejas
de disco até o final. Aperte os parafusos nas bandejas.
a
Execute o programa contido no CD, um menu de opção
para escolha dos modelos será mostrado. Selecione o seu
modelo para Turbo NAS.
b
Clique em “Instalar QNAP Finder” e siga as instruções para
instalar o QNAP Finder.
c
O QNAP Finder detecta o Turbo NAS na rede e solicita que
efectue uma configuração rápida. Clique em “Yes” (Sim)
para continuar.
a
Insira o CD-ROM do produto no seu Mac e procure o
diretório QFinder4Mac. Em seguida execute QFinder4Mac.
dmg.
b
Utilize o QFinder e siga as instruções para concluir a
configuração do NAS.
a
Conecte o NAS diretamente ao PC. Ligue o NAS.
b
Abra um browser de internet e digite o endereço IP
do NAS: http://169.254.100.100: 8080/ (Certifique-se
que o endereço IP do seu PC está configurado para a
mesma subrede, ex. 169.254.100.1).
c
S
iga as instruções para finalizar a configuração do NAS.
O QNAP Turbo NAS fornece um painel LCD para que
possa realizar uma configuração rápida em poucos
passos.
a
Selecione a configuração RAID
O sistema detectará o número de discos duros instalados
e lhe pedirá se deseja executar a configuração padrão.
Pressione “Enter” para confirmar.
b
Execute a configuração RAID
O sistema solicitar-lhe-á que confirme a configuração do
disco. Em seguida, seleccione para encriptar, ou não, o
volume do disco. A encriptação não pode ser removida.
A palavra-chave por defeito da encriptação é “admin”,
a qual pode ser alterada no interface de administração
com base na Web. Após a configuração rápida, poderá
c
Ligue o cabo de rede e o cabo de alimentação. Em
seguida, ligue o cabo de alimentação à tomada.
d
Ligue o servidor. O servidor apitará uma vez. Por favor
espere por um minuto até o servidor apitar mais uma
vez. O servidor inicializou com sucesso.
Lembre-se que se instalar um disco rígido (novo ou usado)
que nunca foi instalado anteriormente no NAS, o disco rígido
será automaticamente formatado ou particionado e todos os
dados do disco serão apagados.
O desligamento anormal do sistema fará com que o próximo
processo de inicialização leve mais tempo para verificar as
informações do disco. O processo de verificação pode levar
muitos minutos dependendo da capacidade do disco rígido.
Nota: se o servidor não for encontrado, clique em “Refresh”
para tentar de novo.
Se for um utilizador de Mac ou de Linux e não pretender
utilizar o Touch-N-Go para configurar o NAS, consulte o
Parágrafo IV e o Parágrafo V para a configuração do sistema.
Nota: Por favor assegure-se que você instalou os discos
rígidos corretos no NAS.
a
Touch-N-Go: Graças a poucas etapas simples a partir
do painel frontal do LCD, poderá configurar o NAS sem
recorrer ao PC. Consulte o Capítulo II para informações
detalhadas.
b
CD-ROM (Utilizadores de Windows): O CD-ROM na caixa
de acessórios poderá ajudá-lo a compreender melhor
a configuração do sistema. Também pode instalar os
utilitários QNAP a partir do CD-ROM. Consulte o Parágrafo
III para informações detalhadas.
I. Instalação do Hardware
III. Configuração do Sistema (Usuários de Windows)
IV. Configuração do Sistema (Usuários de Mac)
V. Configuração do Sistema (Usuários de Linux)
II. Configuração do Sistema (Touch-N-Go)
e
Uma vez que o sistema tiver sido iniciado, poderá navegar
na administração da Web do NAS, acedendo ao endereço
http://NAS IP:8080/ no navegador. Faça o login no NAS com
a conta de administrador por defeito (nome de utilizador:
admin, palavra-chave: admin).
Tem 2 opções ao seu dispor para configurar o NAS.
Português
efectuar o login do NAS em http://NAS IP:8080/ (Login
por defeito: admin, palavra-chave: admin).
1. A descrição acima se aplica somente à instalação rápida. Para
configuração avançada pelo painél LCD ou informação sobre as
configurações baseadas na rede, consulte o manual do usuário.
2. Se você estiver usando um disco duro de tamanho grande (por
exemplo, 500GB ou superior) para configuração RAID, o sistema
poderá levar um período de tempo para executar a sincronização
RAID antes dele poder operar a velocidade completa. Durante a
sincronização, você pode acessar o NAS normalmente.
d
A página para configuração rápida será exibida. Clique em
“Next” e siga as instruções para finalizar a configuração.
die Verschlüsselung lautet „admin“ und kann auf dem
webgestützten Administrationsinterface geändert werden.
Nach der schnellen Konfiguration können Sie den NAS unter
http://NAS IP:8080/ anmelden (Hersteller-Benutzername:
admin, Passwort: admin).
1. Die obige Beschreibung bezieht sich nur auf die schnelle
Installation. Die erweiterte Konfiguration über den LCD-Bildschirm
oder Informationen über die webbasierten Einstellungen finden
Sie in der Bedienungsanleitung beschrieben.
2. Bei Verwendung einer Festplatte mit großer Kapazität (z.B. 500 GB oder
größer) für die RAID-Konfiguration benötigt das System möglicherweise
einige Zeit, um die RAID-Synchronisation auszuführen, bevor es mit
voller Geschwindigkeit laufen kann.Während der Synchronisation
können Sie auf das NAS-Gerät normal zugreifen.
I.
硬件安装
a
Install a hard disk on each tray. Make sure the disk
holes match the holes at the base of the disk tray and
lock the disk with the screws.
b
Insert the disk trays to the Turbo NAS and push the
disk trays to the end.
a
將硬碟底部用螺絲牢牢地鎖在抽取盒上。
b
插入硬碟抽取盒至末端。
c
接上網路線及電源接頭,並將電源線接頭插入電
源插座。
d
按下電源按鈕啟動系統,系統會發出一嗶聲開始
啟動。請等待約一分鐘,直到聽到系統發出另一
嗶聲,表示開機完成。
a
将硬盘底部用螺丝牢牢地锁在抽取盒上。
b
插入硬盘抽取盒至末端。
a
ハードディスクを各トレイに設置します。ディスクの穴
とディスクトレイ基部の穴を揃え、ねじで固定します。
b
各トレイにハードディスクを固定します。
a
각 트레이에 하드 디스크를 설치합니다. 디스크 구
멍이 디스크 트레이 바닥의 구멍과 일치하는지 확
인하고 나사로 디스크를 고정합니다.
b
디스크 트레이를 Turbo NAS에 끼우고끝까지 미십시
오.
a
Execute the product CD-ROM, a model selection
menu is shown. Select your Turbo NAS model.
b
Click “Install QNAP Finder” and follow the instructions
to install QNAP Finder.
c
QNAP Finder detects the Turbo NAS on the network
and prompts you to perform quick setup. Click “Yes”
to continue.
a
產品光碟片放入光碟機後,會自動出現如下選
單。請先選擇您的產品型號。
b
按「安裝
QNAP Finder
」並依指示安裝
QNAP Finder
。
c
QNAP Finder
會偵測到網路上的
Turbo NAS
系統,
並詢問是否進行快速設定,請按「是」繼續。
a
产品光盘片放入光驱后,会自动出现如下选单。
请先选择您的产品型号。
b
按“安装 QNAP Finder”并依指示安装 QNAP
Finder。
c
QNAP Finder 会侦测到网络上的 Turbo NAS 系
统,并询问是否进行快速设定,请按“是”继续。
a
製品CDを起動させると、モデルを選択する画面が表示
されます。該当するモデルを選択してください。
b
「Install QNAP Finder」 (QNAPファインダのインスト
ール) をクリックし、説明に従ってQNAPファインダ
をインストールします。
c
QNAP Finder がネットワーク上のTurbo NASを検出す
ると、かんたん設定を実行するかどうかを確認するウ
ィンドウが表示されます。「確認」をクリックして続
行します。
a
제품 CD를 실행합니다, 모델 선택 메뉴가 표시될
것입니다. 계속하려면 Turbo NAS 모델을 선택합니
다.
b
“QNAP Finder 설치” 를 클릭한 다음 지시를 따라
QNAP Finder를 설치합니다.
c
QNAP Finder는 네트워크에서 터보 스테이션을탐
지하고 빠른 설정을 수행하려는지를 물을 것입니
다. 계속 진행하려면 “확인” 를 클릭합니다.
a
Insert the product CD-ROM in your Mac and find the
directory QFinder4Mac. Then run QFinder4Mac.dmg.
b
Run QFinder and follow the instructions to finish the
configuration of the NAS.
a
將
NAS
光碟片放入光碟機中,點選
Mac
電腦上
的光 碟 機 , 找 到
QFi n d e r4 M a c
的目 錄 , 執 行
QFinder4Mac.dmg
。
b
執行
QFinder4Mac.dmg
,並依指示執行快速安裝
後,即可完成系統設定。
a
将NAS光盘片放入光驱中,点选Mac计算机
上的光驱,找到QFinder4Mac的目录,执行
QFinder4Mac.dmg。
b
执行QFinder4Mac.dmg,并依指示执行快速安
装后,即可完成系统设定。
a
NASのCDROMをMacに挿入すると、ディレク
トリQFinder4Macが表示されます。その後、
QFinder4Mac.dmgを実行します。
b
QFinder (Qファインダ) を実行し、説明に従ってNAS
の構成を終了します。
a
Mac에 NAS CD-ROM을 삽입하고 QFinder4Mac디
렉토리를 찾으십시오. 그 다음에 QFinder4Mac.dmg
을 실행하십시오.
b
QFinder를 실행하고 지침을 따라 NAS의 구성을 종
료합니다.
a
Connect the NAS to the PC directly. Turn on the NAS.
b
Open a web browser and enter the IP address of the
NAS: http://169.254.100.100:8080/ (Make sure the IP
address of your PC is configured to the same subnet,
e.g. 169.254.100.1).
c
Follow the instructions to finish the configuration of
the NAS.
a
將
Turbo NAS
與
PC
對接後,開啟電源。
b
打 開 網 頁 瀏 覽 器 , 輸 入
N A S
的
I P
位 置
http://169.254.100.100:8080/(
請將
PC
的
IP
位置設
於同網段,例如
: 169.254.100.1)
。
c
依網頁指示執行快速安裝後,即可完成系統設定。
a
将Turbo NAS与PC对接后,开启电源。
b
打开网页浏览器,输入NAS的IP位置
http://169.254.100.100:8080/(请将PC的IP位置
设于同网段,例如: 169.254.100.1)。
c
依网页指示执行快速安装后,即可完成系统设定。
a
NAS と PC を直接接続します。NASの電源を入
れます
b
ウェブブラウザを開き、NASのIPアドレスを入力しま
す: http://169.254.100.100:8080/ (PCのIPアドレスが同
じサブネットに対して構成されているよう確認してく
ださい。例: 169.254.100.1)。
c
説明に従い、NASの構成を完了します。
a
NAS를 PC에 직접 연결합니다. NAS를 켭니다.
b
웹 브라우저를 실행한 다음 NAS의 IP 주소를 입력
합니다: http://169.254.100.100:8080/ (PC의 IP 주소
가 같은 서브넷으로 구성되어 있는지 확인합니다
(예: 169.254.100.1).)
c
지침을 따라 NAS의 구성을 종료합니다.
QNAP Turbo NAS provides an LCD panel for you to
perform the quick configuration in a few steps.
a
Select the RAID configuration
The system detects the number of hard drives installed
and prompts you to execute the default configuration.
Press “Enter” to confirm.
b
Execute the RAID configuration
The system prompts you to confirm the disk configuration.
Next, select to encrypt the disk volume or not. The
encryption cannot be removed. The default encryption
password is “admin”, which can be changed in the
web-based administration interface. After the quick
configuration, you can login the NAS by http://NAS IP:8080/
(Default login: admin, password: admin).
QNAP Turbo NAS LCD
面板,讓您快速完成系統安裝。
a
設定
RAID
組態
系統將根據偵測到的硬碟數量詢問是否執行預設組
態,按下確認鍵
(Enter)
。
b
執行
RAID
組態,完成
請確認要執行的磁碟組態,並選擇是否加密磁碟,
磁碟 一 經 加密 便 無 法移 除, 預 設 的加密 密 碼 為
「
admin
」,您可以登入管理頁面變更密碼。系統
完成快速設定後,您便可以透過
http://NAS IP:8080/
登入
NAS
的網頁管理介面,開始使用
NAS
所提供的
各項強大功能與服務。
(
預設的帳號為
admin
,密碼
為
admin)
QNAP Turbo NAS LCD 面板,让您快速完成系统
安装。
a
设定RAID 组态
系统将根据侦测到的硬盘数量询问是否执行预设组
态,按下确认键“Enter”。
b
执行RAID 组态,完成
请确认要执行的磁盘组态,并选择是否加密磁盘,
磁盘一经加密便无法移除,预设的加密密码为
“admin”,您可以登入管理页面变更密码。系统完
成快速设定后,您便可以透过http://NAS IP:8080/
登入NAS的网页管理界面,开始使用NAS所提供的
各项强大功能与服务。(预设的账号为admin,密码
为 admin)
QNAP Turbo NASはLCD パネルにより、いくつ
かの手順で構成を簡単に行うことができます。
a
RAID 設定を選択する
システムは取り付けられたハードドライブの数を検出
し、デフォルトの設定を実行するかどうかを尋ねます。
「Enter」を押して確認します。
b
RAID 設定を実行する
システムがディスク構成について確認を求めます。続い
て、ディスクボリュームを暗号化するかどうかを選択し
ます。暗号化を元に戻すことはできません。デフォルト
の暗号化パスワードは「admin」です。これは、ウェブ
ベースの管理インターフェイスで変更することも可能で
す。クイック構成の後、NASにhttp://NAS IP:8080/ (デ
フォルトのログイン: admin、パスワード: adminとなり
ます)
QNAP Turbo NAS에 탑재된 LCD 패널에서 사용자
는 적은 수의 단계를 거쳐 빨리 구성할 수 있습니다.
a
RAID 구성을 선택합니다
시스템이 설치된 하드 드라이브의 번호를 인식하고 기본
구성을 실행할 것인지 묻습니다. 확인하려면“Enter”를
누릅니다.
b
RAID 구성을 실행합니다
시스템은 디스크 구성을 확인하라고 지시합니
다. 이제 디스크 볼륨의 암호화 여부를 선택합니
다. 암호는 제거할 수 없습니다. 기본 암호화 암호
는 “admin”이며, 이것은 웹 기반 관리 인터페이스
에서 변경할 수 있습니다. 빠른 구성을 완료한 후
http://NAS IP:8080/ 을 이용해 NAS에 로그인할 수
있습니다(기본 로그인: admin, 암호: admin).
c
Connect the network cable and power cord. Then
plug in the power cord to the socket.
d
Turn on the server. The server beeps once. Please wait
for one minute until the server beeps another time.
The server has started up successfully.
c
接上网络线及电源接头,并将电源线接头插入电
源插座。
d
按下电源按钮启动系统,系统会发出一哔声开始
启动。请等待约一分钟,直到听到系统发出另一
哔声,表示开机完成。
c
ネットワークケーブルと電源コードを接続します。続いて
電源コードを壁のコンセントに差し込みます。
d
電源ボタンを押します。一度、ビープ音が鳴ります。
その後、約1分で再びビープ音が鳴れば、Turbo NAS
が起動します。
c
네트워크 케이블과 전원 코드를 연결합니다. 그런
다음 전원 코드를 소켓에 연결합니다.
d
Turbo NAS을 켭니다. 서버에서 비프음이 한 번 울
립니다. 서버에서 비프음이 또 한번 울릴 때까지 잠
시 기다립니다. 서버가 시작되었습니다.
Note that if you install a hard drive (new or used) which has
never been installed on the NAS before, the hard drive will
be formatted and partitioned automatically and all the disk
data will be cleared.
注意:若您要安裝之硬碟從未被安裝至
NAS
,硬碟將
會自動被格式化,且硬碟上的資料會被清除。
NASにこれまで設置されたことのないハードドライブ (新
品あるいは中古) を設置する場合は、ハードドライブは自
動的にフォーマット及びパーティションされ、すべてのデ
ィスクデータは消去されます。
전에 NAS에 설치한 적이 없는 하드 드라이브 (새 것 또
는 사용한 것) 를 설치할 경우, 하드 드라이브가 자동으
로 포맷되고 파티션 설정이 되어 모든 디스크 데이터가
지워진다는 것에 유의하십시오.
若您要安装之硬盘从未被安装至 NAS,硬盘将会自动被
格式化,且硬盘上的数据会被清除。
Abnormal shutdown will lead to longer startup time for
checking disk data in the next bootup. The checking process
may take up to several minutes depending on the hard disk
capacity.
非正常的關機方式會造成在下次開機程序中硬碟進行
資料檢查,此過程會導致較長的開機時間。檢查的時
間會因硬碟容量的大小而有差異,過程可能需時數分
鐘之久。
非正常的关机方式会造成在下次开机程序中硬盘进行
数据检查,此过程会导致较长的开机时间。检查的时
间会因硬盘容量的大小而有差异,过程可能需时数分
钟之久。
不正なシャットダウンが行われると、次に起動する際、
ディスク・データをチェックするため起動に時間がかか
ります。ハードディスクの容量により、チェックには数
分を要することがあります。
비정상적으로 종료하면 다음 부트 과정에서 디스크 데
이터를 확인하기 위해 더 많은 시간이 소요될 수 있습니
다. 확인하는 과정에서 하드 디스크 용량에 따라 수분이
걸릴 수 있습니다.
Note: If the server is not found, click “Refresh” to try again.
注意:若無法偵測到
Turbo NAS
系統,請按
「更新」
按鈕再試一次。
注意:若无法侦测到 Turbo NAS 系统,请按“更新”
按钮再试一次。
注意:
Turbo NASが見つからない時は「リフレッシュ」を
クリックしてください。
注意:請先確認您已經正確地安裝硬碟並鎖上螺絲。
注意:请先确认您已经正确地安装硬盘并锁上螺丝。
注意:必ず事前にTurbo NASにハードディスクを取り付け
ておいてください。
메모: Turbo NAS 를 찾을 수 없는 경우,“새로 고치기” 을
클릭하여 재시도합니다.
메모: 터보 스테이션 상에 하드 디스크 드라이브를 설치
했다는것을 확인하여 주십시오.
If you are a Mac or Linux user and do not want to use
Touch-N-Go to configure your NAS, please refer to Sections
IV and V for system configuration.
若您為
Mac
或
Linux
使用者,並且不想使用
Touch-
N-Go
方式安裝您的
NAS
,請參考第
IV
及
V
節。
若您为 Mac 或 Linux 用户,并且不想使用 Touch-N-Go
方式安装您的 NAS,请参考第 IV 及 V 节。
Macあるいは Linuxユーザーのお客様は、NASの構成に
Touch-N-Go (タッチ・アンド・ゴー) を使用しないでくださ
い。システム構成には、セクションIVおよびVを参照してく
ださい。
Mac 또는 Linux 사용자이고 Touch-N-Go를 사용하지 않
고 NAS를 구성하려면 시스템 구성에 대한 IV 단원과 V
단원을 참조하십시오.
Note: Please make sure that you have installed the hard
disk drive on the Turbo NAS.
a
Touch-N-Go: By a few simple steps from the front
LCD panel, you can configure the NAS without PC.
Please refer to Section II for the detailed information.
b
CD-ROM (Windows users): The CD-ROM in the
accessory box can help you have a full understanding
about the system configuration. You can also install
QNAP utilities from the CD-ROM. Please refer to
Section III for the detailed information.
a
Touch-N-Go:
您可以使用
NAS
前方的
LCD
面板,
透過簡單的步驟,便可在不需電腦的狀態下完成
系統安裝。詳細說明請參考第
II
節。
b
CD-ROM (Windows
使用者
)
:您可以使用附件盒
內的
CD-ROM
完整的安裝
NAS
。詳細說明請參考
第
III
節。
a
Touch-N-Go: 您可以使用 NAS 前方的 LCD 面
板,透过简单的步骤,便可在不需计算机的状态
下完成系统安装。详细说明请参考第 II 节。
b
CD-ROM (Windows 使用者):您可以使用附件盒
内的 CD-ROM 完整的安装 NAS。详细说明请参
考第 III 节。
a
Touch-N-Go (タッチ・アンド・ゴー):前面LCDパネル
から、いくつかの簡単な手順だけで、PCを使用せずに
NASを構成することができます。詳しくはセクション
IIを参照してください。
b
CD-ROM (Windowsユーザー):付属のCD-ROMは、シ
ステム構成をすべて理解する役に立ちます。QNAPユー
ティリティもCD-ROMよりインストールすることがで
きます。詳しくはセクションIIIを参照してください。
a
Touch-N-Go: 전면 LCD 패널에서 적은 수의 간단한
단계를 거쳐서 PC 없이도 NAS를 구성할 수 있습
니다. 자세한 내용은 II 단원을 참조하십시오.
b
CD-ROM (Windows 사용자): 부속품 상자의 CD-
ROM은 시스템 구성을 전체적으로 이해하도록 도
움을 줄 수 있습니다. 또한 CD-ROM에서 QNAP 유
틸리티들을 설치할 수 있습니다. 자세한 내용은 III
단원을 참조하십시오.
I. Install the Hardware
I.
硬體安裝
I.
ハードウェアを取り付ける
I
.
하드웨어 설치
III. System Configuration (Windows Users)
III.
系統設定
(Windows
使用者
)
III.
系统设定
(Windows
用户)
III.
システム構成
(Windows
ユーザー
)
III.
시스템 구성 (
Windows 사용자)
IV. System Configuration (Mac Users)
IV.
系統設定
(Mac
使用者
)
I V.
系统设定
(
Mac
用户
)
IV.
システム構成
(Mac
ユーザー
)
IV.
시스템 구성
(Mac 사용자)
V. System Configuration (Linux Users)
V.
系統設定
(Linux
使用者
)
V.
系统设定
(
Linux
用户
)
V.
システム構成
(Linux ユーザー
)
V.
시스템 구성
(Linux 사용자)
II. System Configuration (Touch-N-Go)
II.
系統設定
(
Touch-N-Go
)
II.
系统设定 (Touch-N-Go)
II.
システム構成
(
Touch-N-Go
)
II.
시스템 구성
(
Touch-N-Go
)
e
After the system has been initialized, you can browse
the web administration of the NAS by entering
http://NAS IP:8080/ in your browser. Login the NAS
with the default administrator account (username:
admin, password: admin).
e
完 成 安 裝 後 , 您 可 在 網 頁 瀏 覽 器 輸 入
h t t p : //NAS IP:8080/
,便可登入
NAS
管理介面
(
預設使用者名稱:
admin
,密碼:
admin)
。
e
完成安装后,您可在网页浏览器输入
http://NAS IP:8080/,便可登入 NAS 管理接口
(预设使用者名称:admin,密码:admin)。
There are 2 options for you to configure your NAS.
您可以選擇下列兩種方式安裝
NAS
。
您可以选择下列两种方式安装 NAS。
NASを構成するには二つのオプションがあります。
NAS를 구성하기 위한 옵션은 2가지입니다.
English
繁體中文
简体中文
日本語
한글
1. The above description applies to quick installation only. For
advanced configuration by the LCD panel or information about
the web-based settings, please refer to the user manual.
2. If you are using a large-sized hard drive (e.g. 500GB or above)
for RAID configuration, the system may take a period of time
to execute RAID synchronization before it is able to operate at
full speed. During the synchronization, you can access the NAS
normally.
1.
以上為快速安裝說明,如欲透過
LCD
執行進階功能安裝或是
執行網頁安裝,請參閱使用者手冊。
2.
如果您使用大容量硬碟
(
例如:
500GB
以上
)
執行
RAID
組態,
系統會需要一段時間透過背景執行
RAID
同步處理,完成後
系統運作即可達到全速效能。在硬碟同步的過程中,
NAS
仍
可正常使用。
1. 以上为快速安装说明,如欲透过LCD执行进阶功能安装或
是执行网页安装,请参阅使用者手册。
2. 如果您使用大容量硬盘 (例如:500GB以上) 执行RAID组
态,系统会需要一段时间透过背景执行RAID同步处理,完
成后系统运作即可达到全速效能。在硬盘同步的过程中,
NAS仍可正常使用。
1. 上の説明は、クイックインストールにのみ適用されます。
LCD パネルによる詳細設定について、または Webベースの
設定に関する情報については、ユーザーマニュアルを参照
してください。
2. RAID 設定に大容量のハードドライブ (500GB 以上) を使用
している場合、RAID 同期化を最高速度で操作できるように
なるまで時間のかかることがあります。同期化の間、NAS
には正常にアクセスできます。
1. 위의 설명은 빠른 설치에만 적용됩니다. LCD 패널의 고급
구성과 웹 기반 설정은 사용 설명서를 참조하십시오.
2. RAID 구성용 대형 하드 드라이브(예: 500GB 이상)를 사용
하는 경우, 시스템에서 RAID가 최고 속도로 작동하기 전까
지 RAID 동기화를 실행하는 데 다소 시간이 걸릴 수 있습
니다. 동기화하는 동안, NAS를정상적으로 액세스할 수 있
습니다.
d
The quick configuration page is shown. Click “Next”
and follow the instructions to finish the configuration.
d
接下 來 便 進入 快速 設定首 頁 , 請點 選「下 一
步」,並繼續依步驟指示完成所有設定程序。
d
接下来便进入快速设定首页,请点选“下一步”
,并继续依步骤指示完成所有设定程序。
d
クイック構成ページが表示されます。「次へ」をクリ
ックし、指示に従い構成を完了させます。
e
システムの初期化後、NASのウェブ管理を閲覧するこ
とができます。ブラウザに http://NAS IP:8080/ と入
力してください。デフォルト管理者アカウントで NAS
にログインします(ユーザー名: admin、パスワード:
adminとなります)
e
시스템이 초기화된 후, http://NAS IP:8080/ 을 브라
우저에 입력해 NAS의 웹 관리를 찾을 수 있습니다.
기본 관리자 계정으로 NAS에 로그인합니다 (사용
자 이름: admin, 암호: admin).
d
빠른 구성 페이지가 보이게 됩니다. “다음” 에 클릭
하여 지시 사항에 따라 구성을 완료하십시오.