EasyManua.ls Logo

QOLSYS iQ Tilt S User Manual

QOLSYS iQ Tilt S
2 pages
To Next Page IconTo Next Page
Page #1 background imageLoading...
Page #1 background image
IQ TILT S-LINE QUICK INSTALL GUIDE
Sensor: 2.5”H x 1”W x .5”D
Wireless signal range: 600ft (200M), open air.
Code outputs: tamper, tamper restore, alarm, alarm
restore, low battery.
Transmitter frequency: 319.5 MHz
Unique code ID
Supervisory keep-alive interval: 70 minutes.
RF Peak field strength: typical 36000 uV/m at 3m
Operating Temperature: -10C~50C
Relative Humidity: 5-95% Non-Condensing
Storage Temperature: -40-80C
Replace battery with exact replacement every 5 years
with 3V Lithium (x2).
(2) -Panasonic CR2032
-Energizer CR2032
-Duracell DL2032
SPECIFICATIONS
The IQ Tilt is designed to tell you whether an overhead garage door is open or closed. The tilt
sensor houses a cylinder with a metal bearing inside. When the sensor is tilted, the bearing rolls
down the cylinder towards from the metal contacts. This connects a circuit and sends a signal to
the panel saying that the garage has been opened. NOTE: Improper orientation and/or placement of
the bearing cylinder may result in false alarms or incorrect signals.
STEP
1
REMOVE
BATTERY
TABS
STEP
2
APPLY
ADHESIVE
TUBE
ORIENTATION
STEP
3
The cylinder should be
angled inside the
sensor housing as
shown
This is a quick guide for experienced installers only. Refer to http://dealers.qolsys.com (login required)
OVERVIEW
Question and Answer IconNeed help?

Do you have a question about the QOLSYS iQ Tilt S and is the answer not in the manual?

QOLSYS iQ Tilt S Specifications

General IconGeneral
TypeTilt Sensor
BatteryCR2032
Operating Temperature0°C to 50°C
Operating Humidity0% to 85% non-condensing
Wireless Signal Range600ft, open air
Weight0.5 oz

Summary

Overview of IQ Tilt Sensor

IQ Tilt Sensor Functionality

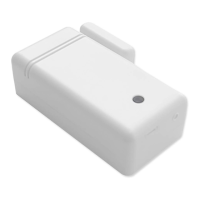
Explains how the tilt sensor detects garage door status using an internal bearing.

Product Specifications

Battery Replacement Guidance

Recommends replacing the 3V Lithium battery every 5 years with exact replacements.

Installation Steps - Page 1

Step 1: Remove Battery Tabs

Instruction to remove battery tabs before installation.

Step 2: Apply Adhesive

Instruction to apply adhesive to the sensor for mounting.

Step 3: Tube Orientation

Guidance on the correct orientation of the internal cylinder for the sensor.

Installation Steps - Page 2

Step 3: Choose Install Location

Instruction to select a mounting position on the top panel of the garage door.

Step 4: Sensor Placement

Guidance on mounting the sensor horizontally with the arrow facing UP.

Step 5: Learn Into Panel

Instructions for placing the panel in 'autolearn' mode to add the device.

Related product manuals