5
Mounting
IMPORTANT! ENSURE THAT THE LOUDSPEAKER IS
MOUNTED PROPERLY AND A SAFETY CABLE IS INSTALLED
TO RETAIN THE LOUDSPEAKER IN THE EVENT OF A MOUNT-
ING FAILURE. CONSULT A LICENSED, PROFESSIONAL ENGI-
NEER WHEN ANY DOUBT OR QUESTIONS ARISE REGARDING
A PHYSICAL EQUIPMENT INSTALLATION.
Safety Cable Attachment (all models)
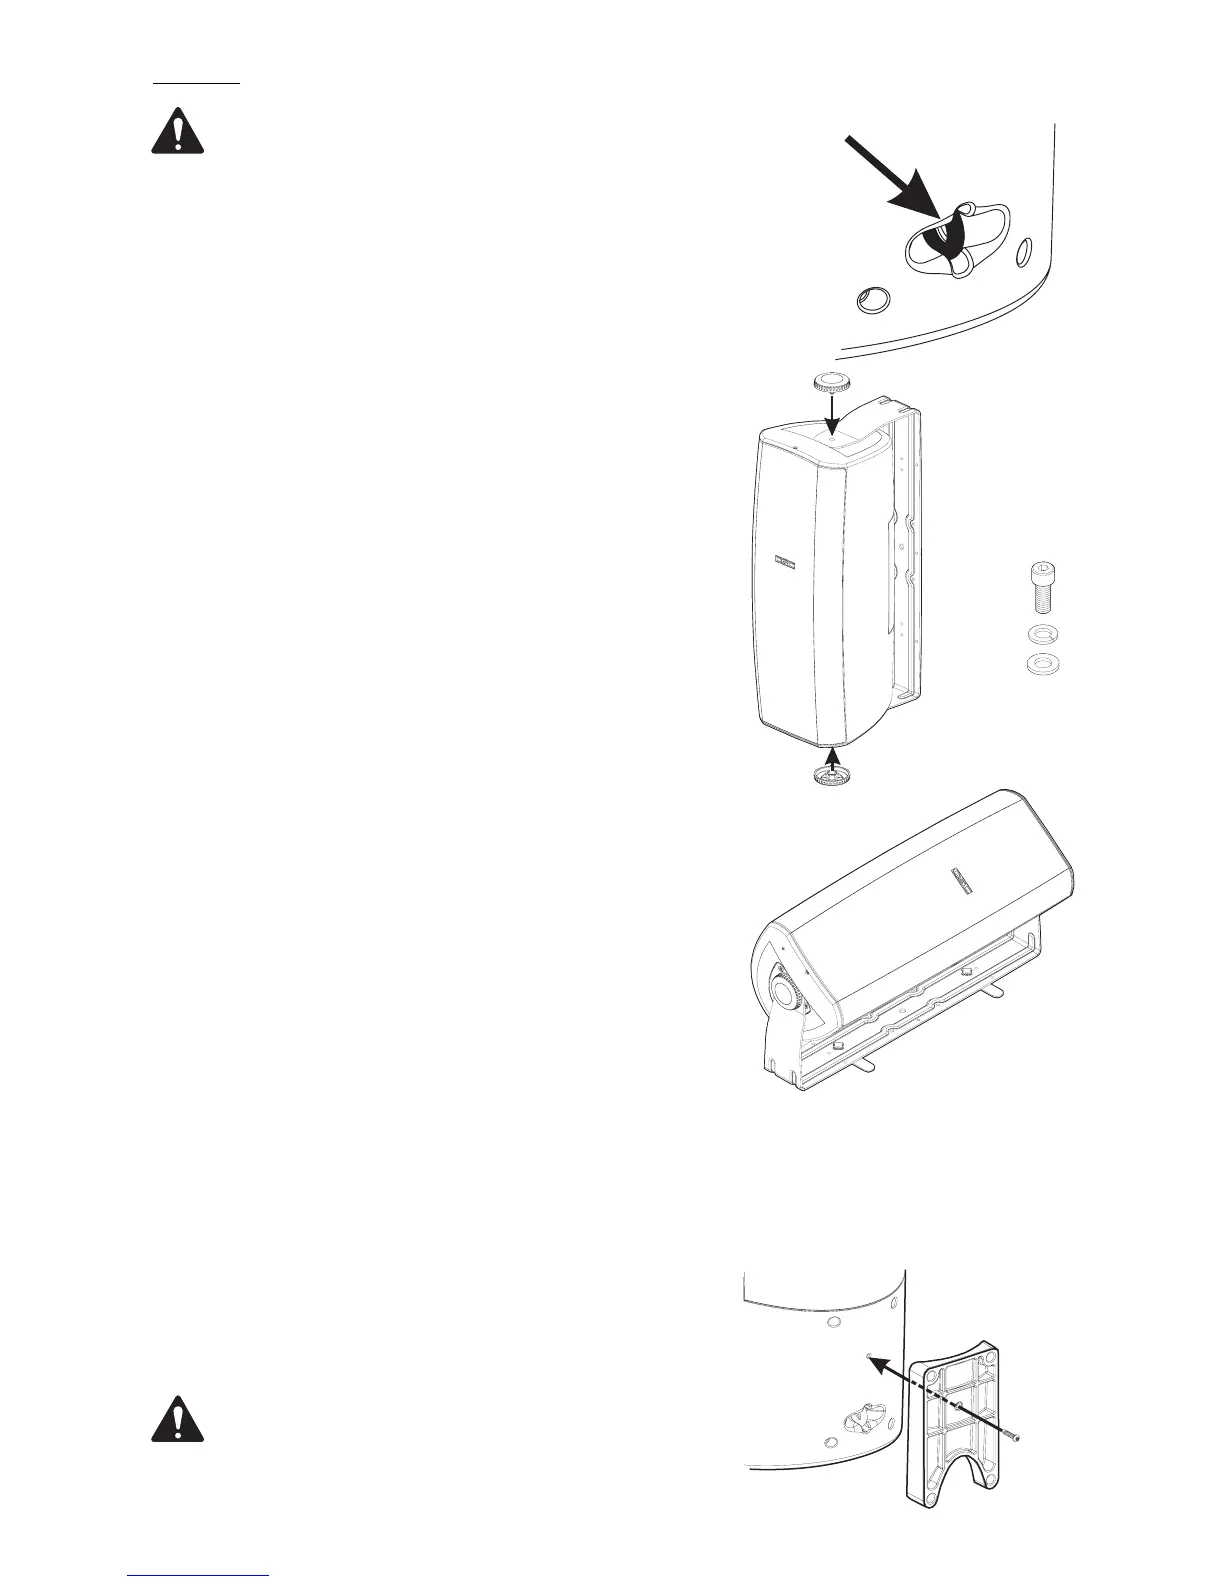
On the back of the loudspeaker, near the bottom, is a safety cable attachment
point. Install a safety cable strong enough to support several times the
weight of the loudspeaker assembly in the event it may fall. The cable must
be secured to a secondary support point which is also strong enough to sup-
port several times the loudspeaker’s weight.
Yoke Mount (all models)
The included yoke mount handles most surface mounting applications. It is
constructed of light, strong alloy and pre-drilled for ease of use. Integral
bushings at the cabinet contact points ensure ease of positioning. A large
center-hole is provided on the mounting surface side for wiring pass-through.
Mount the yoke to a surface strong enough to support the weight of the loud-
speaker assembly using suitable hardware (not included). If any doubt exists
as to the suitability or strength of the mounting surface, consult a qualified
professional engineer. After securing the yoke to the mounting surface, have
an assistant hold the loudspeaker in place while installing either the retain-
ing knobs or socket head screws with flat and lock washers (AD-S282H and
AD-S282HT only). Once the loudspeaker has been positioned for desired
acoustic coverage, tighten the hardware securely.
Floor Monitor (I-282H only)
The I-282H yoke mount comes with two swivel feet, four self-adhesive rub-
ber feet, and retaining knobs. Attach the two of the rubber feet to each of
the two swivel outrigger bars, one at each end. Press firmly in place to
ensure adhesion. Then attach each of the two swivel outrigger bars to the
yoke mount using the two small retaining knobs included. The rubber feet
should be oriented away from the yoke mount. Swivel the outrigger bars per-
pendicular to the long axis of the yoke and tighten the retaining knobs. Set
the completed yoke assembly on the floor, resting on the rubber feet. Place
the loudspeaker into the yoke and secure using the two large retaining knobs
provided. Position the loudspeaker for desire acoustic coverage and tighten
the retaining knobs securely.
Pole Mounting (I-282H only)
On the bottom of the I-282H is a pole cup that accepts 1.375” or 1.500” (35
mm or 38 mm) pole diameters. For pole mounting, lift the loudspeaker into
position over the pole end and set it onto the pole. Ensure the pole is fully
and firmly seated into the pole cup of the loudspeaker.
OmniMount (all models)
For applications requiring the use of OmniMount’s Pro 60.0 mount, there is an
adapter plate included. The adapter plate is used between the OmniMount
bracket and the loudspeaker cabinet. Orient the plate with it’s curved side
toward the loudspeaker and its safety cable access cut-out toward the bot-
tom of the loudspeaker. Attach to cabinet using the provided M4 x 18mm
self-tapping screw. Consult OmniMount’s literature and installation recom-
mendations for proper and safe application of their product.
We recommend the use of M8 x 1.25 x 50mm bolts with a flat
washer 1.8mm thick and a split-lock washer 1.9mm thick for
securing the OmniMount bracket to the loudspeaker cabinet.
Attach safety
cable here
OmniMount adapter plate-
Attach to cabinet using provided M4 x 18mm
self tapping screw, then attach OmniMount
following manufacturer’s recommendations.
For enhanced security,
use the included M10
socket head screws to
secure the loudspeaker
to the yoke mount.
 Loading...