2 Connecting the Drive Interface and Power Cables
LTO-3, LTO-4, LTO-5, LTO-6, LTO-7 and LTO-8
Power Requirements Power requirements for the 1U Rackmount enclosure are as follows:
• 100 to 240 Volts AC, 2 to 4 Amps
• 47 to 63 Hz
Connecting the Drive Interface and Power Cables
1 Shut down and turn off the host server system.
2 Turn off all attached accessory devices, such as printers and other SCSI devices.
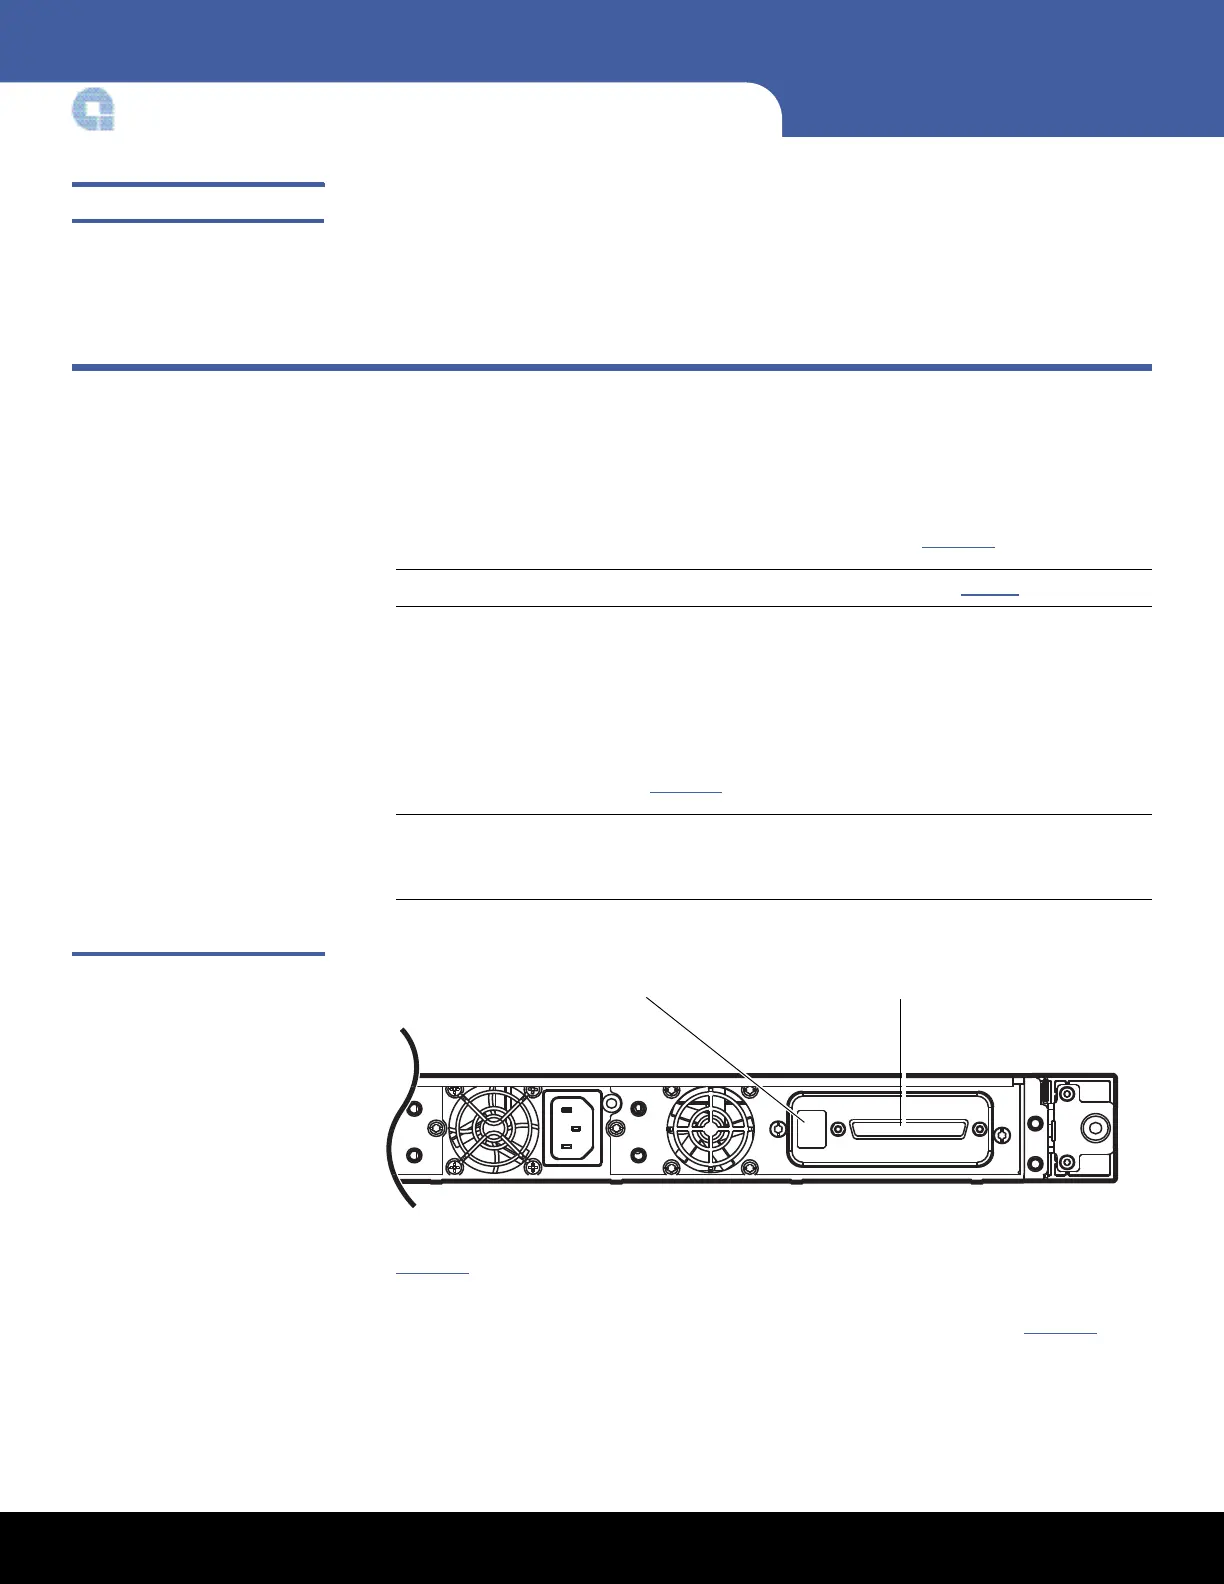
3 On the back panel of a SCSI 1U Rackmount enclosure (see Figure 1
):
Note: If this is a SAS 1U rackmount enclosure, continue with Step 4.
a Connect one end of the supplied external parallel SCSI cable to parallel SCSI
connector on the same side of the enclosure as the installed tape drive.
b Connect the other end of the supplied external parallel SCSI cable to the parallel
SCSI connector on the host server.
c As required, use the parallel SCSI ID selector switch to set the SCSI ID of the
installed tape drive (see Figure 1
).
Note: Any time you change the parallel SCSI ID, you must turn the tape drive
power off and then back on by pressing the power button on the front
panel of the 1U Rackmount enclosure.
Figure 1 Parallel SCSI Interface
Connectors
4 On the back panel of a serial-attached SCSI (SAS) 1U Rackmount enclosure (see
Figure 2
):
a Connect one end of the supplied external SAS interface cable to one of the
external SAS interface connectors at the rear of the enclosure (see Figure 2
). The
left-most SAS connector is for a drive installed on the left of the enclosure, and
the right-most SAS connector is for a drive installed on the right.
Parallel SCSI connectorSCSI ID selector