This document provides a comprehensive guide for the Quell Slimline Photoelectric Smoke Alarm, Model QSP10 (Product Code 138626), covering its function, usage, and maintenance.
Function Description
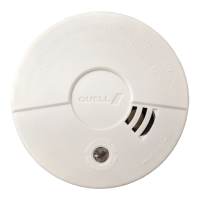
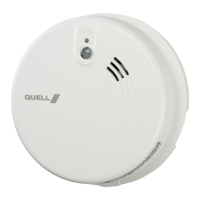
The Quell Slimline Photoelectric Smoke Alarm is designed to detect visible particles, which are typically associated with slow smouldering fires. For optimal protection against both fast flaming and slow smouldering fires, it is recommended to install both ionisation and photoelectric alarms. The alarm complies with AS3786:2014 standards.
The device features a clear product function description table that outlines various operational states and their corresponding indications and descriptions:
- Standby Status: The red LED flashes every 40 seconds, indicating that the unit is working normally.
- Low Battery Warning: The unit chirps with the red LED flashing every 40 seconds. This indicates that the battery is in a low state, and the smoke alarm device should be replaced.
- Fault Warning: The unit chirps with the red LED flashing two times. This signifies a fault within the unit, and troubleshooting steps should be followed.
- Self-Test Fault Warning: The red LED flashes twice every 40 seconds, indicating a buzzer fault or buzzer detection circuit fault.
- Test Function: When the TEST button is pressed for at least 3 seconds, the red LED flashes once per second, and the alarm sounds until the button is released. This confirms that all electronic circuitry, the horn, and the battery are functioning correctly. If no alarm sounds during the test, refer to the "Trouble Shooting" section.
- Weekly Self-Test: The unit chirps weekly, performing an automatic self-test. While this occurs, it is still recommended to manually test the alarm semiannually by pressing the TEST button.
- Silence Function: This smoke alarm includes a built-in silence feature. If non-hazardous sources like cooking cause the alarm to sound, it can be temporarily silenced by pressing the test button. The red LED flashes every 8 seconds during this mode. The alarm enters silence mode for 10 minutes, after which it will resume normal operation.
- Fire Alarm: When a fire is detected, the red LED flashes every second, and the alarm sounds, indicating an active fire event.
- No Disturbing: When the HUSH button is pressed, the unit will stop nuisance warnings for approximately 10 hours under low battery or fault mode. The red LED flashes every 40 seconds during this period.
Usage Features
The installation instructions emphasize proper placement for effective smoke detection. By law, at least one smoke alarm must be installed on each level of the home. Recommended locations include:
- Every room where someone sleeps with the door closed, as a closed door can prevent an alarm outside from waking the sleeper.
- The immediate area of bedrooms and the exit path from all sleeping areas.
- Stairways, as they act as chimneys for smoke and heat.
- Any room where large electrical appliances (e.g., portable heaters or humidifiers) are operated.
- If a hallway or room is more than 9.1m long, alarms should be placed at both ends.
- For maximum household protection, refer to the provided diagrams (Figures 1A, 1B, 1C).
Local state and federal laws or local fire brigades should be consulted for minimum installation requirements.
Ceiling Mounting: Smoke rises to the ceiling and spreads horizontally. Mounting the alarm in the centre of the ceiling places it closest to all points in the room. When ceiling-mounted, the alarm should be at a minimum of 50cm from the side wall. For sloped, peaked, or cathedral ceilings, the alarm should be placed between 500mm and 1000mm from the highest point of the ceiling. In rooms with ceiling slopes greater than 1m in 8m horizontally, alarms should be located on the high side of the room.
Wall Mounting: Use an interior wall with the top edge of the alarm at a minimum of 10cm and a maximum of 30cm below the ceiling.
Locations to Avoid:
- Garages, due to combustion products from automobiles.
- Less than 20" (50cm) from the peak of an "A" frame type ceiling.
- Areas where temperatures may fall below 0°C or rise above 40°C, such as unfinished attics.
- Dusty areas, which can cause nuisance alarms or failure.
- Very humid areas (greater than 93%R.H.), where moisture or steam can cause nuisance alarms.
- Insect-infested areas.
- Within 3 feet (0.9m) of kitchen doors, bathroom doors with tubs or showers, forced air supply ducts, or high airflow areas.
- Kitchens, as normal cooking can cause nuisance alarms. If a kitchen alarm is desired, it should have an alarm silence feature or be a photoelectric type.
- Near fluorescent lights, which can cause electronic "noise."
Installation Steps:
- Place the mounting plate at the desired location and mark drilling holes.
- Drill two 5mm holes.
- Push plastic plugs into the holes.
- Remove the fixing plug from the mounting plate (if necessary).
- Insert screws into the mounting plate and tighten them firmly into the plugs.
- Place the smoke alarm on the mounting bracket and secure it by turning it clockwise.
- Test the alarm by pressing the test button. If no sound is generated, the alarm is not functioning correctly and should not be used.
Disassembly:
- To disassemble, insert a screwdriver into the mounting hole and turn the smoke alarm counterclockwise to remove it from the bracket.
- Alternatively, turn the alarm body counterclockwise and lift it from the bracket without tools.
Activation:
To activate the alarm, install it on the mounting bracket. The alarm will emit a "beep" sound, indicating successful activation. Press the test button firmly for at least 3 seconds; the alarm will sound with 3 short beeps and a 1.5-second pause, repeating until the button is released. The alarm may continue to sound for a few seconds after release, confirming normal operation.
Night Mode: The smoke alarm features an automatic night mode. In dark rooms, the LED signal is dimmed to prevent disturbance during sleep.
Alarm Tamper-Resist Feature: A tamper-resist feature is provided. To activate it, break out the tamper-resist blocks on the mounting plate. This feature helps deter unauthorized removal of the alarm.
Good Safety Habits:
- Install and maintain fire extinguishers on every level of the home and in the kitchen, basement, and garage. Learn how to use them before an emergency.
- Be aware that smoke alarms may not awaken all sleeping individuals. Those capable should assist others who may not wake or evacuate unassisted.
- Create a floor plan showing all doors, windows, and at least two escape routes from each room. Consider rope or chain ladders for second-story windows.
- Hold family meetings to discuss the escape plan and ensure everyone knows what to do in a fire.
- Designate an outdoor meeting place.
- Familiarize everyone with the alarm sound and train them to leave when they hear it.
- Practice fire drills at least every six months, including night drills. Ensure small children wake up to the alarm sound. Practice helps all occupants test the plan before an emergency.
- What to do when the Alarm Sounds:
- Alert small children.
- Leave immediately via your escape plan. Do not waste time getting dressed or collecting valuables.
- Before opening any inside door, feel its surface. If hot or if smoke seeps through cracks, do not open it. Use an alternative exit.
- If the door is cool, brace your shoulder against it, open it slightly, and be ready to slam it shut if heat and smoke rush in.
- Stay close to the floor in smoky conditions. Breathe shallowly through a cloth, wet if possible.
- Once outside, go to your designated meeting place and ensure everyone is present.
- Call the fire brigade (000 in AUS or 111 in NZ) from a neighbour's home or a phone box, not from yours.
- Do not return home until fire officials declare it safe.
- Situations where a smoke alarm may not be effective: smoking in bed, unsupervised children, cleaning with flammable liquids, fires where the victim is intimate with a flaming initiated fire (e.g., clothes catching fire while cooking), and incendiary fires that grow too rapidly to allow egress even with properly located detectors.
Maintenance Features
Regular maintenance is crucial for the smoke alarm's proper functioning.
- In addition to weekly testing, the alarm requires periodic cleaning to remove dust, dirt, and debris.
- Clean the alarm at least once a month using a vacuum cleaner with a soft brush to vacuum all sides and covers of the device.
- The alarm has a low battery monitor that will cause it to "chirp" approximately every 40 seconds, with the red LED flashing once at the same time, for a minimum of thirty days when the battery is low.
- If a defective battery or other failures occur, refer to the "Trouble Shooting" section. If failures persist during the warranty period, return the unit to your retailer.
- WARNING: The battery is sealed within the cover and is not replaceable. If the low battery chirp occurs, replace the entire alarm.
- IMPORTANT: Do not attempt to remove the cover to clean the inside, as this will affect the warranty.