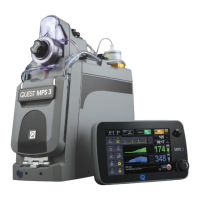
4.5. Console or Controller Change Out
It is recommended to change out either the Console or Controller when the MPS
3 system becomes unusable, even after following the corrective actions and
troubleshooting suggestions in this manual.
If a Console needs to be replaced during a case:
1. Stop flow
2. Select Shutdown with Alarm button or Rear switch
3. Clamp source and delivery lines
4. Remove disposable set from system
5. Unplug power cord, Controller communications cable from Console,
circulation inlet and outlet lines, and any additional accessories connected to
the rear of the console
6. If on Pole Mount, remove Console Pole Mount locking pin from foot.
7. Replace the console
8. Connect power cord, Controller communications cable to console, circulation
inlet and outlet lines (ensure adequate water in circulation system) and any
required accessories
9. Turn on console with Rear and Standby switches. After system diagnostics
is complete, select SWAP on Alarm 314
10. Select SAME CNTLR on Alarm 315
11. Select RESUME CASE to recall all previous case parameters
12. If using a Hypothermic Reservoir, prime the circulation system by selecting
Temp Settings H2O Prime. If using a Heater-Cooler Unit, resume flow
from Heater-Cooler Unit.
If a Controller need to be replaced during a case:
1. Stop flow
2. Select Shutdown with Alarm button or Standby Switch on the front of the
Console (hold for 3 seconds and wait for switch to turn orange)
3. Remove Controller from Mounting Arm
4. Disconnect Controller communications cable from Console
5. Replace Controller
6. Connect Controller communications cable to Console, and required
accessories to new Controller
7. Turn on console Standby switch (hold for 3 seconds and wait for switch to
turn blue).
8. After system diagnostics is complete, select SWAP on Alarm 314
9. Select DIFF CNTLR on Alarm 315
10. Select NEW CASE to setup parameters either manually or via a protocol