Do you have a question about the Quick MILL QM67 EVO and is the answer not in the manual?
Initial setup procedures including water hardness testing and reservoir preparation.
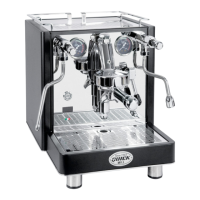
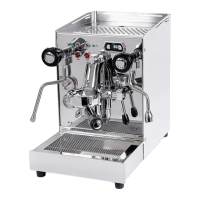
Understand the steam and pump pressure gauges for monitoring machine operation and settings.
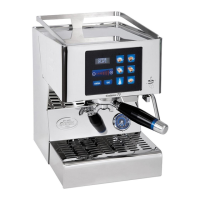
Procedure to adjust coffee and steam boiler temperatures using the PID controller's interface.
Proper technique for filling portafilter basket for even espresso extraction.
Correct tamping pressure and polishing method for consistent espresso shots.
Adjust grind size for optimal espresso flow, aiming for a tapered mouse tail appearance.
Emphasize consistent tamping and coffee quantity for predictable shot results.
Note that cooling flushes are not required for dual boiler machines.
Rinse group head after brewing to prevent coffee oil buildup on the shower screen.
Whole milk is recommended for best steaming results and flavor.
Steam milk to 150-160°F for creamy micro-foam; avoid overheating which burns milk.
Select an appropriate pitcher size for optimal milk steaming and pouring latte art.
Fill pitcher 1/3 to 1/2 full to prevent splashing or overflow during steaming.
Initial phase of frothing, introducing air until milk reaches ~100°F (body temperature).
Second phase of frothing, creating smooth micro-foam by submerging the wand.
Purge the steam arm over the drip tray to remove condensation before steaming milk.
Angle wand 45° and submerge tip 1" below milk surface for stretching milk.
Introduce air by keeping wand near surface until milk reaches ~100°F (body temperature).
Submerge wand ~1" to spin milk, creating micro-foam until pitcher is too hot to hold (~150°F).
Keep steam wand tip submerged for 3 seconds after shutting off to preserve micro-foam.
Purge wand for 1-2 seconds and wipe immediately after use to prevent milk drying.
Lowering tip too far creates turbulence, preventing micro-foam formation.
Tap pitcher and swirl milk to remove remaining bubbles after steaming.
Swirl steamed milk until ready to pour to prevent separation.
Open hot water knob to dispense water; close when desired level is reached.
Learn the importance and procedure for plain water and cleaner backflushing.
Perform weekly plain water backflushing to keep the shower screen clean.
Use cleaner monthly or every 35-50 shots to maintain internal components.
Two methods provided for removing the group gasket and shower screen.
Insert screen into gasket with beveled side up; use lubricant for easier installation.
Check boiler pressure, steam tip, wand, and knob for blockages or improper function.
Verify boiler pressure, check hot water knob, and note potential vapor lock issues.
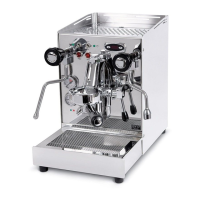
The device described in the manual is the Quick Mill QM67 EVO Dual Boiler Espresso Machine.
The QM67 EVO is a high-performance dual boiler espresso machine designed for making espressos, cappuccinos, and lattes. It combines classic aesthetics with advanced features to provide a superior coffee brewing experience. The dual boiler system allows for simultaneous brewing and steaming, enhancing efficiency and temperature stability. The machine is equipped with an E61 grouphead, known for its excellent thermal stability and pre-infusion capabilities, which contributes to consistent and high-quality extractions. A PID controller is integrated to precisely manage boiler temperatures, ensuring optimal brewing conditions and allowing users to fine-tune flavor profiles. The machine also includes a shot timer for monitoring extraction duration.
| Brand | Quick MILL |
|---|---|
| Model | QM67 EVO |
| Category | Coffee Maker |
| Language | English |