Do you have a question about the Quick MILL QM67 and is the answer not in the manual?
Initial setup steps including water testing and reservoir preparation.
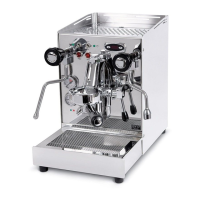
Explanation of boiler steam and brew pressure gauges.
Description of indicator lights for power and heating status.
Details on the machine's vibratory pump and its auto-fill function.
Accessing, cleaning, and sanitizing the water reservoir.
Explanation of advanced parameters like Fahrenheit/Celsius and priority modes.
How to use the hot water wand and important safety precautions.
Procedures for cleaning the group head via backflushing with water or cleaner.
Adjusting the brew pressure using the expansion valve adjustment screw.
Covers removal, cleaning, and installation of group gasket and shower screen.
Information on descaling, including its risks and the manufacturer's discouragement.
Cleaning oxidized contacts for PID controller buttons to restore functionality.
Using cleaners and cloths for maintaining the machine's stainless steel surfaces.
Diagnosing issues related to steam wand and hot water wand functionality.
Resolving problems with the machine not heating up or indicator lights not functioning.
Troubleshooting slow or fast espresso extraction based on grind and tamping.
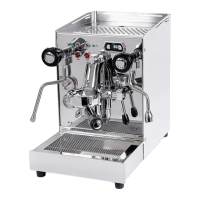
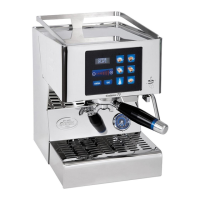
The QM67 Dual Boiler Espresso Machine is a sophisticated device designed for brewing high-quality espresso, cappuccinos, and lattes. It features a dual boiler system, allowing for simultaneous coffee brewing and milk steaming, which enhances efficiency and temperature stability. The machine is equipped with a PID controller, which is crucial for precise temperature management of both the coffee and steam boilers, ensuring optimal extraction and steam quality.
For coffee brewing, the machine emphasizes three main variables: the quantity of ground coffee, tamping pressure, and grind size. Users are guided to loosely fill the basket, then level it by running a finger across the top to remove excess coffee and ensure an even distribution. Tamping involves applying approximately 30 lbs of pressure evenly on the coffee bed, followed by a light twist to "polish" the surface. Consistency in tamping pressure is highlighted as vital for shot quality and timing. The grind size is critical and should be adjusted so that espresso flows out like a "tapered tail of a mouse," taking approximately 25 seconds for a 2 oz double shot. If the flow is too quick, a finer grind is needed; if too slow or non-existent, a coarser grind is required. The ideal grind particle size is described as being between powder and salt. The manual explicitly states that a cooling flush is not needed on this dual boiler machine, as it could negatively impact temperature stability.
The PID controller's display cycles between the current temperatures of the coffee and steam boilers, indicated by the position of a decimal point. Users can adjust these temperatures by pressing both arrow keys simultaneously to enter the setting mode, then using the up/down arrows to change values. The coffee boiler temperature is factory-set to 200°F, with a recommended brew range of 195°-205°F (90°-96°C) to bring out different flavor characteristics. A hotter temperature may yield bitter notes, while a colder one might result in sourness. The steam boiler temperature is set to 263°F by default, corresponding to approximately 1.7 bars of steam pressure. Advanced PID settings allow for changing between Fahrenheit and Celsius modes, and adjusting boiler priority (coffee or steam), which can be useful for steaming larger quantities of milk. The PID also includes an integrated shot timer that activates when the brew lever is lifted and the pump is on, displaying the duration of the shot.
Steaming milk with the QM67 involves specific techniques to achieve creamy micro-foam. Whole milk is recommended for its foaming properties and flavor. The milk should be as cold as possible to maximize the time available for steaming and prevent a burnt taste, with a target temperature of 150-160°F. The frothing pitcher should be filled between 1/3 and 1/2 full to avoid splashing or overflow. The process involves "stretching" the milk by introducing air with the steam wand just below the surface until it reaches "body temperature" (around 100°F), producing a "sucking" sound. Following this, "texturizing" involves submerging the wand deeper to create a rolling motion, breaking down large air bubbles into tiny ones for a smooth, creamy texture. This continues until the pitcher becomes too hot to hold (around 155°F). Users are advised to purge the steam wand before and clean it immediately after use to prevent milk residue buildup.
Maintenance is crucial for the longevity and performance of the QM67. Backflushing is a vital procedure, with two types: plain water backflushing and backflushing with espresso machine cleaner. Plain water backflushing should be done at least once a week, or more frequently if desired, using a backflush disc in the portafilter. The brew lever is raised for 15 seconds, then lowered, repeating three to five times. Backflushing with espresso machine cleaner is recommended approximately once a month or every 35-50 espressos, using 1/4 teaspoon of cleaner. Overuse of cleaner is cautioned against as it can remove lubricating oils. After cleaning, a shot of espresso should be pulled and discarded to "cure" the group.
Setting the pump (brew) pressure is another maintenance task. This involves installing the backflush disc, removing the cup warming tray to access the expansion valve adjustment screw, and then raising the brew lever. The pressure should rise to 9.5-10 bar with the backflush disc, adjusted by turning the screw clockwise to increase pressure and counter-clockwise to decrease it. If brew pressure is low during espresso extraction, it indicates a need for a finer grind.
Group gasket and shower screen replacement is recommended yearly. The QM67 uses an E61 8.5mm gasket. The machine should be turned off and cooled before replacement. Two methods for removal are described: prying with a flat blade screwdriver or spoon for newer gaskets, or using a scratch awl or ice pick for older, dried-out gaskets. Before installing new components, the group head must be thoroughly cleaned with hot water and backflushing cleanser to remove any residue. Installation involves inserting the screen into the gasket with the writing or beveled side up, then pressing the portafilter with the gasket and screen into the group head with upward pressure.
Descaling is generally discouraged by the manufacturer due to potential issues like foaming, damage to electrical components, or blockages, especially if softened water is already in use. Instructions for descaling are explicitly not provided. The PID controller itself requires no maintenance, but if buttons become unresponsive due to oxidation from disuse, rapidly pressing them with the machine off can help clean the contacts. Cleaning the stainless steel exterior can be done with specialty stainless steel cleaners, glass cleaner, or white vinegar for water stains, followed by buffing with a dry, lint-free cloth for a mirror finish.
Troubleshooting guidance covers common issues. For "No Steam From Steam Wand" or "No Water From Hot Water Wand," users are advised to ensure both boilers have been on for at least 15 minutes, check the steam pressure gauge (should be 1.2-1.7 bar), and inspect for blockages in the steam tip or wand (including the white Teflon tube). For "Not Heating," verify the machine is plugged in, both boiler power switches are on, the water reservoir is full, and the silicone hoses are not impeding the float. Resettable hi-limit switches on each boiler can be checked by unplugging the machine, removing the outer shell, and pressing the reset button. If PID and heating lights are not working, ensure the machine is plugged in, power switches are on, the reservoir is full and properly seated, and the white float is not obstructed. A "vapor lock" (pressure dropping to zero when steam/hot water knobs are opened, then heating normally) is attributed to a sticking vacuum breaker valve.
| Type | Semi-Automatic Espresso Machine |
|---|---|
| Pump Type | Vibration Pump |
| Boiler Material | Stainless Steel |
| Water Reservoir Size | 3 liters |
| Material | Stainless Steel |
| Weight | 44 lbs |
| Boiler Capacity | 0.75 L |
| Pump Pressure | 15 bar |
| Power | 1200 W |
| Boiler Size | 0.75 liters |
| Water Tank Capacity | 3.0 Liters |