Install indoor unit
LQFK
LQFK
LQFK
LQFK
Ø
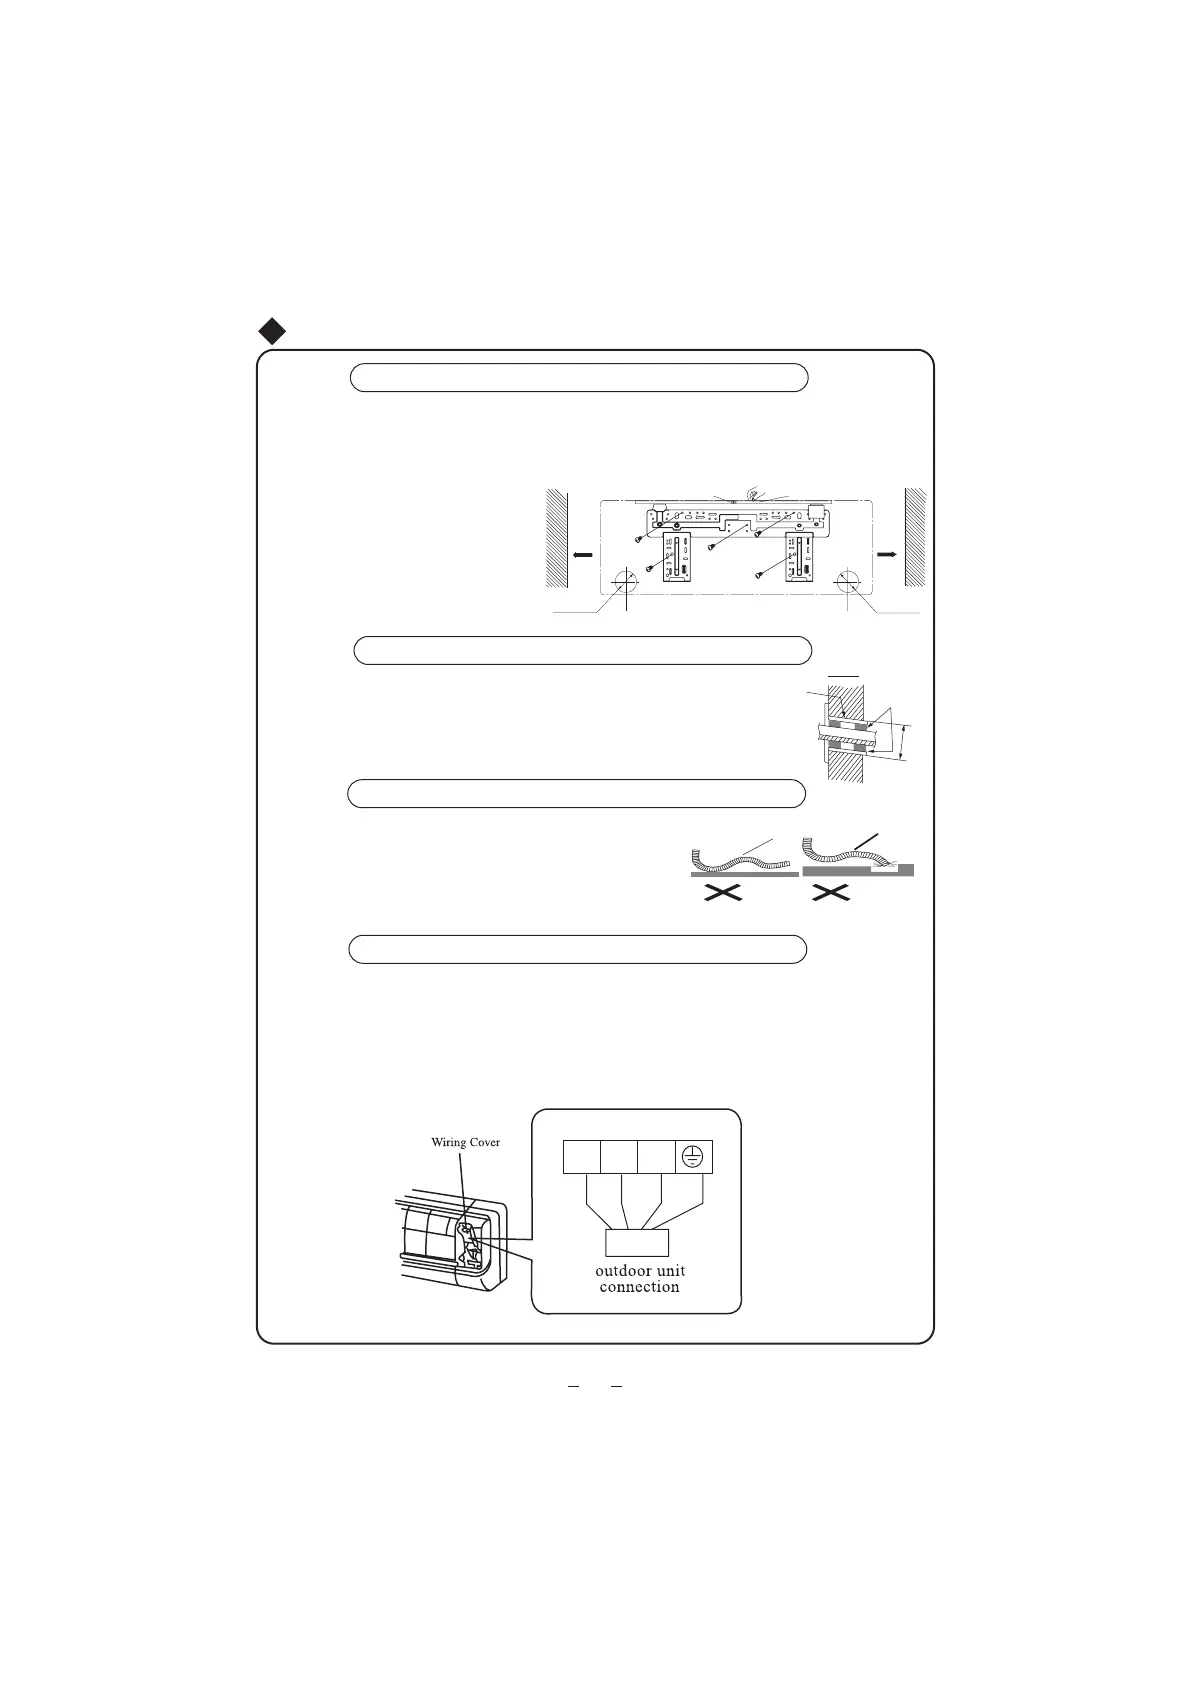
Install the rear panel
1.Always mount the rear panel horizontally. Due to the water tray of indoor unit has been adopted the
both-way drainage design, the outlet of water tray should be adjusted slightly down when installing, that is
taking the outlet of the water tray as the center of a circle, the included angle between the evaporator and
level should be 0 or more, that is good for condensing water drainage.
2.Fix the rear panel on the wall with screws.
(Where is pre-covered with plastic granula)
3.Be sure that the rear panel has been fixed
firmly enough to withstand the weight of an
adult of 60kg, further more, the weight should
be evenly shared by each screw.
Install the piping hole
0DNHWKHSLSLQJKROHɎ2.17 inLQWKHZDOODWDVOLJKWGRZQZDUGVODQWWRWKH
outdoor side.
2.Insert the piping-hole sleeve into the hole to prevent the connection piping
and wiring from being damaged when passing through the hole.
Install the water drainage pipe
1.For good draining, the drain hose should be placed at a downward slant.
2.Do not wrench or bend the drain hose or flood its end by water.
3.When the long drainage hose passing through indoor,
should wrap it with insulation materials.
Wrenched Bent
Flooded
Indoor Outdoor
Wall pipe
Seal pad
)LJ
Wall
Wall
Mark on the middle of it
Gradienter
Left
Right
(Rear piping hole)
(Rear piping hole)
Space
to the
wall
above
Space
to the
wall
above
Connect indoor and outdoor electric wires
1.Open the surface panel.
2.Remove the wiring cover Fig 6.
3.Route the power connection cord and signal control wire (for cooling and heating unit only) from the
4.Reassemble the clampand wiring cover.
5.Recover the surface panel.
back of the indoor unit and pull it toward the front through the wiring hole for connection.
Fig.6
1
%8 %. %1 <(*1
 Loading...