True to the Music
Radial Engineering
JDX User Guide
7
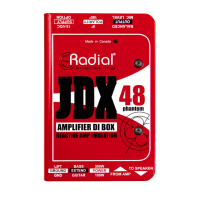
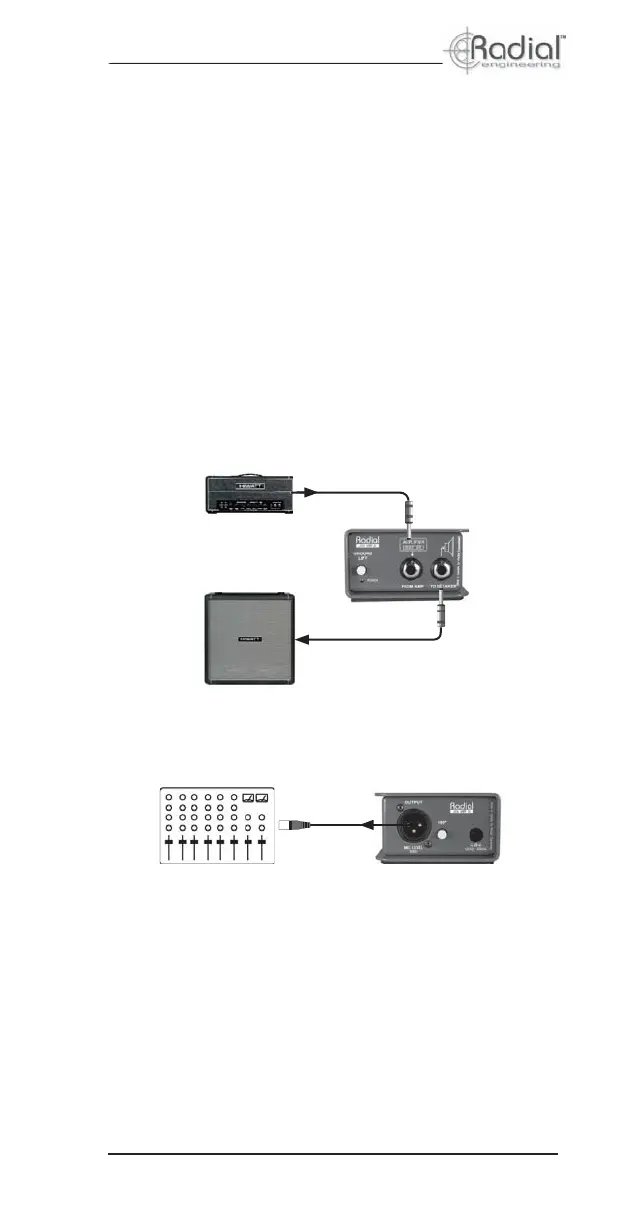
CONNECTING THE JDX
The JDX will typically be located on or near the guitar amplifi er to
facilitate short speaker cables. We recommend speaker cables be
6 feet or less in length with a minimum of 16AWG two conductor
cable. Longer cables should use heavier gauges to maintain the
best power transfer. The balanced XLR connection from the JDX
to the mixing console may be made through several hundred feet
of balanced cable without signal loss.
Before you begin, ensure your amplifi er and PA or record-
ing system are turned off. Lower all the volume controls to
minimum to avoid loud transients.
1. Connect your amplifi er’s speaker output to the FROM AMP
¼” jack on the JDX.
2. Connect the SPEAKER ¼” jack on the JDX to your speaker
cabinet.
3. Connect the XLR output to a mic preamp input on your mixing
console using a standard XLR microphone cable.
4. Connect the JDX power supply and check the LED power
indicator to confi rm power is present.
5. Turn on your amp and bring up the volume to a low level for
testing. Always test at low volume before cranking it up.
6. If all is well, set the amp volume to an appropriate level. Keep
in mind that the level at the balanced XLR output will follow
the amp so it’s best to set the level of the amp before setting
levels at the mixing console.