PG 4
What wires do you have?
Make sure your wires are labeled. This may require you to nd
the ‘other end’ connection for each wire on your heating or air conditioning equipment and read the
label there. Refer to the Wire Reference page at end of install section for better understanding of wire
labels from different HVAC system makers.
IMPORTANT: The CT50 runs on 3 AA alkaline batteries and/or the C wire if available. If you do
not have a C wire you can run a new wire from the HVAC or use a standard 18-24V [AC or DC] wall
transformer. A constant power source is required when using a radio module.
IMPORTANT: If you have both RH and RC you need to
remove the jumper wire between these 2 terminals.
Prepare Wires
Please follow these guidelines for safe and
secure wire connections:
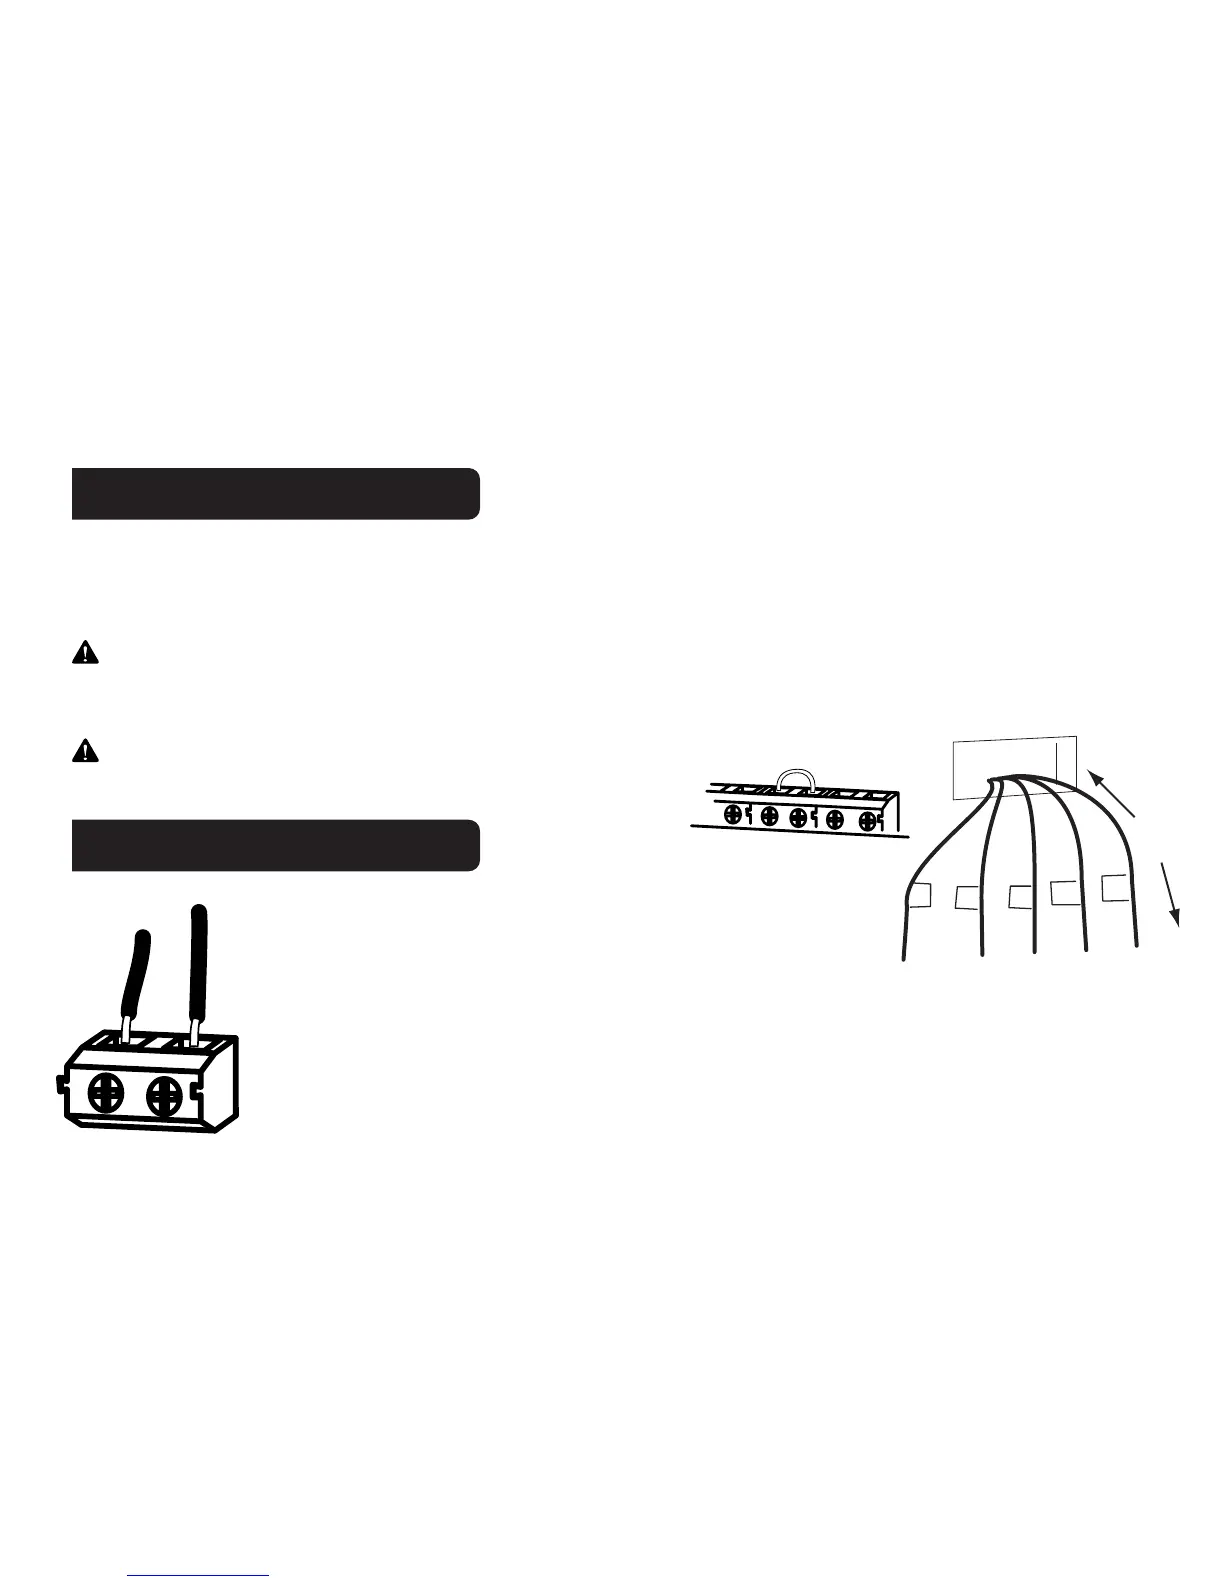
• You will need at least 2.6” of wire for each of your connections to the CT50.
• If you do not have enough wire, splice additional wire to allow enough slack.
• Terminals accept wires from 16-22awg.
• Fan out wires below the hole as shown.
• Remove insulation 1/8” from the tip of each wire.
• When handling, take care not to damage the labels for each wire.
G
C
Y
RH
W
2.6"
from HVAC
System
Jumper
wire
Wire Terminals
Y
RH RC
G A
 Loading...