1. Assemble the display stand as shown in
the picture. Insert the tubes into the sockets,
no gluing is required.
2. Place the water-proof gasket on the
bottom of the keel and then attach the
ballast to the keel with the 5x50mm screw
using the 4mm allen key.
3. Place the water-proof gasket on the top of
the keel and then insert in slot on bottom of
hull. Secure keel by inserting the 5x90mm
screw through the deck and tighten with the
4mm allen key.
4. Insert the rudder into the tube in the hull
from below. Attach nylon control arm, secure
with the clip. Check that the rudder moves
freely then insert the push rod into the steer-
ing arm connector. Center the rudder and
tighten the setscrew with the 2mm allen key.
4/14
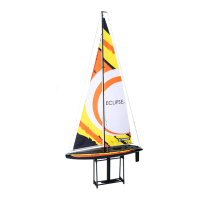
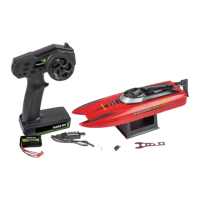
Assembly of the Eclipse sailboat is easily accomplished by follow-
ing the step-by-step rigging instructions that follow. A great deal of
the assembly has been done for you, reducing the assembly time
to about an hour. Everything that you need is included.
Please refer to the contents legend on page 3 if you have any
questions about part names.
The radio receiver, On/Off switch, rudder servo and the sail winch
are located under the hatch located at the rear of the deck. Open
by turning the latch 90 degrees and lift. After charging the Lithium
battery with the supplied charger, install it on the hook and loop
that is pre-installed in the hatch. Plug the battery into the receiver
JST plug. When the boat is not in use, unplug the battery from the
receiver.