11
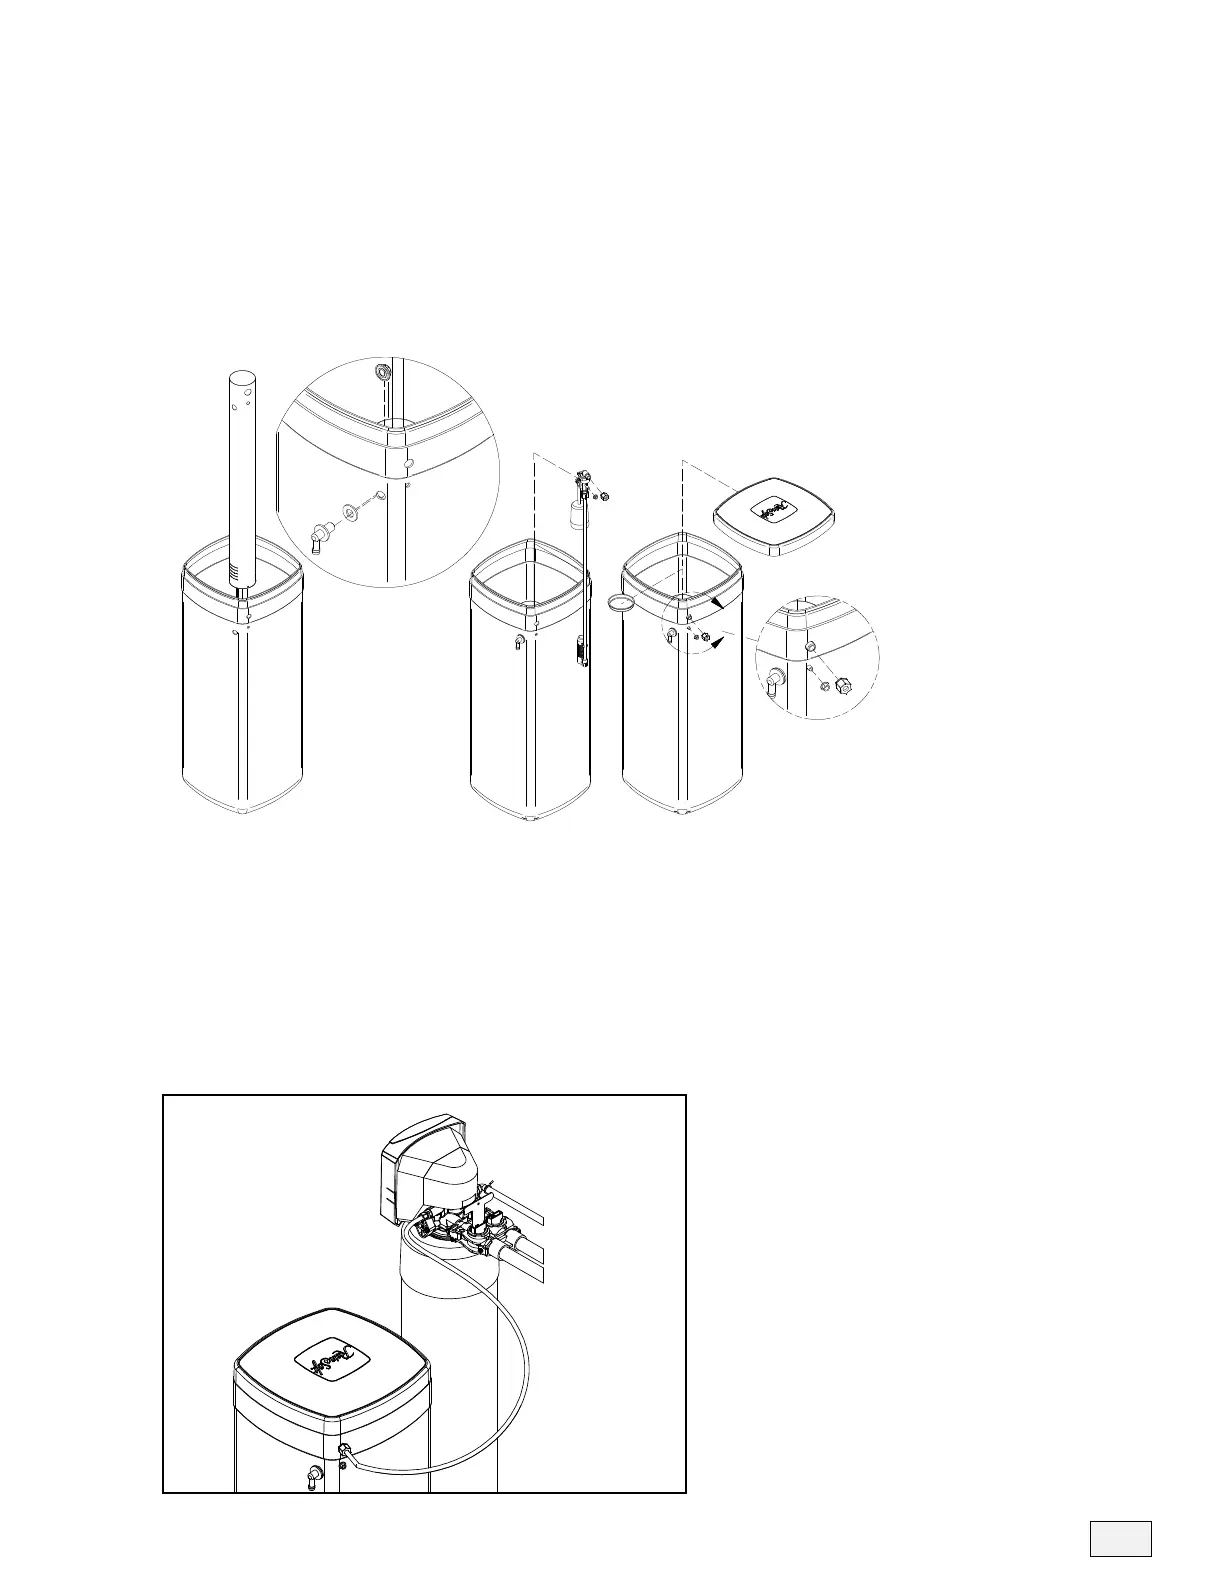
10. Install the Brine Safety Float
• Insert the brine well into the brine tank (see figure 7.1).
• Attach the brine well to the brine tank with the overflow
elbow (see figure 7.2).
• Insert the safety float into the brine well. The top of the safety
float should be about 5 inches from the overflow elbow (see
figure 7.3).
11. Install the Brine Line
• Slide the brass compression nut over the end of the brine line,
followed by the ferrule and tube support. Attach the brine line
to the brass fitting on the right side of the valve (see figure 8).
• Insert a tube support into the other end of the brine line and
push the brine line into the brine safety float elbow. Use a
locking clip to secure the connection (see figure 8)
Important Note: Not Applicable
for EC5-CAB Models.
FIGURE
FIGURE 7.2
FIGURE 7.3
FIGURE 7.4
FIGURE 7.5
7.1
Figure 7
Important Note: Not Applicable for
EC5-CAB Models.
Figure 8
Important Note for EC5-CAB
Models: The overflow elbow is
located on the back of the brine
cabinet tank (not shown).
Important Note: The brine over-
flow line must not be higher than
the overflow elbow on the brink
tank. (This is a gravity overflow.)
This line is used only when other
overflow valves fail.