10
20
7
8
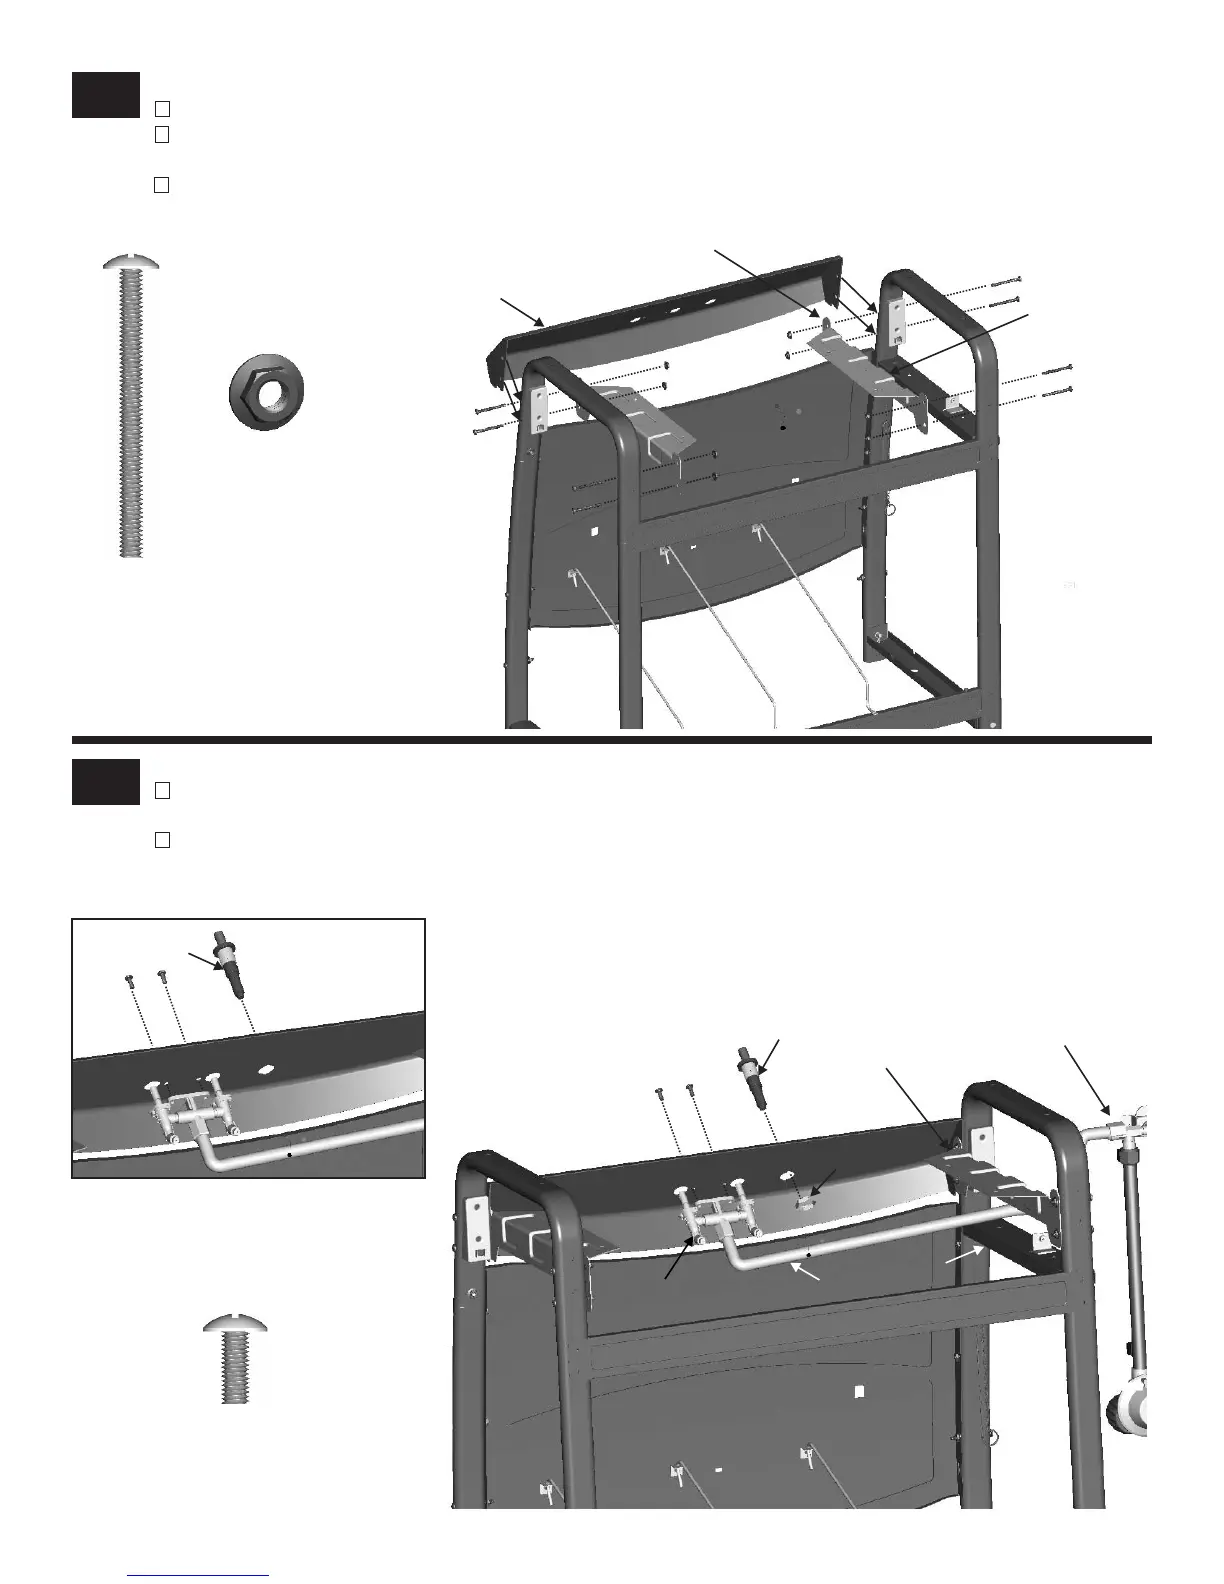
Valve / Hose / Regulator and Ignitor
Insert main burner valve and hose between left firebox support and side brace, attach valve/ hose/ regulator assemble
to control panel with #10-24x1/2" machine screws.
Attach ignitor to control panel using the stamped nut that’s provided. NOTE: if your grill comes with Snap-in ignitor,
please see Option.
Control Panel and Firebox Supports
Stand cart upright.
In front, slide control panel between left and right legs, attach control panel with #10-24x2" machine screws. Place
firebox supports onto screws and tighten with #10-24 flange nuts. Tighten all screws.
In back, attach upper firebox support with #10-24x2" machine screws and #10-24 flange nuts.
#10-24x2”
Machine Screw
Qty. 8
#10-24
Flange Nut
Qty. 8
Control Panel
Chamfer edge
Firebox
Support
#10-24x1/2”
Machine Screw
Qty. 2
Valve/Hose/Regulator
Ignitor
Left firebox support
Stamped nut
Main burner valve
Hose
Side brace
Back of cart
Option: Snap the
ignitor into the
control panel.
Snap-in ignitor