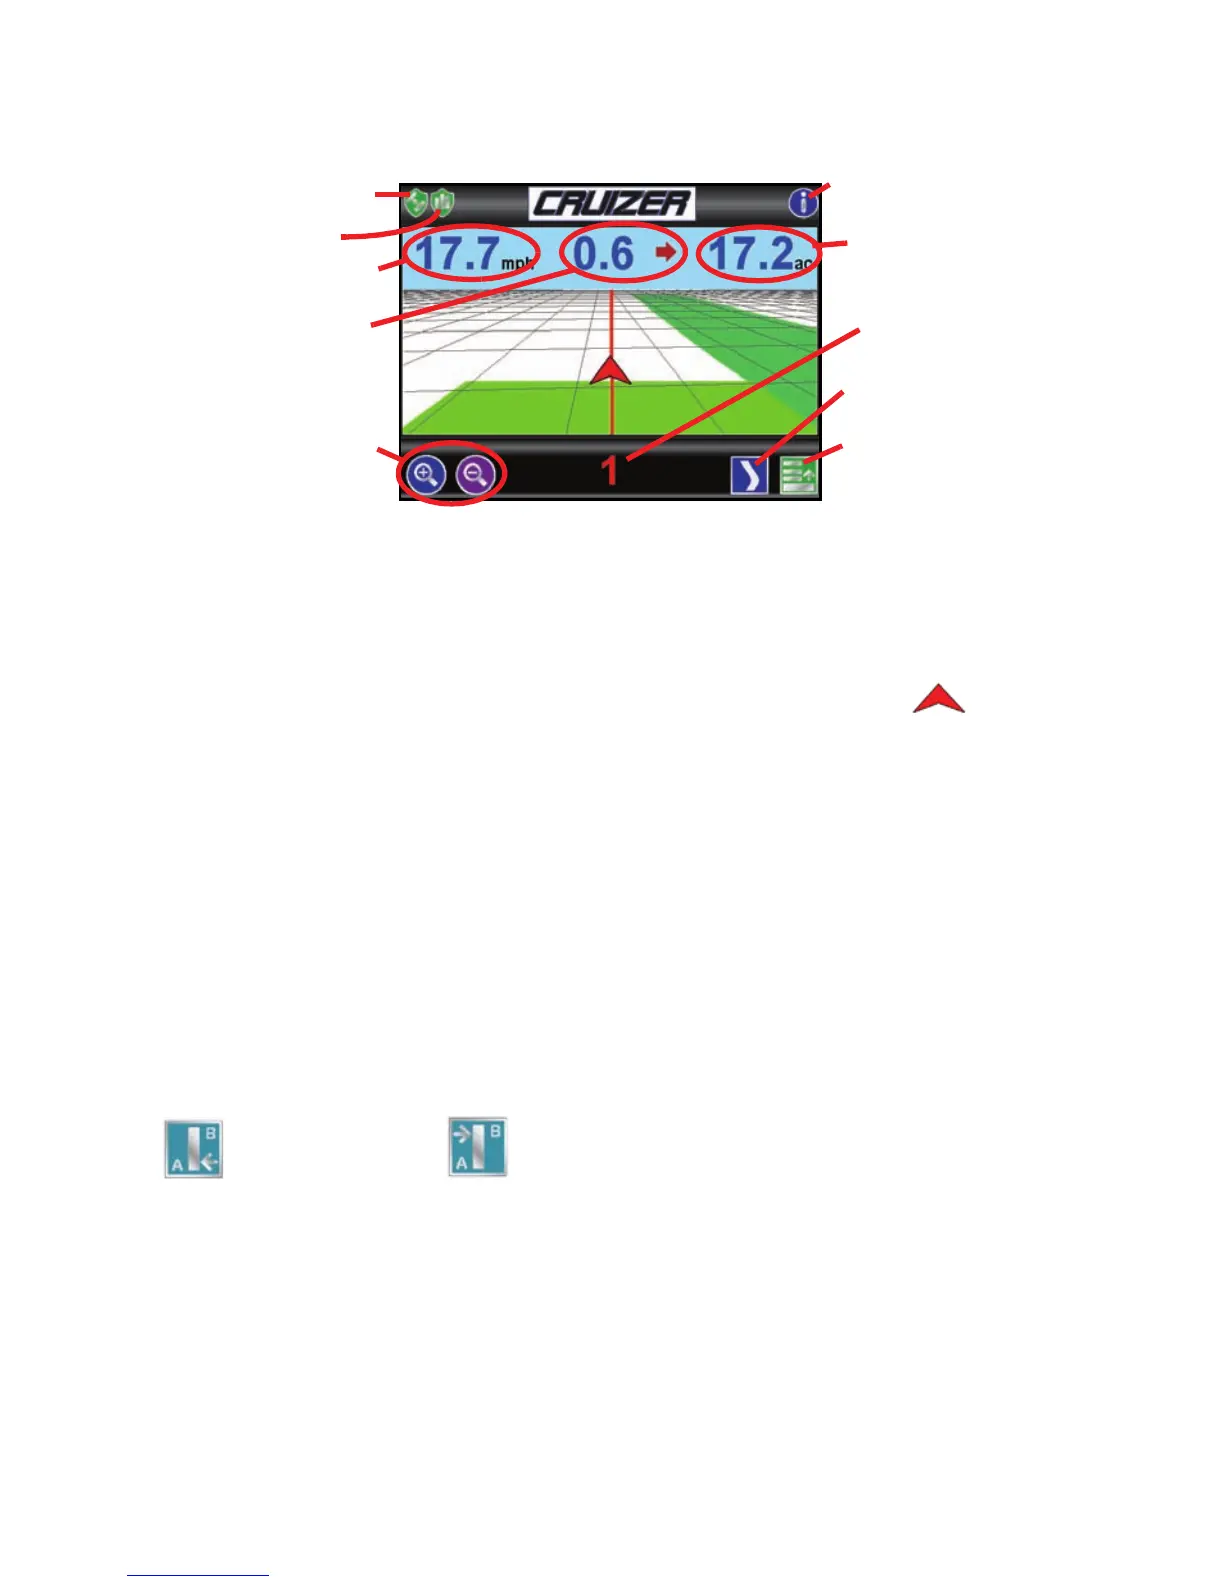
Guidance Screen
Once you have selected the desired Guidance Pattern, Cruizer will display the
Guidance Screen which will look similar to the following:
Touching icons or areas of the screen will access different information available
through Cruizer’s interface. Touch the:
1. GPS Status icon to display the GPS Status screen. Use this screen to view DGPS
receiver settings or help diagnose GPS problems.
2. History icon to toggle History recording On or Off. Touching the icon on
the Guidance screen will also toggle this feature.
3. Speed or CoG (Course over Ground) area to toggle the information displayed
between these two options.
4. The Distance to Line Display shows the distance and direction from the vehicle
to the current guidance path.
5. Zoom In or Out icons to either zoom in or zoom out on any of Cruizer’s
Guidance screens.
6. Information icon to display a help page containing a brief explanation of Cruizer
icons.
7. The Area Covered tally displays the total field area covered by active boom
sections (painted area on the Cruizer display).
8. The Swath Number or Set A-B icons are displayed in this area.
9. Alternate Guidance Pattern icon to switch to the Guidance Pattern displayed in
this area. The available Guidance Patterns will depend upon the pattern selected
when starting Guidance.
10. Menu icon to open the Menu. See the Menu section for more information on
features and options available through the Menu.
Touch the Set A
icon to set a point
at the vehicle’s
current location.
Touch the Set B icon to set a second point at the
vehicle’s current location and start A-B Guidance.
Cruizer will draw a line using either a Straight or
Pivot pattern to create a guidance path.
1
2
6
3
5
8
9
4
7
10

 Loading...
