2
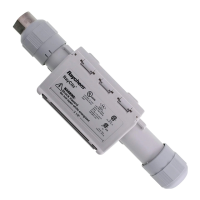
RayClic-PC, RayClic-PS, RayClic-PT Installation Instructions
54
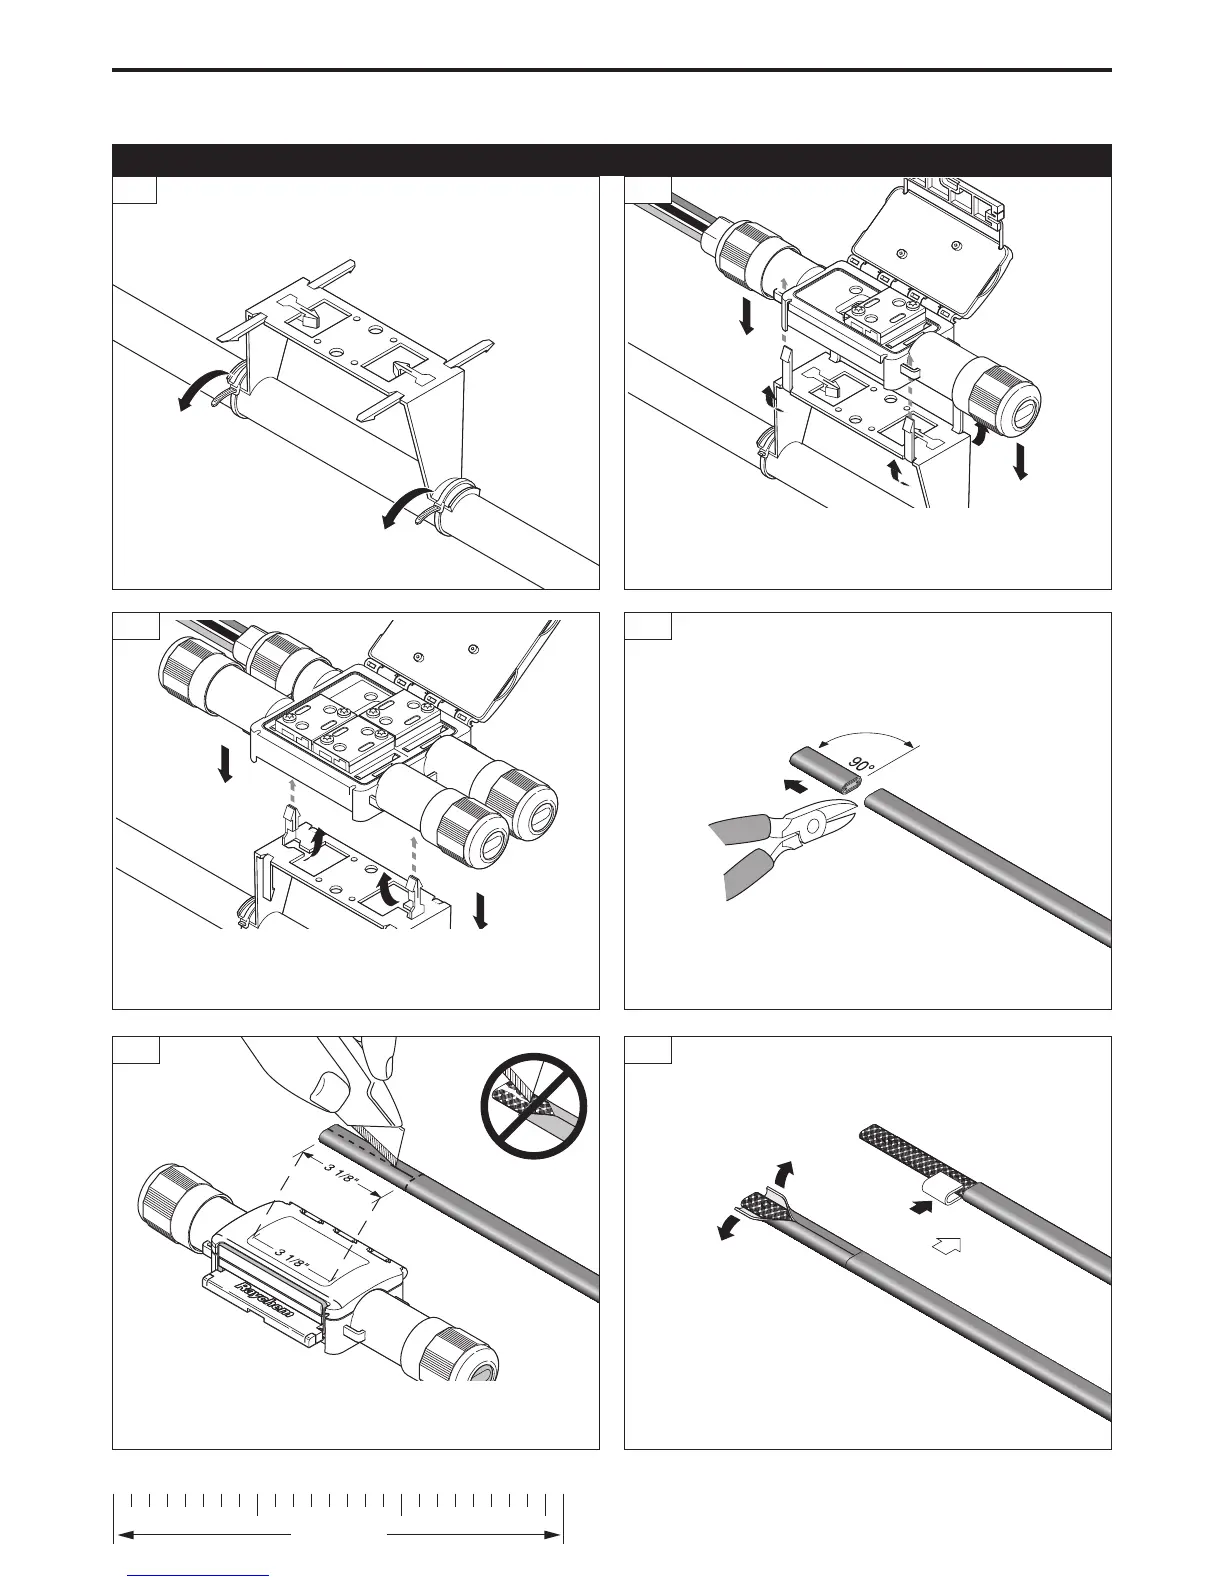
• Score around and down the outer jacket of the heating cable
3 1/8 inches from the end.
• Remove the outer jacket.
• Place the metal clip over the base of the exposed braid.
Do not cut through
metal braid or
inner jacket.
1
2A
32B
• Using the plastic cable ties, attach* the bracket to the pipe.
• For the RayClic-PS powered splice and the RayClic-PT powered
tee, fold up two center snaps, then position the connector over the
snaps and press down.
• Allow enough extra heating cable to make service loops as required.
• Make sure the end of the heating cable is cut clean.
• For the RayClic-PC power connection, fold up the four outer snaps,
then position the connector over the snaps and press down.
Power Connection, Splice and Tee Installation
3
1
/8"
* For roof-mounted applications,
follow steps 3 through 9 (pages 2–4),
then turn to “Roof Installation” on page 5.
If you experience difficulty during installation, refer to the “Troubleshooting Guide” on page 7.