3
RayClic-PC, RayClic-PS, RayClic-PT Installation Instructions
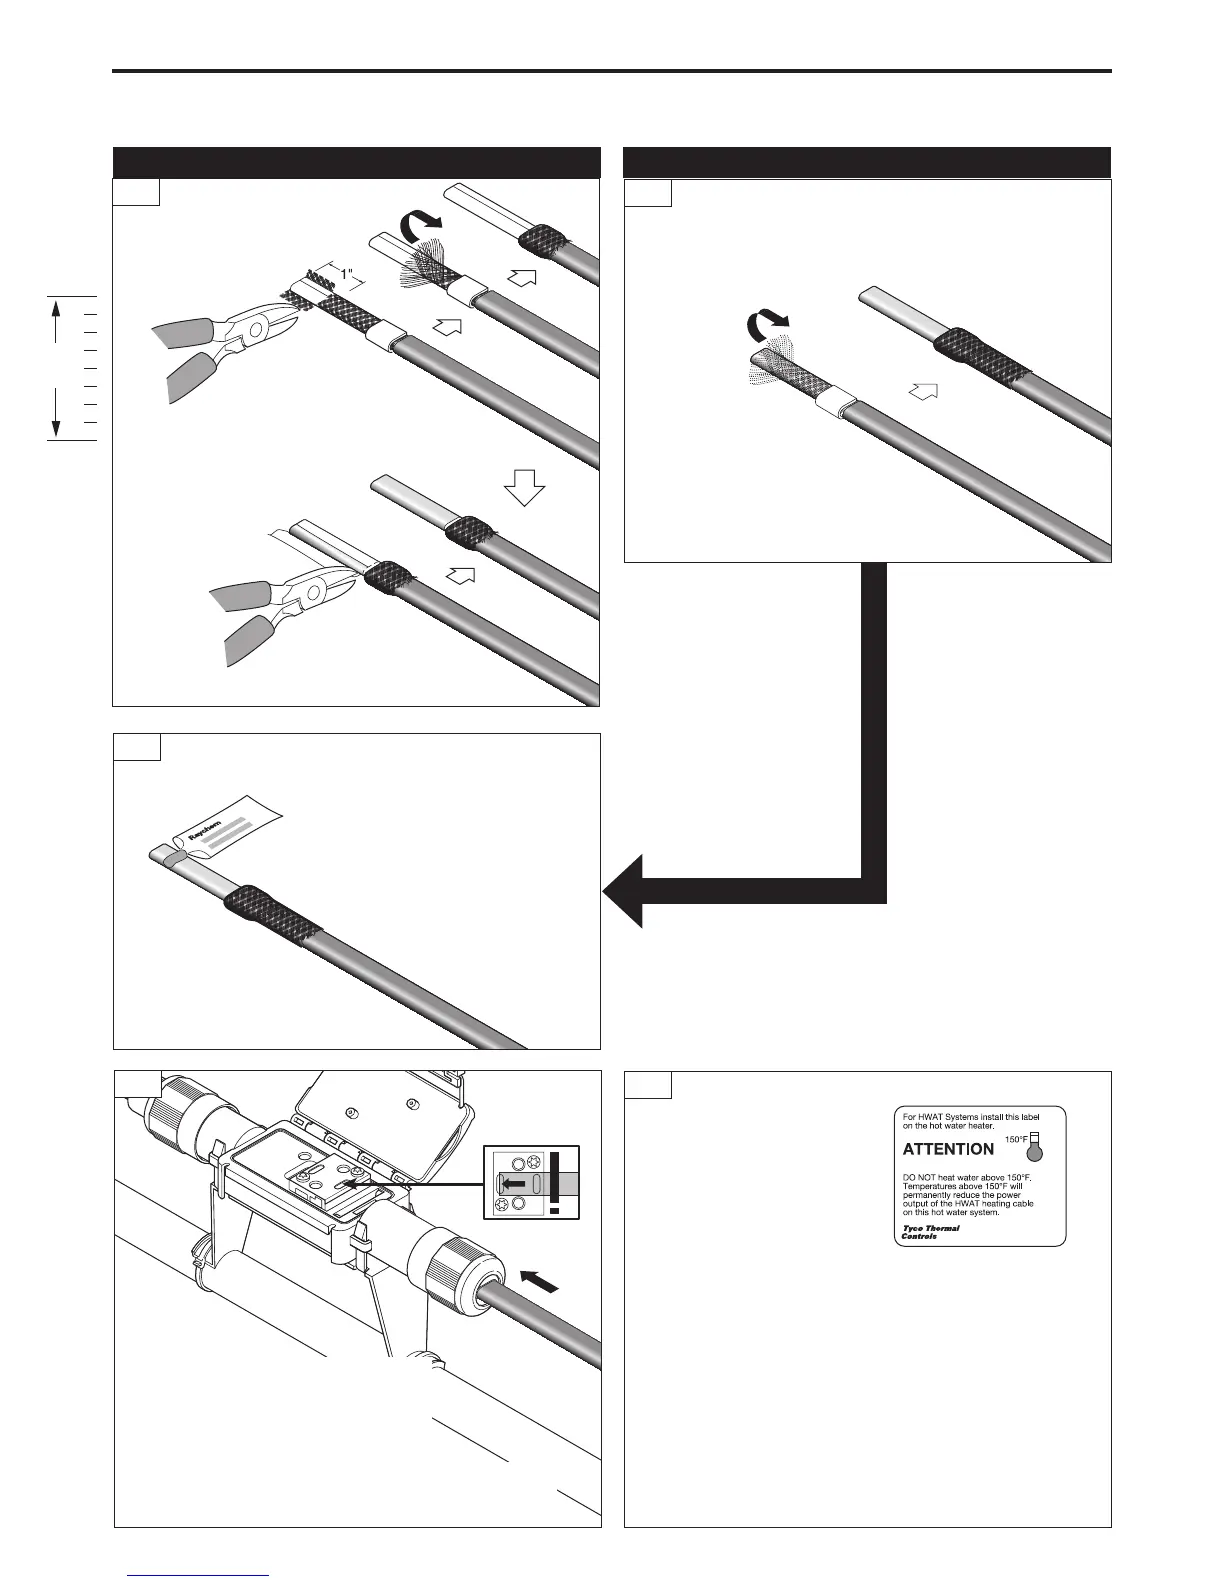
6B
6A
• Pull exposed braid back over metal clip.
8
• Insert prepared heating cable
end into connector. Push until heating
cable is fully inserted and end is visible
through opening in connection cover plate.
HWAT Only
IceStop and XL-Trace Only
1"
9
• For HWAT only:
Apply HWAT label on
insulated hot water tank.
• Using wire cutters, cut away 1-inch of the braid.
• Pull exposed braid back over metal clip.
IceStop and XL-TraceHWAT
7
• Using wire cutters, cut away aluminum wrap.
Note: RayClic connection kits are designed to be installed only
once; the heating cable cannot be removed once installed.
• Apply a small amout of lubricant to the
jacket surface near the end of the cable.
• Avoid using large amounts of lubricant
on the exposed end of the cable.