1.Usingadrillanda4mm(5/32)drillbit,drilloutthe
4mountingholes.
Holesshouldbedrilledfromthefrontoftheunit,
takingcarenottodamagetheunitbyapplyingtoo
muchforcetothedrill.
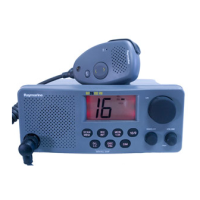
Panelmounting–Ray60/Ray70
TopanelmounttheRay60/Ray70followthesteps
below.
Beforemountingtheproduct,ensurethatyouhave:
•Selectedasuitablelocation,ensuringthereisnothing
behindthemountingsurfacethatmaybedamaged
whendrilling/cutting.
•Identiedthecableconnectionsandroutethatthe
cableswilltake.
•Drilledoutthemountingholesontheunit.
•Removedthefrontbezel.
1.Checktheselectedlocationfortheunit.Aclear,
atareawithsuitableclearancebehindthepanel
isrequired.
2.Fixthesuppliedmountingtemplatetotheselected
location,usingmaskingorself-adhesivetape.
3.Usingasuitableholesaw(thesizeisindicatedon
thetemplate),makeaholeineachcornerofthe
cut-outarea.
4.Usingasuitablesaw,cutalongtheinsideedgeof
thecut-outline.
5.Ensurethattheunittsintotheremovedareaand
thenlearoundtheroughedgeuntilsmooth.
6.Drill4holesasindicatedonthetemplatetoaccept
thexings.
7.Removethebackingsfromthesuppliedgasket.
8.Placethegasketinpositiononthebackoftheunit
andpressrmlyontotheange.
9.Connectthepower,andothercablestotheunit.
10.Slidetheunitintoplaceandsecureusingthexings
provided.
11.Attachthefrontbezel.
Note:Thesuppliedgasketprovidesasealbetween
theunitandasuitablyatandstiffmountingsurface
orbinnacle.Thegasketshouldalwaysbeused.
Itmayalsobenecessarytouseamarine-grade
sealantifthemountingsurfaceorbinnacleisnot
entirelyatandstifforhasaroughsurfacenish.
Attachingthefrontbezel–Ray60/Ray70
Afterinstallationthefrontbezelcanbeattached
followingthestepsbelow.
Thefollowingprocedureassumesthattheunithas
alreadybeenmountedinposition.
1.Orientatethebottom-rightsideofthebezelunder
thebottom-rightsideoftheunit,ensuringthatthe
clipsalongthebottomedgeofthebezellatchinto
position.
2.Ensurethebezeliscorrectlyalignedwiththeunit,
asshown.
3.Applyrmbutevenpressuretothebezelalongthe:
i.Outeredges-workfromthesidesupwardsand
thenalongthetopedge,toensurethatitclips
securelyintoposition.
ii.Inneredges-ensurethatthebezelsitsat.
4.Checkthatallcontrolbuttonsarefreetooperate.
12
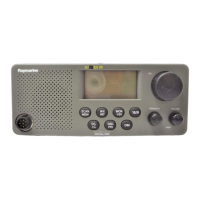
Ray52/Ray50/Ray60/Ray70
 Loading...